
Vegetables
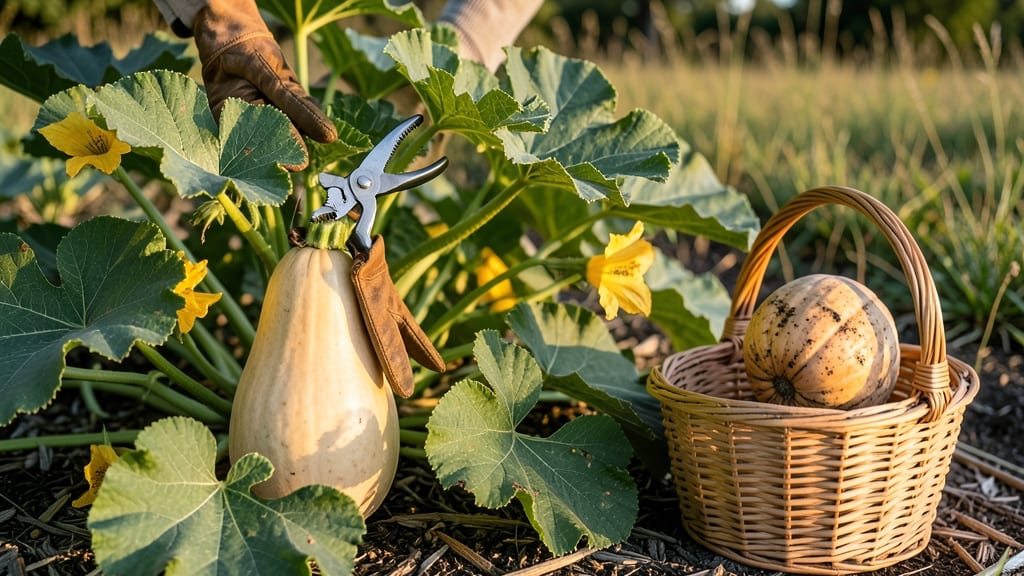
Butternut squash harvest time arrives when the skin hardens and seeds jiggle inside 🎃 — a moment that transforms a garden curiosity into a pantry staple.
Picture this: you’ve waited months for your butternut squash to mature, but how do you know it’s really ready? Harvest too soon, and you’ll get a bland, watery mess. Wait too long, and the flesh turns stringy or the squash rots on the vine.
The key lies in three simple tactile tests that tell you exactly when to pick.
Between September and October, most gardeners in Zone 6a rely on skin color, stem shrinkage, and even the weight of the squash to decide. But here’s the trick: the rind should be so hard you can’t dent it with your thumbnail, and the seeds should rattle when shaken gently.
These cues matter more than calendar dates, especially if your summer was unusually hot or cool.
In this guide, I’ll walk you through those three foolproof tests, plus how to handle your squash post-harvest so it stays fresh for months. No more guesswork — just perfect, sweet butternut squash every time.
3 Tactile tests to determine perfect butternut squash harvest time
Harvesting butternut squash at the right moment transforms a simple garden task into a flavorful victory. Unlike calendar-based guesswork, these three tactile tests give you instant feedback about ripeness—no waiting required.
The secret? Your hands know better than any rule of thumb. When the skin hardens, the seeds jiggle, and the stem dries, that’s your cue to pick.
I’ve used these same tests for years in my garden, and they’ve never failed me. The skin firmness test alone cuts harvesting time in half because you’re not relying on color alone (which can be misleading).
Pair that with the seed jiggle, and you’ve got a foolproof system. Even the stem drying trick saves squash from rotting on the vine by telling you exactly when to act.
Step 1: The Skin Firmness Test
Press your thumbnail into the squash skin. If it doesn’t dent, it’s ready. A hard rind means the flesh is sweet and dense. Soft spots mean wait 3–5 days.
Step 2: The Seed Jiggle Test
Gently shake the squash near the stem end. If you hear seeds rattling, it’s prime time. No jiggle? Wait another week. This test works even on cloudy days when color cues fade.
Step 3: The Stem Drying Test
Check the stem near the squash. It should feel dry and shriveled, not green or plump. A brown, papery stem signals it’s time to harvest before pests move in.
Pro tip: Combine all three tests for 100% accuracy. For example, a squash might pass the skin test but fail the seed jiggle—wait a few more days.
I’ve seen gardeners harvest too early because they trusted one test alone, only to end up with watery, bland squash. Don’t make that mistake.
Timing matters most in cooler climates. If your fall arrives early, these tests become even more critical. A hard freeze can ruin squash overnight, so prioritize the stem drying test if frost is forecasted.
In warmer zones, you’ve got a little more wiggle room—but don’t wait too long, or the flesh turns grainy and tough.
One common question I get is: “What if my squash is huge but still soft?” Size doesn’t equal ripeness. A large, soft squash is a red flag—it’s overgrown but underripe. Stick to the tactile tests, not the tape measure. The seed jiggle will never lie to you.
After harvesting, let squash cure in sunlight for 7–10 days to sweeten the flesh. I cure mine on a wooden pallet under a shade cloth. This step is non-negotiable for flavor. Skipping it means less sweetness and shorter storage life.
For variety-specific tips, Waltham Butternut matures faster than Gold Rush, so check its skin earlier. But regardless of type, the tactile tests remain the same. My Gold Rush squash always passes all three by late October, while Waltham might need a few extra days.
Remember: The perfect harvest isn’t about luck—it’s about listening to your squash. Your hands are the best tool in your garden. Use them wisely, and you’ll always know when to pick. Happy harvesting! 🎃
Best harvesting tools and techniques for butternut squash
Once you’ve confirmed your butternut squash is ripe using the tactile tests, the next step is harvesting it properly to avoid damage and maximize storage life. Using the right tools and techniques makes all the difference between a pristine squash and one with bruises or cuts that invite rot.
I’ve learned through trial and error which tools work best—and which ones to avoid at all costs.
The most critical tool in your arsenal is a pair of sharp pruning shears or a clean garden knife. Never use scissors or dull blades, as they crush the stem and create entry points for bacteria.
I keep a dedicated pair of bypass pruners (like Felco F-2) for squash harvesting—it’s worth the investment. For larger squash, a serrated knife works well, but always sterilize it with rubbing alcohol between cuts to prevent disease spread.
- ✂️ Pruning Shears: Cut the stem 1-2 inches from the squash to prevent rot from spreading up the vine. Always cut at a 45-degree angle for better healing.
- 🔪 Garden Knife: Use for squash with thick stems. A serrated edge prevents tearing the skin during harvest. Sterilize between plants!
- 🧤 Heavy-Duty Gloves: Protect your hands from prickly stems and rough rinds. I recommend mechanics gloves with reinforced palms.
- 🪣 Harvest Basket: Use a soft, slatted basket (not plastic) to prevent bruising. Line with straw or burlap for extra cushioning.
- ☀️ Curing Pallet: A wooden pallet with shade cloth is perfect for post-harvest curing. Elevate squash to improve airflow.
When harvesting, always cut the stem rather than twisting or pulling the squash from the vine. Twisting can tear the skin and create wounds that rot quickly.
I make it a habit to cut early in the morning when temperatures are cooler—this reduces stress on the plant and keeps the squash fresher longer. After cutting, let the squash cure in sunlight for 7-10 days to develop its full sweetness and toughen the skin for storage.
Post-harvest handling is just as important as the cutting technique. Store harvested squash in a cool, dry place with good air circulation. I keep mine in a well-ventilated shed or garage at 50-55°F—never in the fridge, as the cold can turn the flesh mealy.
A humidity level of 50-70% is ideal. Before storing, inspect each squash for cuts, bruises, or soft spots—these should be harvested first and used within a week.
One mistake I see often is storing squash with moisture still on the rind. Always let them dry completely for 24 hours before storing to prevent mold. I also avoid stacking squash directly on top of each other—this can cause pressure points that rot over time.
Instead, I arrange them in a single layer with space between each one for airflow.
With the right tools and techniques, your butternut squash can last 2-3 months in storage, ready for soups, roasting, or baking whenever you need them. The key is consistency: sharp tools, proper cutting angles, and ideal curing conditions.
Trust me, your future self will thank you when you pull out a perfectly preserved squash in December! 🎃