
Vegetables
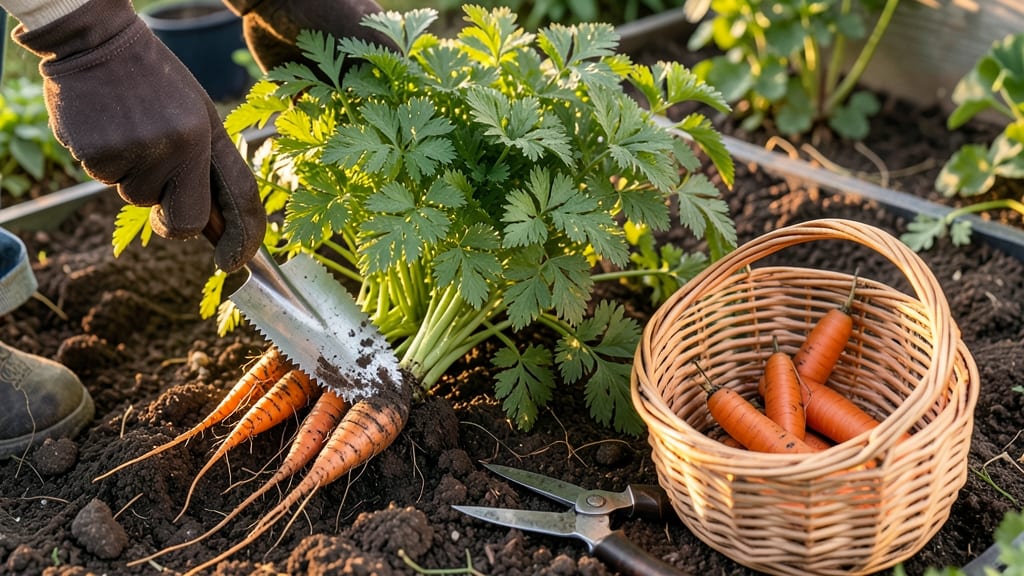
Harvesting carrots at the right time ensures sweet, crisp roots 🥕—and waiting too long turns them woody and tough.
Picture this: you’ve nurtured your carrot patch for months, only to pull a root that snaps like a twig. That’s the difference between knowing your carrot harvest time and guessing. The good news? Three simple tests—leaf flopping, finger resistance, and root size—tell you exactly when to pull.
Timing matters just as much as soil prep. Harvest too early, and you’re left with tiny nubs; too late, and you’re stuck with bitter, fibrous roots.
Below, I’ll walk you through the easiest way to check readiness, plus how to harvest without breaking a single root—so you can enjoy that garden-fresh crunch all season.
Whether you’re a first-time grower or a seasoned pro, these tips will help you avoid common mistakes and get the most out of your crop. Ready to pull at the perfect moment? Let’s dig in.

3 Simple tests to determine perfect carrot harvest time
Harvesting carrots at the right time ensures sweet, crisp roots instead of tough, fibrous ones. The key is watching for three foolproof signs that your carrots are ready to pull.
These visual and tactile cues will help you avoid the common mistake of leaving them in the ground too long, which can turn your harvest into disappointment.
I’ve tested these methods in my own garden over the years, and they’ve never failed me. Whether you’re growing short-season varieties or letting your carrots mature fully, these three simple tests will give you confidence in your harvest timing.
Let’s dive into each one so you can start pulling perfect carrots like a pro.
Leaf Flopping Test
Watch for carrot tops flopping over—this is your first sign. When the green foliage starts to bend or collapse, it means the root has reached maturity and is ready for harvest.
Finger-Pull Resistance Test
Gently grasp a carrot top and pull upward. If it comes out easily with minimal resistance, the root is ready. If it resists or breaks, wait a few more days.
Root Size Indicator
For most varieties, 1-2 inches in diameter is ideal. If you’re growing baby carrots, harvest when they reach half that size. Dig up one carrot to check its size before harvesting the whole batch.
Let me explain why these tests work so well. The leaf flopping happens because the root has fully developed and is no longer absorbing nutrients from the soil. This is nature’s way of telling you, "It’s time!"
The finger-pull test is a quick way to avoid damaging the roots while ensuring they’re mature enough to eat. And the root size indicator gives you a tangible measurement to avoid guesswork.
One thing I’ve learned is that carrot varieties differ in maturity time. For example, Danvers carrots typically take 70-80 days to reach harvest size, while Paris Market varieties mature in just 60 days.
Always check the seed packet for specific guidelines, but these tests will help you fine-tune your timing.
If you’re growing carrots in containers or raised beds, these tests are even more critical. Container-grown carrots can become root-bound quickly, so monitoring their growth closely is essential.
I’ve found that container carrots often mature faster than those in garden beds, so keep an eye on them every 3-4 days once they start showing signs of readiness.
Another pro tip: Harvest in the morning when the soil is moist but not soggy. This makes the roots easier to pull and reduces the risk of damage. I always bring a small hand trowel to gently loosen the soil around the base before pulling.
This step is especially helpful if your soil is compacted or clay-heavy, which can make harvesting difficult.
What about late-season harvesting? If you’re growing carrots for fall or winter storage, you can leave them in the ground longer, but don’t wait too long. Once the tops start yellowing or dying back due to frost, the roots may become woody.
In my experience, harvesting before the first hard frost ensures the best flavor and texture.
Finally, if you’re unsure whether your carrots are ready, dig up one or two to check. This is the most reliable way to confirm their size and condition without risking your entire harvest.
Remember, smaller carrots are often sweeter and more tender, so don’t feel like you have to wait for them to reach their maximum size.
Now that you know these three simple tests, you can confidently harvest carrots at their peak. The next step? Learn how to store them properly to keep them fresh for weeks—because nothing beats the taste of a homegrown carrot pulled at just the right time. 🥕
How to harvest carrots without damaging the roots (step-by-step)
Harvesting carrots at the right carrot harvest time is just the beginning—how you pull them determines whether you end up with whole, crisp roots or broken, unusable scraps. The key is gentle extraction to avoid snapping those delicate roots while they’re still in the soil.
I’ve learned through trial and error that a little prep work and proper technique make all the difference.
Start by checking your carrot harvest time indicators: tops flopping over, roots reaching 1-2 inches in diameter, and firm skin. Once you’ve confirmed they’re ready, follow these steps to pull them safely without damaging the roots.
The goal is to loosen the soil and guide the carrot out smoothly, not yank it like a weed.
- 1 Loosen the soil around the carrot with your fingers or a fork. Gently work the soil 1-2 inches deep to create space without disturbing the root too much.
- 2 Grip the tops firmly but gently about 1 inch above the soil line. Avoid pulling from the leaves—this can snap the root where it meets the soil.
- 3 Pull at a 45-degree angle toward you, using a steady, upward motion. If resistance is strong, loosen more soil—never force it, or you’ll risk breaking the root.
- 4 Shake off excess soil gently with your hands or a soft brush. Avoid using water or rubbing hard, as this can damage the skin and shorten storage life.
- 5 Inspect for damage immediately. Discard any broken or forked carrots—these won’t store well. Store the rest in a cool, dark place (like a root cellar or fridge) for up to 3 weeks.
After harvesting, I always replenish the soil with compost or aged manure to prepare for the next planting. This not only feeds future crops but also encourages beneficial microbes that improve soil structure, making it easier to harvest carrots next season.
Plus, it’s a great way to reduce waste by returning organic matter to the garden.
If you’re harvesting in hard or compacted soil, consider adding sand or perlite to improve drainage before replanting. This prevents the same issues that make roots difficult to extract. For container-grown carrots, use a light potting mix designed for root vegetables to avoid soil compaction entirely.
Pro tip: Harvest carrots on a dry, sunny day when the soil is slightly moist but not soggy. This reduces the risk of soil sticking to the roots and makes the extraction process cleaner and easier.
Store them in a perforated bag with a damp paper towel to maintain humidity and crispness.