
Picking
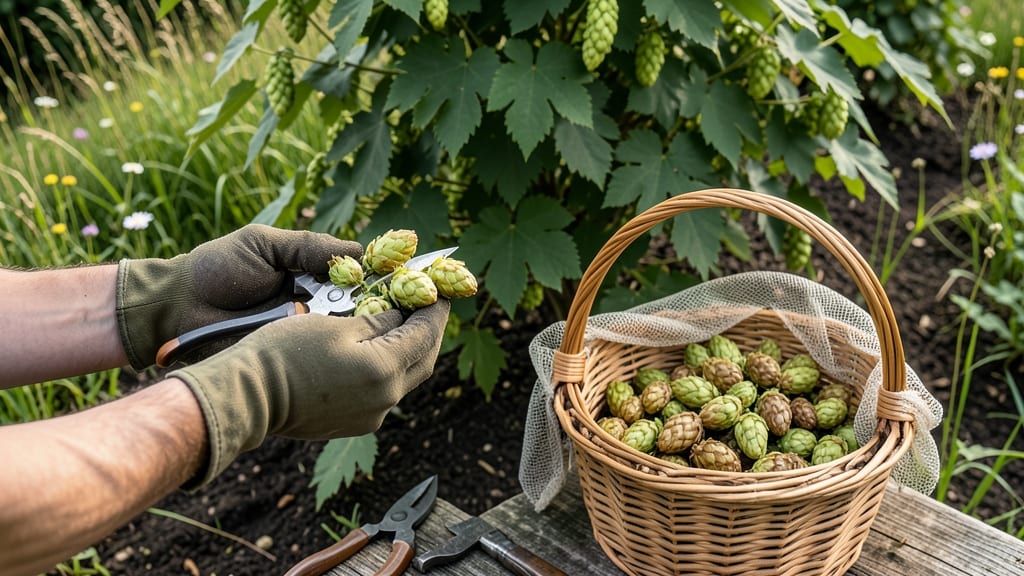
Harvesting hops at the right time is the key to unlocking bold flavors and strong aromas in your homebrew—late August through September is when those golden cones reach peak ripeness 🌿.
Timing your hops harvest perfectly can make the difference between a bitter disappointment and a legendary homebrew—so how do you know when those cones are ready?
Most gardeners wait until the cones turn golden-brown and release a strong, piney aroma when crushed, but there’s more to it than just color. Humidity, temperature swings, and even your local growing zone can shift that window by weeks.
In this guide, I’ll walk you through the four foolproof tests to nail your harvest, plus how to adjust for your region and avoid the three mistakes that ruin flavor before you even brew.

How to test hops cone ripeness: 4 key methods brewers use
Timing your hops harvest is an art that separates homebrew legends from bitter disappointments. The cone ripeness determines flavor, aroma, and even the alpha acid content that defines your beer's character.
As a brewer with my own hops garden, I’ve learned that relying on guesswork leads to wasted cones or underwhelming brews. Instead, I use these four key methods to pinpoint the perfect moment—when cones are at their peak for both flavor retention and aroma preservation.
Understanding these methods isn’t just about avoiding overripe or underripe cones—it’s about unlocking the full potential of your hops varieties. Whether you’re growing Cascade for citrusy notes or Citra for tropical flavors, each method gives you a different lens to assess ripeness.
Let’s dive into the visual cues, tactile tests, and even chemical analysis that professional brewers swear by to nail the harvest window.
Visual Color & Lupulin Glands
Look for golden-brown cones with visible yellow lupulin glands on the underside. Overripe cones turn brownish-gray and lose aroma.
Tactile "Pluck Test"
Gently pinch a cone—if it detaches easily with minimal force, it’s ready. Underripe cones stay firmly attached; overripe ones crumble.
Aroma Intensity Test
Crush a cone between your fingers—ripe hops release a bold, piney, or floral aroma. Weak or musty smells mean it’s past its prime.
Alpha Acid Analysis
For precision, test alpha acid levels (4–12% range). Use a refractometer or lab kit—peaks at 8–10% for most varieties signal optimal harvest time.
The visual color check is my first go-to method because it’s the easiest to perform in the field. I scan my hops bines for cones that have transitioned from green to a rich golden-brown hue. This color shift indicates the lupulin glands—the resinous powerhouses of flavor—are fully developed.
However, I’ve learned the hard way that color alone isn’t foolproof. Some hops varieties, like Centennial, can look ripe but still lack the aroma intensity needed for a great brew.
That’s where the tactile pluck test comes in. I’ve spent hours perfecting this technique, and it’s saved me from harvesting overripe cones that would’ve ruined a batch of IPA. The goal is to gently pinch a cone between your thumb and forefinger.
If it detaches cleanly with just a little pressure, it’s ready. Underripe cones will resist, while overripe ones will crumble or fall apart entirely. This test is especially critical for aroma hops, which lose their delicate notes quickly once harvested.
But nothing beats the aroma intensity test for confirming ripeness. I crush a small sample of cones between my fingers and take a deep sniff. Ripe hops release a pungent, resinous aroma that’s unmistakable—think piney, citrusy, or floral depending on the variety.
If the smell is faint or musty, the cones are past their peak. I once harvested a batch of Galena that smelled off, and my stout ended up tasting dull. That mistake taught me to trust my nose over everything else.
For those who brew at scale or want lab-grade precision, alpha acid analysis is the gold standard. Alpha acids are the compounds that contribute to bitterness in beer, and their concentration peaks at harvest time.
I use a refractometer to measure the acid levels, aiming for a sweet spot between 8–10% for most varieties. If the reading is below 6%, the cones aren’t ripe enough; above 12%, they’re overripe.
This method requires a bit more equipment, but it’s worth it for serious brewers who want to maximize their hops yield and flavor consistency.
One common mistake I see—even among experienced growers—is ignoring the regional climate when testing ripeness. In cooler climates, like USDA Zone 5, hops may take longer to ripen, while warmer zones like Zone 7 can accelerate the process.
I adjust my testing schedule based on local weather patterns, checking cones every 3–5 days leading up to harvest. This proactive approach ensures I don’t miss the window, especially with late-season varieties like Sim
Hops harvest time by variety: when to pick for maximum flavor
Not all hops ripen at the same time, and picking at the wrong moment can turn your homebrew into a flavorless disappointment. Aroma hops like Cascade or Citra need precise timing for their delicate floral and citrus notes, while bittering hops such as Fuggle or Chinook can handle a slightly wider window.
Your USDA zone also shifts the harvest calendar—warmer climates may see cones ready 2-3 weeks earlier than cooler regions.
Climate plays a huge role too. Humid summers can delay ripening, while dry heat may speed it up. I’ve seen Cascade hops in Zone 7 ready by late August, but in Zone 5, they often wait until early September.
The key is watching for cone color, aroma, and lupulin gland visibility—not just the calendar.
| Variety Type | Ideal Harvest Time | Zone Adjustments | Key Ripeness Sign |
|---|---|---|---|
| Aroma Hops (Citra, Mosaic, Galaxy) | Late Aug - Early Sep | Zone 6-7: Standard Zone 8+: 1-2 weeks earlier |
Golden-brown cones, strong citrus/pine scent |
| Dual-Purpose (Cascade, Centennial) | Early - Mid Sep | Zone 5: 1 week later Zone 9+: 2 weeks earlier |
Plump cones, visible lupulin glands |
| Bittering (Fuggle, Chinook, Columbus) | Mid - Late Sep | Zone 4: 10 days later Zone 8+: Standard |
Dense cones, earthy aroma, brown bines |
For aroma hops, I recommend harvesting when 70-80% of cones are golden-brown—don’t wait for 100% or you’ll lose those volatile oils that define flavors like passionfruit or grapefruit. With bittering hops, you’ve got more leeway. Wait until 90% of cones are mature and the bines start yellowing.
In Zone 5, I’ve seen Chinook cones stay fresh on the vine for 10-14 days past ideal harvest, while Citra loses its punch in just 3-5 days.
One trick I’ve learned is to harvest in the morning after dew has dried but before the sun peaks. This preserves moisture content and prevents the cones from drying out too quickly.
If you’re in a humid climate, like the Pacific Northwest, you might need to harvest earlier to avoid mold risk. Conversely, in dry regions such as California’s Central Valley, cones can dry on the vine faster, so monitor closely.
Pro tip: If you’re unsure, do the "crush test". Snap a few cones between your fingers—if they release a strong, resinous aroma (like pine or citrus), they’re ready. If it’s weak or musty, wait 2-3 more days.
Overripe cones taste dull and grassy, and underripe ones add harsh bitterness that even the best brewing techniques can’t fix.
Remember, storage matters too. Once harvested, dry your cones in a well-ventilated, dark space at 60-70°F for 5-7 days. Proper drying locks in flavor, while poor drying turns your homebrew into a bitter swamp.
Now go check those bines—your next batch of IPA or pale ale is waiting for perfectly timed hops!