
How To
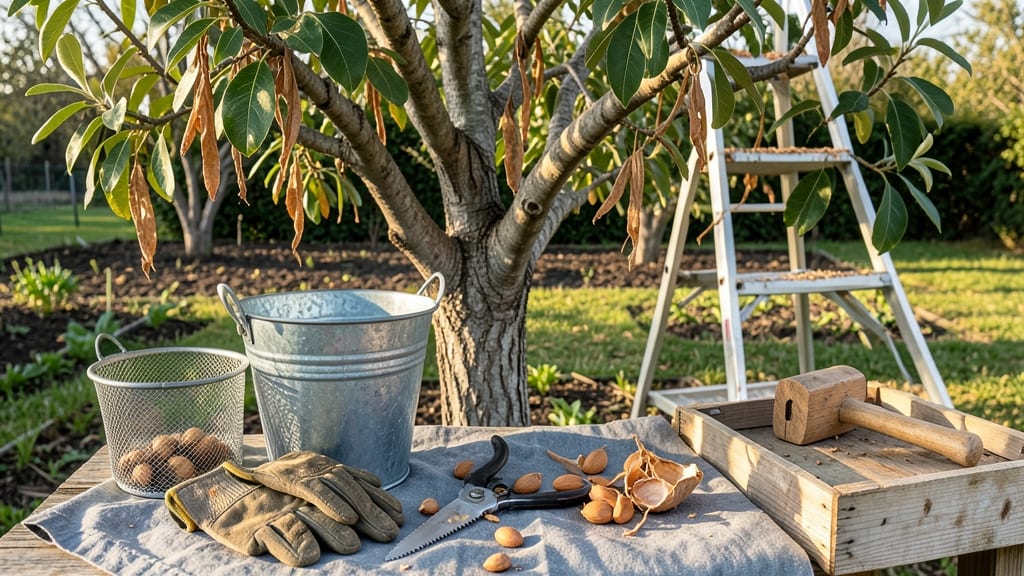
To harvest almonds at the right time means waiting for the hulls to split naturally and the nuts to harden inside—skipping this step can leave you with bitter, underripe nuts or shriveled shells.
Picture this: you’ve spent years nurturing your 🌰 almond tree, and now the moment has arrived. But how do you know when those nuts are truly ready? The answer lies in the shell hardness test, a simple but critical trick that separates a great harvest from a mediocre one.
In Zones 7-10, where almonds thrive, the harvest window typically opens in late summer—around August to October. However, missing the cue can mean nuts that are either too soft (still developing) or too dry (overripe).
Below, I’ll walk you through the exact signs to watch for, the tools you’ll need, and how to handle those precious nuts once they’re off the tree.
Whether you’re a backyard grower or a small-scale farmer, mastering this process ensures you get the sweetest, most flavorful almonds possible—without the guesswork.

When to harvest almonds: shell hardness test explained
Knowing when to harvest almonds is crucial for maximizing yield and quality. The shell hardness test is my go-to method to determine peak ripeness, especially for home gardeners growing almond trees in USDA Zones 7-10.
Unlike commercial orchards, small-scale harvests rely on visual and tactile cues rather than scheduled dates. This test helps you avoid both underripe nuts (too soft, poor flavor) and overripe nuts (prone to mold or pests).
Almonds typically mature between late August and October, but exact timing depends on your climate and variety. In hotter regions like California, harvest starts earlier (late August), while cooler zones may extend into October.
The shell hardness test accounts for these variations by focusing on the nut's physical readiness rather than calendar dates. For example, a Nonpareil almond (a popular variety) might test ready in early September, while a Butte almond could take another 2-3 weeks.
Before testing, gather a few almonds from different parts of the tree. Look for these visual cues first: the hulls should be dry and fully brown, and the nuts should rattle slightly when shaken.
If the hulls are still green or partially closed, the nuts aren’t ready. This step saves time and prevents premature harvesting, which can stunt future tree productivity.
How to Perform the Shell Hardness Test
- 🌰 Step 1: Select Test Nuts
Pick 3-5 almonds from various branches. Avoid nuts near the trunk or tips, as they may ripen unevenly. - 🔍 Step 2: Check Hull Condition
The hull should be dry, papery, and fully brown. If it’s still green or leathery, wait 1-2 weeks. - 👂 Step 3: Listen for Rattle
Shake the nut near your ear. A loose, audible rattle means the nut is ready. No rattle? It’s underripe. - ✂️ Step 4: Test Shell Hardness
Gently press the shell with your thumb. It should feel firm but not brittle. If it dents easily, wait longer. - 🌧️ Step 5: Verify Ground Drop
Check for fallen nuts on the ground. If most nuts have dropped naturally, it’s time to harvest.
Regional differences play a huge role in timing. In Southern California, where summers are long and hot, almonds often ripen by late August. Meanwhile, gardeners in Zone 8 or 9 (like parts of Arizona or Texas) might see harvests stretch into early October.
Pay attention to your local last frost date too—you’ll want to harvest before temperatures drop below 50°F (10°C), which can cause nuts to spoil.
One common mistake I see is relying solely on color. Just because the hull looks brown doesn’t mean the nut is ready. Always combine the shell hardness test with the rattle test for accuracy.
For example, I once harvested a batch of almonds in early September because the hulls were brown, but the shells were still soft. The nuts shrank during drying and had poor flavor. Lesson learned: always test the shell!
For home gardeners with dwarf or semi-dwarf trees, harvesting is easier because branches are more accessible. Use a ladder or pruning saw to reach higher nuts, but avoid damaging branches. If you’re growing almonds in containers, shake the pot gently over a tarp to catch fallen nuts.
This method works well for young trees or small varieties like ‘Texas’ or ‘Fritz’ almonds, which are popular in home orchards.
After confirming ripeness, act quickly. Almonds left on the tree too long can attract squirrels, birds, or pests, or develop mold in wet conditions. Spread a tarpaulin or mesh bag under the tree to collect fallen nuts.
Harvest over 2-3 days to avoid overwhelming yourself, especially if you’re processing by hand. For larger trees, consider using a tree shaker or hiring help to speed up the process.
Pro tip: Harvest early in the morning when nuts are cool and dry. This reduces the risk of mold growth during drying. Store harvested almonds in a well-ventilated, dry place (like a garage or shed) for 1-2 weeks to complete the drying process.
Avoid plastic bags, which trap moisture and encourage spoilage. With the right timing and care, you’ll enjoy plump, flavorful almonds straight from your tree!
🌰
Harvesting methods for almond trees: manual vs. mechanical techniques
Once your 🌰 almond tree reaches harvest season, choosing the right method depends on your tree's size, your budget, and how hands-on you want to be. Small backyard trees often benefit from manual harvesting, while larger commercial orchards rely on mechanical techniques for efficiency.
Each approach has distinct advantages, and picking the wrong one can mean wasted nuts or even damage to your tree.
For home gardeners with dwarf or semi-dwarf varieties (typically under 20 feet), hand-picking or gentle shaking is usually sufficient. These methods give you precise control and minimize risk to the tree.
However, if you're dealing with a standard-size tree (25+ feet tall), mechanical harvesters become a game-changer, saving time and reducing physical strain. Let’s break down the pros and cons of each method so you can decide what works best for your orchard.
Manual vs. Mechanical Harvesting Methods
Hand-Picking
- Pros: Precise, no damage
- Cons: Time-consuming, labor-intensive
Best for: Small trees, home gardens
Tree Shaking
- Pros: Faster than hand-picking
- Cons: Risk of branch damage, needs tarps
Best for: Medium trees, 10-20 ft tall
Mechanical Harvesting
- Pros: Efficient, scalable
- Cons: Expensive, requires training
Best for: Large orchards, commercial use
If you opt for hand-picking, wear thick gloves to protect your hands from the rough hulls and use a small ladder for taller branches. This method is ideal for small orchards or single trees where precision matters.
However, it’s physically demanding and can take hours for even a modest-sized tree. I recommend doing this on a dry, calm day to avoid slipping on wet branches or losing nuts to wind.
For tree shaking, you’ll need a sturdy tarp beneath the tree to catch the falling nuts. This method works well for medium-sized trees (10-20 feet) and speeds up the process significantly. However, be cautious—overzealous shaking can damage branches or even uproot young trees.
I’ve found that using a long pole to gently tap branches yields better results than vigorous shaking. Always start from the outer branches and work your way inward to avoid overloading the tree’s structure.
For larger orchards, mechanical harvesters are the way to go. These machines shake the tree while a conveyor system collects the nuts below. They’re expensive (typically $10,000-$50,000 for rental or purchase), but they save countless hours of labor.
If you’re considering this route, ensure your trees are mature and healthy enough to withstand the vibrations. I’d also recommend consulting with a local orchard specialist to choose the right machine for your tree size and terrain.
Regardless of the method, always harvest in the early morning when nuts are dry and less likely to crack during collection. After harvesting, spread the nuts on tarps or mesh screens in a dry, shaded area to finish drying for 1-2 weeks.
Proper post-harvest handling is just as critical as the harvesting method itself—don’t skip this step!