
How To
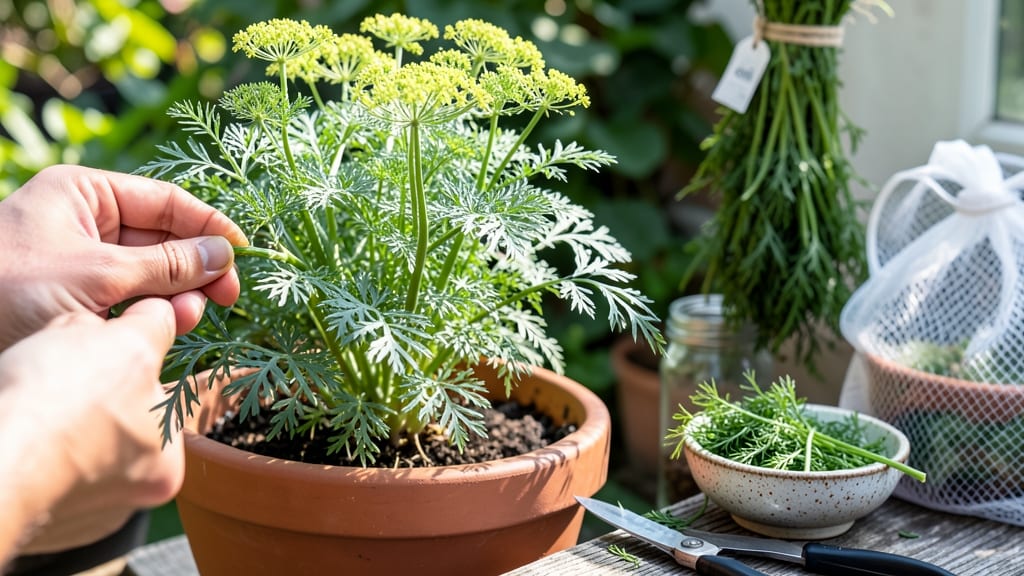
Harvesting and storing dill properly unlocks its bold flavor for months, whether you’re making pickles or garnishing fish 🌿.
Here’s the catch: most people wait too long to cut the stems, or they store it the wrong way and end up with dull, wilted sprigs that taste like sad lettuce.
The good news? With the right timing and methods, you can keep dill vibrant in your freezer, pantry, or fridge for up to a year.
In this guide, I’ll walk you through the best time to snip those fragrant stems, how to dry or freeze dill without losing potency, and the simple tricks that save flavor—like why you should never wash dill before storing it.
By the end, you’ll know exactly when to harvest for peak freshness, which storage method works best for your kitchen, and how to avoid the mistakes that turn your homegrown dill into a flavorless afterthought.

When and how to harvest dill for maximum flavor and longevity
Timing your dill harvest correctly is the secret to unlocking its bright, citrusy flavor. Unlike many herbs, dill has two peak harvest windows: once for tender leaves and again for flavorful seeds. Missing these windows means sacrificing potency—or worse, bitter-tasting dill.
I’ve learned the hard way that harvesting too late or too early can turn your prized dill into a sad, flavorless shadow of its former self.
For leaf harvests, aim to pick dill when stems reach 6-8 inches tall and leaves are fully unfurled but still vibrant. This usually happens around 60 days after planting, though exact timing depends on your climate.
If you wait too long, the leaves become tougher and less flavorful, while the plant shifts its energy to seed production. The key is to harvest early and often—this encourages bushier growth and more leaves.
| Harvest Stage | Best Time | Plant Height | Flavor Profile | Storage Method |
|---|---|---|---|---|
| Leaf Harvest | 6-8 weeks after planting | 6-12 inches | Bright, citrusy, tender | Fresh or dried |
| Seed Harvest | 8-10 weeks after planting | 18-36 inches | Earthy, nutty, strong | Dried only |
| Over-Harvested | Any time | Stunted growth | Bitter, weak flavor | Discard or compost |
When harvesting dill leaves, always use clean, sharp pruning shears or scissors to make cuts just above a leaf node. This encourages new growth and prevents damage to the stem.
I recommend harvesting in the morning after dew has dried—this ensures the leaves are at their freshest and most flavorful. Never pull leaves by hand, as this can uproot the plant or leave jagged tears that invite pests.
For seed harvests, wait until the seed heads turn golden-brown and begin to dry on the plant. This usually happens in late summer or early fall, depending on your growing zone. To harvest, gently twist the seed heads off the stems and place them in a paper bag.
Store the bag in a cool, dry place for 1-2 weeks to complete drying. Once fully dry, crumble the seeds out of the bag and store them in an airtight container away from light.
One common mistake I see is over-harvesting dill, which weakens the plant and reduces future yields. Never take more than one-third of the plant at a time, and always leave at least 6 inches of stem to support regrowth.
Signs of over-harvesting include yellowing leaves, stunted growth, and a lack of new shoots. If you notice these symptoms, cut back on harvesting and give your dill a chance to recover with proper water and sunlight.
If your dill stems start to wilt after harvest, don’t toss them! You can often revive limp dill by placing the stems in a glass of cool water for 1-2 hours. This works best if the stems are still firm and haven’t turned mushy.
Once revived, you can use the dill fresh or proceed with drying. For long-term storage, wilted stems are best used for drying or freezing rather than fresh applications.
To extend your dill’s life, always harvest regularly throughout the growing season. This prevents the plant from becoming woody or flowering too early. In my garden, I harvest dill every 2-3 weeks during its peak growing months (June through August).
This consistent harvesting not only keeps the flavor strong but also encourages a longer harvest window. Plus, it gives you a steady supply for all your culinary needs!
Finally, invest in a few essential tools to make harvesting easier: a pair of sharp pruning shears, a clean cutting board, and paper bags or mesh produce bags for storing harvested dill.
These tools ensure clean cuts, reduce waste, and help maintain the plant’s health. With the right techniques, you’ll enjoy fresh, flavorful dill from early summer well into fall.
Best dill storage methods compared: fresh vs. dried vs. frozen
Once you’ve harvested your peak-flavor dill, the next challenge is preserving that bright, tangy taste. I’ve tested all three storage methods—fresh, dried, and frozen—and found each has its own sweet spot depending on how you plan to use your dill.
Fresh dill stays vibrant for 1-2 weeks in the fridge, but dried and frozen dill can last 6-12 months without losing potency.
For example, if you’re making pickles or soups, fresh dill is ideal for quick use, while dried dill works best in seasoning blends or long-cooked dishes. Frozen dill is my go-to for garnishes or quick recipes because it retains more color and texture than dried sprigs.
Let’s break down the pros, cons, and exact steps for each method.
| Method | Prep Steps | Storage Life | Best For |
|---|---|---|---|
| Fresh | Trim stems, remove lower leaves, store in airtight container with paper towel | 1-2 weeks (fridge) | Quick recipes, garnishes, salads |
| Dried (Air) | Bundle stems, hang upside-down in dark, dry place for 2-3 weeks | 6-12 months (pantry) | Seasoning blends, long-cooked dishes |
| Dried (Dehydrator) | Slice stems, dehydrate at 95°F for 2-4 hours | 6-12 months (pantry) | Powdered dill, spice mixes |
| Frozen (Whole) | Wash, dry thoroughly, blanch 30 sec, freeze in airtight bags | 8-12 months (freezer) | Garnishes, soups, stews |
| Frozen (Chopped) | Chop finely, spread on tray to prevent clumping, freeze, then transfer to bag | 8-12 months (freezer) | Quick cooking, sauces, dressings |
For fresh dill storage, I swear by the paper towel trick. After trimming the stems, wrap them loosely in a damp paper towel inside a sealed container to slow wilting.
Place it in the crispest part of your fridge, not the door—this keeps it fresh for up to 2 weeks. Pro tip: Avoid washing dill before storing, as excess moisture speeds up spoilage.
When it comes to drying dill, air-drying is the simplest method but takes 2-3 weeks. Bundle 5-6 stems together and hang them in a dark, dry, well-ventilated spot like a pantry or closet.
Once completely dry, strip the leaves and store them in glass jars away from light. For faster drying, use a dehydrator at 95°F for 2-4 hours—this works especially well if you’re short on time.
My favorite method for long-term dill storage is freezing, especially if you’re planning to use it in cooked dishes. Start by blanching the stems for 30 seconds to preserve color, then spread them on a tray to freeze individually before transferring to a vacuum-sealed bag.
This prevents freezer burn and keeps dill flavor intact for up to a year. For chopped dill, freeze it on a tray first to avoid clumping—this makes it easy to scoop out 1-2 tablespoons at a time for recipes.
If you’re torn between methods, here’s my quick decision guide: Use fresh dill for dishes you’ll eat within a week, dried dill for slow-cooked meals or spice blends, and frozen dill for anything that needs a quick flavor boost.
Each method has its place, and knowing when to use them ensures you never waste a single sprig of your homegrown dill.
🌿