
How To
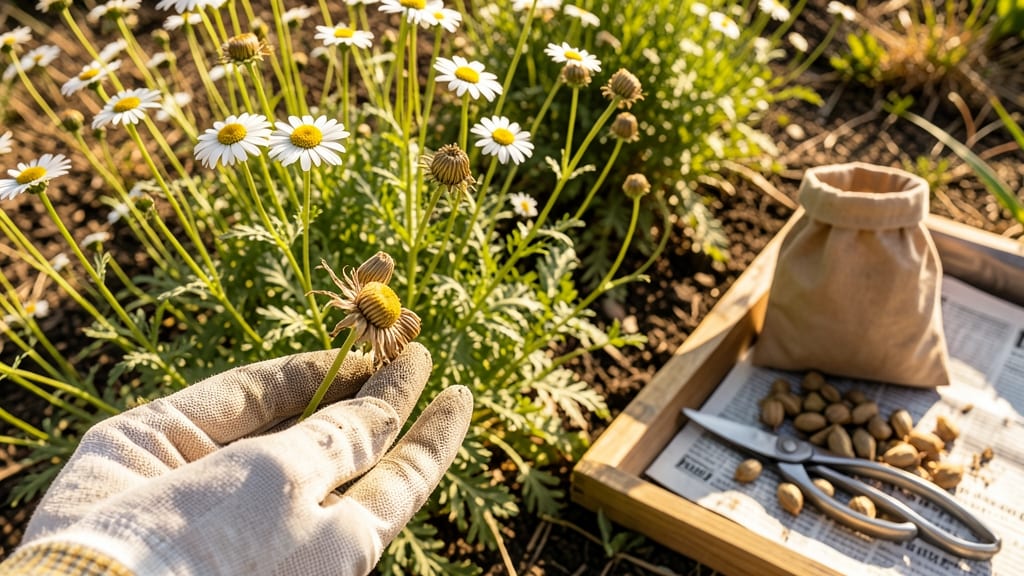
Harvesting chamomile seeds at the right time turns your 🌼 chamomile plants into a seed-saving goldmine for next year’s garden.
You’ve watched those delicate white blooms open and close, but the real magic happens when the flower heads turn brown and crack open naturally—signaling it’s time to collect those tiny seeds before they scatter.
Timing is everything: harvest too early, and the seeds won’t be viable; too late, and you’ll miss the window entirely. The key lies in knowing when those seed heads are just right—dry, papery, and ready to release their bounty.
In this guide, I’ll walk you through the exact steps to harvest, dry, and store chamomile seeds so you can grow your own fragrant plants year after year—no guesswork involved.

When to harvest chamomile seeds: identifying the perfect ripeness stage
Harvesting chamomile seeds at the right time ensures high viability and maximum yield for next season. The key lies in observing subtle but critical changes in the flower heads and seed pods.
Unlike harvesting leaves or flowers, seed collection requires patience—waiting too long risks seed dispersal, while harvesting too early means low germination rates.
Chamomile plants typically produce seeds between July and September, depending on your USDA zone and planting time. In my garden, I’ve found that German chamomile (Matricaria chamomilla) matures slightly faster than Roman chamomile (Chamaemelum nobile). The exact timing varies, but these visual cues are universal.
🌱 Numbered Highlights: How to Spot Perfectly Ripe Chamomile Seed Heads
- 1. Color Shift: Watch for white petals to turn light tan or straw-colored. The center disk (where seeds form) should be deep brown, almost black in some varieties.
- 2. Petal Dispersal: Dry petals will crumble or fall off naturally. If you gently tug, they should separate easily—this signals seed maturity.
- 3. Texture Test: Press a seed head—it should feel crisp and papery, not soft. A hollow sound when shaken confirms dryness.
- 4. Cracking Pattern: Look for natural splits in the seed head. This is chamomile’s way of releasing seeds—harvest before seeds scatter onto the soil.
- 5. Seed Visibility: Peek inside the dried head—seeds should be fully formed and dark brown/black. Immature seeds are greenish or pale.
💡 Pro Tip: Harvest on a dry, sunny morning when humidity is low to prevent mold during drying.
One of the biggest mistakes I’ve seen (even among experienced gardeners) is harvesting based solely on flower color. A fully brown flower head doesn’t always mean the seeds inside are ready.
For example, in humid climates, flower heads may dry externally while seeds remain underdeveloped. Always shake the head—if seeds rattle, they’re ready.
Timing is especially critical for self-seeding varieties like German chamomile. If left unchecked, these plants will scatter seeds aggressively, creating unwanted volunteers in your garden. I’ve learned to harvest seed heads just as they begin cracking, often 1-2 weeks before they fully open.
This gives me control over where the seeds land.
For Roman chamomile, which has a longer blooming season, I monitor individual stems. Some flower heads may mature weeks before others on the same plant. This staggered ripening means I need to check plants weekly during peak harvest season.
A simple trick: mark mature stems with a soft tie or toothpick to avoid missing them.
Weather plays a surprising role in seed ripeness. Hot, dry spells accelerate drying, while cool, wet conditions can delay maturity. In my Zone 6a garden, a sudden September rain can turn crisp seed heads soggy overnight. Always harvest before forecasted rain to preserve seed quality.
If you’re unsure whether a seed head is ready, cut a few test stems and dry them indoors for 3-5 days. Place them in a paper bag (to catch any released seeds) and check for the crisp texture and dark seed color described earlier.
This method helps me avoid harvesting too early.
Remember, overripe seeds lose viability quickly. Once the seed head fully splits open, seeds may scatter or attract pests. In my experience, Roman chamomile seeds remain viable for 2-3 years if stored properly, while German chamomile seeds stay good for 1-2 years.
Harvesting at peak ripeness maximizes your chances of successful germination.
For gardeners in cooler climates, extend the season by harvesting late-blooming flowers and drying them indoors under a grow light or near a sunny window. This mimics the longer daylight of summer and can push seed maturation by 1-2 weeks.
Finally, don’t overlook the seed head’s natural rhythm. Chamomile follows a diurnal cycle—petals often close at night and reopen in the morning. Wait until late morning to harvest when petals are fully dry and brittle.
This small detail has helped me double my seed yield in just one season.
Step-by-step chamomile seed harvesting process for maximum yield
Once you’ve spotted those brown, papery flower heads on your chamomile plants, it’s time to act fast. The seeds won’t wait forever—they’ll scatter at the slightest breeze if you’re not careful.
I’ve learned the hard way that rushing this step can mean losing half your harvest to the wind or birds. The key is to work efficiently while the conditions are perfect: a dry, sunny morning with minimal humidity.
Gather your tools first—this isn’t a job for improvisation. You’ll need clean, sharp pruning shears, a large bowl or bucket, and a soft brush (like an old makeup brush) for later. Don’t skip the bowl; those tiny seeds will fly everywhere if you try to catch them bare-handed.
I also keep a small paper bag handy to collect stray seeds that might drop during the process.
Now, let’s get to the heart of the matter—harvesting those seeds properly. The goal is to collect them at peak ripeness without damaging the delicate structures. If you miss this window, you’ll end up with seeds that either won’t germinate or are already scattered across your garden.
Gently Snip the Seed Heads
Use your pruning shears to cut the entire flower head (about 1-2 inches of stem) when it’s fully brown and dry. Avoid tugging—this can damage the seed pods inside. Work systematically from one plant to the next to avoid missing any ripe heads.
Dry the Heads Completely
Lay the cut heads on a clean, dry surface (like a baking sheet) in a well-ventilated area out of direct sunlight. This prevents mold and ensures the seeds fully dry.
I hang a mesh bag of heads in my garage for 3-5 days—just enough time for them to crisp up and release their seeds naturally.
Separate Seeds from Chaff
Once the heads are brittle, rub them gently between your fingers or use a soft brush to release the seeds. Place a bowl underneath to catch them.
For larger batches, I use a paper bag tied at the top—shake it vigorously to let the wind carry away the chaff while the heavier seeds fall to the bottom.
Store Seeds Properly
Transfer the seeds to a paper envelope or airtight container labeled with the harvest date. Store in a cool, dark place (like your fridge) to maintain viability. Chamomile seeds stay good for 1-2 years if kept dry—test a few each year to ensure they’re still viable.
One common mistake I see is harvesting seeds when the flower heads are still slightly green. These seeds won’t germinate well, and you’ll waste time and effort. Always wait until the heads are fully brown and papery—they should rattle when shaken.
Another pitfall is storing seeds in plastic containers without a desiccant; moisture is the enemy of seed viability.
If you’re harvesting in humid conditions, dry the heads indoors with a fan to speed up the process. I’ve also found that harvesting on a cloudy day reduces the risk of seeds drying too quickly, which can make them brittle and less likely to sprout.
With these steps, you’ll maximize your yield and ensure next year’s chamomile patch starts with the best possible seeds.