
How To
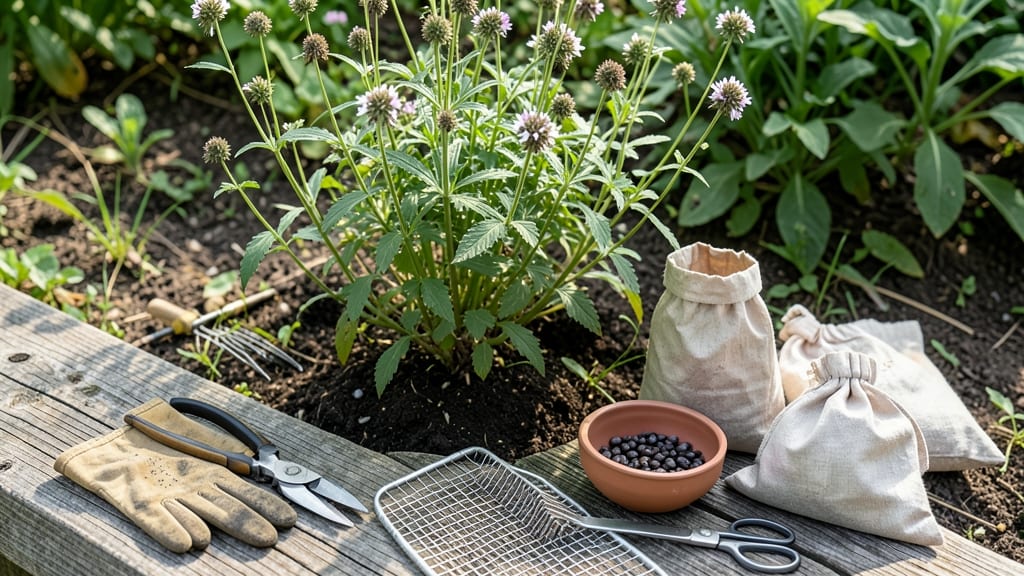
Harvesting chia seeds at the right time is the key to unlocking their full nutritional power—those tiny black seeds are packed with omega-3s, fiber, and protein, but only if you time it perfectly.
Picture this: you’ve nurtured your 🌱 chia plants all season, watching them grow from delicate sprouts to towering seed heads. But now, the moment of truth arrives—how do you know when those seeds are ready to pick?
One wrong move, and you could end up with seeds that are either underripe (and useless) or overripe (and prone to mold).
This guide breaks down the exact signs to watch for—from the color of the seed heads to the telltale rattle of mature seeds—plus the tools and techniques to harvest without wasting a single nutrient-rich seed.
We’ll also cover how to dry and store them properly so you can enjoy their benefits for months (or even years) to come.
Whether you’re a first-time chia grower or a seasoned gardener looking to boost your yield, you’ll learn how to turn your harvest into a pantry staple that’s as good for you as it is delicious.

When to harvest chia seeds for peak nutrition and yield
Timing your chia seed harvest correctly ensures you capture the maximum nutrition and highest yield from your plants. Chia seeds reach their peak nutritional value—including omega-3 fatty acids and antioxidants—when harvested at the right stage of maturity.
Missing this window can leave you with seeds that are either underdeveloped or prone to spoilage. The key lies in observing three critical visual and tactile cues: seed head color, seed rattling, and stem dryness.
Most chia plants take between 120 to 150 days from planting to reach harvest readiness, depending on your climate zone and growing conditions.
In warmer regions like USDA Zone 9 or 10, you might harvest as early as late summer, while cooler zones like Zone 6a may extend the timeline into early fall.
Understanding these variations helps you avoid common mistakes like harvesting too early (resulting in pale, underdeveloped seeds) or too late (risking seed shattering or mold).
| Maturity Stage | Visual Indicators | Tactile Indicators | Days to Harvest |
|---|---|---|---|
| Early Maturity | Seed heads turn light brown; some green remains. | Seed heads feel firm; no rattling. | 90-110 days |
| Optimal Maturity | Seed heads fully brown and dry; leaves yellowing. | Seeds rattle loudly when shaken; heads brittle. | 120-140 days |
| Overripe | Seed heads grayish-brown; may shatter easily. | Seeds loose; risk of mold or spoilage. | 150+ days |
🌱 Pro Tip: Harvest on a dry, sunny morning to minimize moisture and prevent mold.
The color of chia seed heads is your first clue. When they transition from green to a deep, uniform brown, it’s a sign that the seeds inside are mature.
However, don’t wait until they turn grayish-brown, as this indicates overripeness and increases the risk of seed shattering or mold contamination. Pay close attention to the bottom seed heads first—they often mature slightly earlier than those higher up on the stem.
Next, give your chia plants a gentle shake. If the seeds inside the heads rattle loudly, this confirms they’re ready for harvest. This "rattling test" is foolproof and saves you from cutting stems too early.
I’ve found that plants in drier climates may rattle sooner than those in humid areas, so adjust your timing accordingly. If the seeds don’t rattle, wait another 3 to 5 days before checking again.
Your local climate plays a huge role in harvest timing. In arid regions, chia plants may mature faster due to lower humidity, while cooler or wetter climates can delay maturity.
For example, in Pacific Northwest gardens, I’ve seen chia plants take up to 150 days to reach optimal maturity, whereas in Arizona, they might be ready in as few as 100 days. Always monitor your plants closely, especially if your area experiences unpredictable weather patterns.
Soil type also affects harvest timing. Chia plants thrive in well-draining, slightly acidic soil (pH 6.0-7.0), but heavy or clay-heavy soils can slow down maturation. If your soil retains too much moisture, the seed heads may stay green longer or develop fungal issues.
To counteract this, amend your soil with compost or sand before planting. I’ve noticed that chia plants in sandy loam mature about 10 days earlier than those in heavier clay soils.
One of the biggest mistakes I see gardeners make is harvesting based solely on calendar dates rather than plant readiness. While chia typically matures in 3 to 5 months, relying on a fixed timeline can lead to underripe or overripe seeds.
Instead, combine the color test, rattling test, and stem dryness test for the most accurate results. For instance, if your plants are in full bloom but the seed heads still feel firm, hold off for another week.
Environmental stress, such as drought or extreme heat, can also impact harvest timing. If your chia plants experience heatwaves during maturity, they may dry out faster and require earlier harvesting. Conversely, prolonged cloudy weather can delay maturation.
To mitigate these issues, provide consistent watering during the growing season but reduce it as the plants near maturity. This helps the seed heads dry out evenly and uniformly.
Finally, consider the purpose of your harvest. If you’re growing chia for culinary use, aim for the optimal maturity stage to maximize nutritional benefits. For germination purposes, slightly underripe seeds (still firm but turning brown) can sometimes yield better sprouting rates.
However, for most home gardeners, harvesting at peak maturity ensures the best balance of yield, nutrition, and storage life.
Once you’ve confirmed your chia seeds are ready, act quickly to avoid losing your harvest. The next step—cutting and drying—requires careful handling to preserve those hard-earned seeds.
But for now, keep an eye on your plants, and you’ll know exactly when to reap the rewards of your labor. 🌻
Step-by-step chia seed harvesting process: tools and techniques
Now that your chia plants have reached maturity, it’s time to harvest those nutrient-packed seeds. The process is straightforward, but using the right tools and techniques ensures you maximize yield while preserving seed quality.
Start by gathering your supplies—clean, sharp scissors or pruners, a bucket or tray for collection, and a well-ventilated drying area.
Harvesting too early can leave seeds underdeveloped, while waiting too long risks seed shattering or mold. Aim for dry, brown seed heads that rattle when shaken—a sure sign the seeds are ready. Work on a dry, sunny day to minimize moisture and speed up the drying process.
How to Harvest Chia Seeds
-
Step 1: Cut the Seed Heads
Use clean, sharp scissors or pruners to snip the brown, dry seed heads just above the base. Avoid pulling or twisting, which can damage the stems or cause seeds to shatter prematurely. -
Step 2: Remove Excess Debris
Shake the seed heads gently over a clean bucket or tray to dislodge loose seeds and debris. Discard any green or unripe seed heads, as these won’t yield viable seeds. -
Step 3: Dry the Seed Heads
Spread the seed heads in a single layer on a tray or screen in a well-ventilated, dry area (like a garage or shed). Avoid direct sunlight, which can overheat and damage the seeds. Aim for 3-5 days of drying until the seed heads are completely brittle. -
Step 4: Thresh the Seeds
Once dry, rub the seed heads between your hands or use a clean cloth or sieve to separate the seeds from the chaff. Store the seeds in a paper bag or breathable container for 24 hours to remove any remaining debris. -
Step 5: Store Properly
Transfer the seeds to an airtight glass jar or container and store in a cool, dark place (like a pantry). Label with the harvest date—chia seeds last up to 2 years when stored correctly.
For larger harvests, a dehydrator can speed up drying time, but monitor closely to avoid overheating. Set it to 95°F (35°C) and dry for 2-4 hours, checking frequently. Over-drying can reduce seed viability, so aim for crisp, brittle seed heads that crumble easily.
After harvesting, inspect your seeds for signs of mold or pests, such as discoloration or unusual odors. Discard any contaminated seeds immediately to prevent spoilage. Proper storage in a cool, dry environment with minimal light ensures your chia seeds retain their nutritional value and freshness for months.
With these techniques, you’ll transform your homegrown chia plants into a pantry staple packed with omega-3s, fiber, and protein—all while avoiding common harvesting pitfalls. Happy harvesting! 🌱