
How To
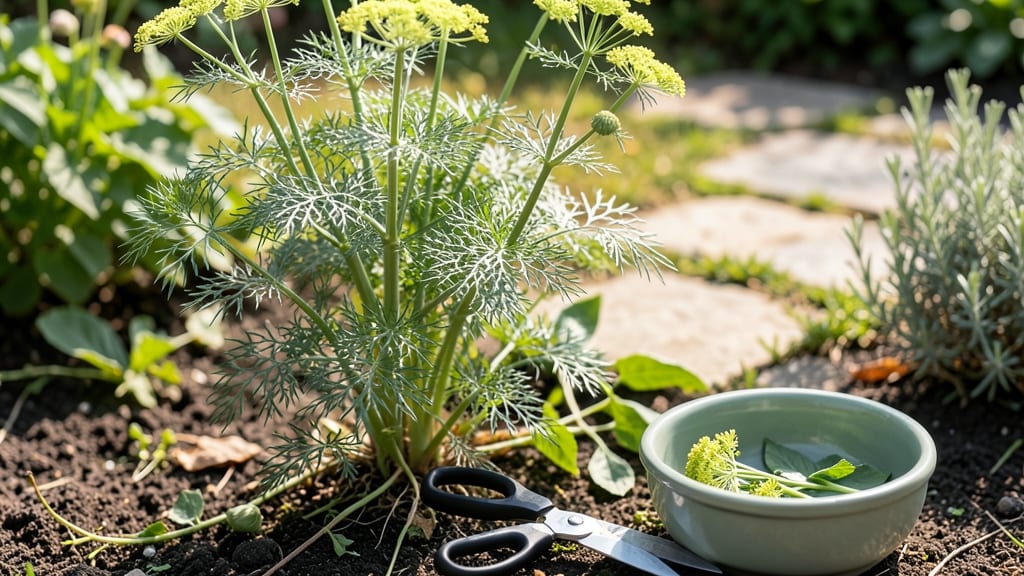
To harvest dill herb at its peak—when leaves are tender and flavorful before stems brown—start by cutting just above a leaf node with clean shears.
Fresh dill isn’t just a kitchen staple—it’s a versatile herb that rewards gardeners with abundant harvests when timed perfectly. But knowing when to harvest (before stems brown or seeds loosen) can mean the difference between flavorful feasts and bitter disappointment.
You’ll want to focus on the ideal timing: leafy dill shines brightest before flowering, while seed dill reaches its prime when those stems turn brown and seeds loosen naturally. Miss the window, and you’re left with tougher leaves or lost seed potential.
Below, I’ll walk you through the exact steps—from recognizing the perfect harvest cues to storing your bounty—so you never waste another harvest again.

When to harvest dill for maximum freshness: key signs & stages
Harvesting dill at the right time transforms your garden into a flavor factory. For leafy dill, timing is everything—wait too long, and those tender leaves turn bitter. The ideal window opens when your plants reach 6-12 inches tall with fully developed but non-flowering leaves.
This usually happens 45-60 days after sowing, depending on your climate.
If you're growing dill for seeds, the game changes completely. You'll want to wait until the stems turn brown and papery, and the seed heads begin to loosen naturally.
This typically occurs 75-90 days after planting, signaling the perfect moment to collect those aromatic seeds for pickling or drying.
Here’s the critical difference: harvesting leaves before flowering preserves their delicate flavor, while waiting for seed maturity ensures you capture the full potential of your dill plant. Miss these cues, and you risk sacrificing both quality and yield.
| Harvest Stage | Key Visual Cues | Days After Planting | Best For |
|---|---|---|---|
| Leaf Harvest | 6-12" tall, feathery leaves, no flower buds | 45-60 days | Fresh cooking, garnishes |
| Seed Harvest | Brown stems, seed heads loosen easily | 75-90 days | Drying, pickling, replanting |
| Over-Mature | Woody stems, bitter leaves, black seeds | 90+ days | Avoid—flavor ruined |
For leafy dill, I always check for small yellow flower buds—that’s your last call before the plant shifts its energy to seed production. Once those buds appear, the leaves start developing a bitter, medicinal taste that even the most devoted gardeners won’t enjoy.
Think of it as nature’s way of saying, "Time’s up!"
When harvesting for seeds, pay close attention to the stem color. Healthy green stems transition to a straw-like brown as they mature. At this stage, the seed heads will rattle when shaken gently, indicating the seeds are ready for collection.
If you wait too long, the seeds may scatter or lose viability.
Pro tip: If you’re unsure whether your dill is ready, harvest a few leaves and taste them. The best flavor comes from young, vibrant leaves with a bright, citrusy aroma. If they taste sharp or soapy, it’s a sign you’ve missed the window.
Improper timing affects more than just flavor—it impacts regrowth potential. Over-harvesting mature plants can stress them, reducing future yields. For leafy dill, I recommend harvesting outer leaves first to encourage new growth from the center. This method keeps your plants productive for weeks.
For seed dill, the stakes are higher. If you harvest too early, the seeds won’t be fully developed, and if you wait too long, they may shatter or lose germination power. The key is to monitor daily during the final stages, especially in hot, dry weather, which speeds up maturation.
One common mistake I see is assuming all dill varieties mature at the same rate. Bouquet dill, for example, bolts quickly and is best harvested young, while Mammoth dill takes longer to reach seed stage. Always check the variety’s specific guidelines to avoid disappointment.
Remember, dill is a biennial plant, meaning it often produces leaves the first year and seeds the second. If you’re growing it as an annual, focus on leaf harvests early in the season, then let a few plants go to seed for next year’s crop.
Step-by-step dill harvesting techniques for leaves & seeds
Harvesting dill at the right time ensures maximum flavor and yield. For leaves, aim to cut when plants reach 6-12 inches tall and before flower buds appear.
For seeds, wait until stems turn brown and seeds loosen naturally. Using the right tools and techniques prevents damaging your plants while maximizing your harvest.
Gather these essential tools: a pair of sharp pruning shears, a clean knife, paper bags for seeds, and a drying rack or mesh bag.
Always sanitize your tools with rubbing alcohol to prevent disease spread. Work in the morning when leaves are dry and crisp for the best texture and flavor.
Cut stems 1/3 from the top
Use sharp shears at a 45-degree angle
Avoid woody stems for best flavor
Wait for brown stems and loose seeds
Cut entire seed heads with 2 inches of stem
Store in paper bags for drying
Wrap in damp paper towel
Store in plastic bag in fridge
Lasts 1-2 weeks fresh
Hang seed heads upside down in dry place
Seeds ready when crisp and brown
Store in airtight container for 1 year
After harvesting dill leaves, rinse gently under cool water and pat dry with a paper towel. Store them in a sealed container in your fridge to preserve their vibrant flavor for up to 2 weeks.
For dried seeds, spread them on a clean towel in a well-ventilated area for 1-2 weeks until completely dry.
Encourage regrowth by cutting stems just above a leaf node. This promotes bushier growth and more harvests throughout the season. If your dill starts to bolt prematurely, trim the flower stalks immediately to redirect energy back into leaf production.
For first-time harvesters, remember: leaves first, then seeds. Over-harvesting can stress your plant, so balance your cuts with proper care. With these techniques, you’ll enjoy fresh dill all season long—perfect for soups, salads, or pickling! 🌿