
How To
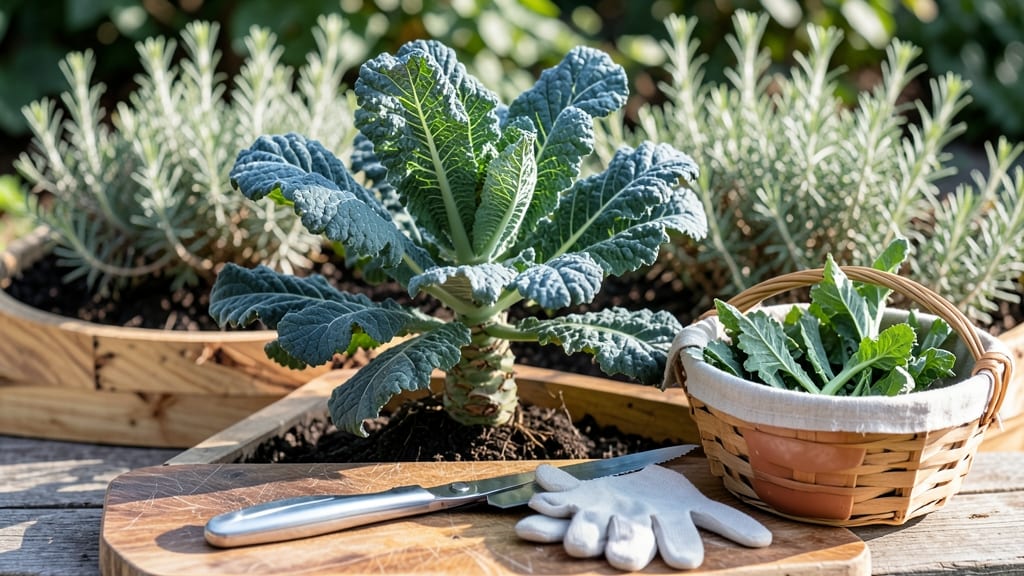
Harvesting dinosaur kale at the right time turns your garden into a nutrient-packed powerhouse—if you know the tricks.
Picture this: you twist a leaf from the stem, and it snaps cleanly with a satisfying pop. That’s the stem twist test in action, the foolproof way to know your dinosaur kale 🥬 is ready to eat.
Skip this step, and you’ll end up with tough, bitter leaves—or worse, a plant that struggles to bounce back.
Beyond the twist, timing matters. Harvest too early, and you’re left with tiny, tender shoots; too late, and the leaves turn woody. The key? Wait for leaves to reach 6-12 inches, boasting deep blue-green hues and curled edges—signs they’re packed with flavor and nutrients.
But here’s the secret: you don’t have to cut everything down. A few strategic snips keep your plant producing for weeks.
In this guide, I’ll walk you through the exact method—from the best tools to use (spoiler: it’s not just any knife) to how to store your harvest so it stays crisp longer.
Whether you’re a first-time gardener or a seasoned green thumb, these tips will ensure your dinosaur kale keeps delivering that restaurant-quality crunch and nutrition, harvest after harvest.

The perfect time and method for harvesting dinosaur kale leaves
Harvesting dinosaur kale at the right time ensures you get the most nutrient-packed, crisp leaves while keeping your plant healthy. Unlike other greens, dinosaur kale thrives when harvested strategically—outer leaves first—to encourage continuous regrowth.
The key is balancing leaf maturity with plant vitality, so you never sacrifice flavor for yield.
Timing your harvest depends on whether you prefer baby greens or fully mature leaves. Baby leaves (harvested at 4-6 weeks) are tender and perfect for salads, while mature leaves (ready at 60-90 days) boast that signature wrinkled texture and bold flavor.
I’ve found the stem twist test is the most reliable way to judge readiness—let me show you how.
How to Harvest Dinosaur Kale: Step-by-Step
- 1 Check leaf maturity: Look for deep blue-green leaves with pronounced curls and 6-12 inches in length. Avoid harvesting if leaves are pale or soft.
- 2 Perform the stem twist test: Gently grasp a leaf stem near the base and twist. If it snaps cleanly (not tears), the leaf is ready. A mushy stem means it’s underripe.
- 3 Use sharp tools: Snip leaves with clean pruning shears or a sharp knife, leaving 1-2 inches of stem attached. Avoid tearing leaves—this stresses the plant.
- 4 Harvest outer leaves first: Always remove older, outer leaves to protect the younger center growth. This method keeps your plant bushy and productive for weeks.
- 5 Time harvests wisely: Pick leaves on cool, dry mornings to preserve crispness and nutrients. Avoid harvesting after rain or in midday heat, which can wilt leaves quickly.
Seasonal timing also plays a role in flavor and texture. Dinosaur kale harvested in spring or fall tends to be sweeter and more tender due to cooler temperatures. In summer’s heat, leaves may develop a slightly bitter taste, but they’re still packed with nutrients.
I’ve noticed that plants grown in partial shade during peak summer months stay crisp longer.
Weather conditions can make or break your harvest. Frost-sensitive dinosaur kale should be picked before the first light frost (around October 15 in most zones). If a hard freeze is forecasted, harvest everything at once and store leaves in the fridge for 5-7 days.
Conversely, hot, dry spells can cause leaves to bolt prematurely—stay vigilant and water deeply to maintain moisture.
One common mistake I see is over-harvesting the center leaves. Dinosaur kale regrows from the base of the plant, so always leave the youngest leaves intact.
Another pitfall is using dull tools, which crush stems and invite pests. Invest in a pair of bypass pruners (around $10-$15) for clean cuts every time.
For maximum yield, aim to harvest every 2-3 weeks during the growing season. This frequency keeps the plant productive and healthy while preventing it from becoming woody or bitter.
I’ve had my dinosaur kale plants last 3-4 months with proper care, yielding 1-2 pounds of leaves per harvest.
Pro tip: If you’re growing dinosaur kale for baby greens, you can harvest leaves as small as 3-4 inches by snipping the tips of outer leaves. This encourages continuous regrowth and gives you a steady supply of tender, salad-ready greens all season long.
Finally, always wash harvested leaves gently with cool water to remove dirt and pests before storing. Pat dry with a clean towel or salad spinner to prevent wilting.
Stored properly in the crisper drawer, dinosaur kale stays fresh for 5-7 days—ready to be massaged, sautéed, or enjoyed raw in your favorite dishes.
How to prune dinosaur kale for continuous harvesting and plant health
Pruning dinosaur kale isn’t just about harvesting—it’s about teaching your plant to regrow stronger and more abundant. When done right, you’ll get weeks of fresh leaves instead of a single, sad harvest. The key? Selective pruning that removes just enough to stimulate new growth without stressing the plant.
Think of it like giving your kale a trim and a pep talk—it’ll bounce back with even bigger, tastier leaves.
I’ve learned the hard way that over-harvesting leads to leggy, sparse plants that never recover. Instead, focus on outer leaves first, leaving the inner ones to keep photosynthesizing.
This method keeps your dinosaur kale bushy and productive, with a steady supply of crisp, nutrient-rich leaves. Plus, it’s a game-changer for small-space gardens where every inch counts.
Before you grab your pruners, gather the right tools: a pair of sharp pruning shears (or clean scissors) and a small bowl to collect your harvest. Avoid dull blades—they crush stems, making your kale more prone to disease.
Work on a dry, sunny morning when leaves are crisp, not wilted. This timing ensures cleaner cuts and happier plants.
Dinosaur kale can only handle 1/3 of its leaves removed at once. Cutting more than this stresses the plant, leading to yellowing leaves or even bolting (flowering prematurely). Always leave the central leaves intact—they’re the plant’s energy source for regrowth. If you see more than 30% of leaves wilted after pruning, you’ve gone too far!
Start by identifying the largest, outermost leaves—these are your first targets. Use your fingers to gently twist the stem near the base until it snaps cleanly. If it resists, the leaf isn’t ready yet.
For tougher stems, use your pruners to cut just above a leaf node (the bump where new leaves grow). This encourages the plant to branch out and produce more leaves from that spot.
Frequency is everything: prune your dinosaur kale every 2-3 weeks during its growing season (spring to fall). In cooler months, space it out to every 4-6 weeks—the plant grows slower and needs time to recover.
Watch for signs of stress, like yellowing or curling leaves, which mean you’re pruning too aggressively. On the flip side, if your plant looks overcrowded with tiny leaves, it’s time for a trim.
After pruning, give your dinosaur kale a light feeding with a balanced fertilizer (like 5-10-10) to support regrowth. Water deeply at the base to reduce stress and prevent fungal issues. Within 1-2 weeks, you’ll see new leaves sprouting from the cut areas—proof your pruning paid off!
With this method, one plant can yield harvests for months, making it one of the most efficient greens to grow.