
How To
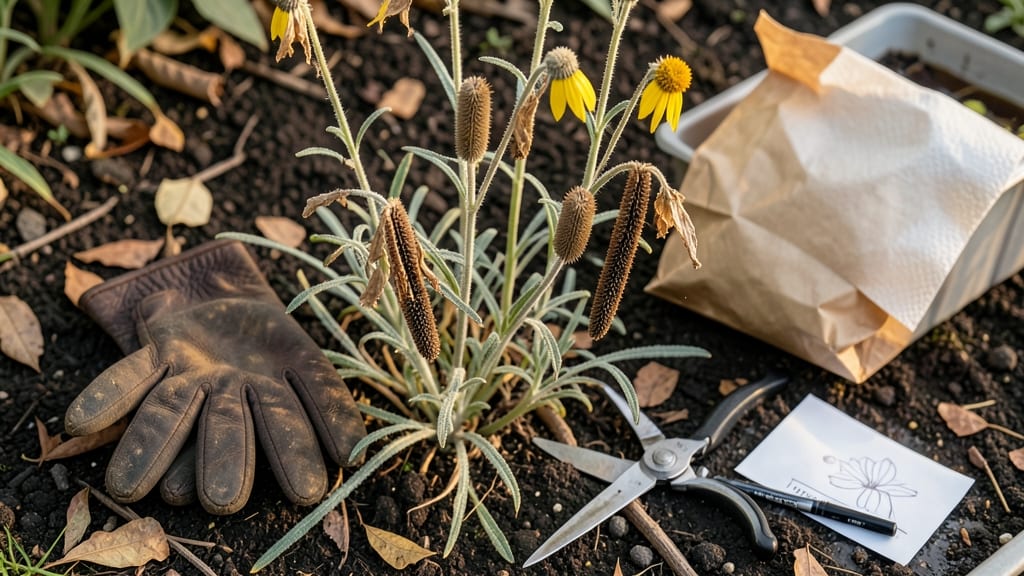
Harvesting evening primrose seeds 🌸 at the right moment means the difference between a thriving garden next year and wasted effort.
Picture this: You’ve nurtured your evening primrose all season, watching those delicate 🌸 flowers bloom at dusk, only to realize you missed the tiny window when those seed pods crack open just right. One wrong move, and the seeds scatter before you can collect them—or worse, they lose viability.
That’s why knowing exactly when to harvest is the key to saving seeds that’ll sprout strong and healthy.
In this guide, I’ll walk you through the signs that tell you the pods are ready—when they turn brown, split open, and release those dark, mature seeds. You’ll also learn the best tools to use, how to dry them properly, and storage tricks to keep them viable for years.
Whether you’re saving seeds for next spring’s garden or sharing them with fellow gardeners, you’ll never miss that perfect harvest moment again.
By the end, you’ll feel like a pro, confident that your evening primrose seeds are ready for planting—and your garden’s future is in good hands.

When and how to identify evening primrose seed pods ready for harvest
Evening primrose (Oenothera biennis) produces stunning yellow flowers that eventually transform into seed pods. Knowing when to harvest these pods is crucial—collect too early, and you’ll get immature seeds that won’t germinate; wait too long, and seeds scatter in the wind.
The key is spotting 3 critical visual cues: pod color, texture, and natural cracking. I’ve learned that late summer to early fall (August–September in most USDA zones) is the ideal window, but exact timing depends on your local climate.
Start by examining the pod color. Unripe pods are green and firm, while ripe ones turn dry and brown. A gentle squeeze should reveal a brittle texture—if it crumbles easily, it’s ready.
Listen closely too: ripe pods often make a soft cracking sound as they release seeds. I once missed a harvest because I ignored these sounds, only to find scattered seeds the next morning! Weather matters too—harvest on dry, sunny days to prevent mold and ensure seeds are fully mature.
Here’s a quick comparison to help you spot the difference between ripe and unripe evening primrose seed pods:
If you’re unsure whether a pod is ready, cut it open to check the seed color. Ripe seeds are dark brown or black, while unripe seeds remain light tan or greenish.
I always carry a small pair of scissors or pruning shears when harvesting to test pods discreetly. Pro tip: Harvest in the morning after dew dries—this reduces humidity and prevents mold during storage.
Another trick I use is to shake the pods gently over a paper bag or cardboard tray. If seeds rain down easily, the pod is ripe. If not, leave it on the plant for another 3–5 days.
Overripe pods may release seeds prematurely, so act quickly once you spot these signs. In my experience, USDA Zone 6a gardeners should aim for late August, while warmer zones can wait until early September.
Weather plays a surprising role in seed maturity. Hot, dry spells accelerate ripening, while cool, rainy periods can delay it. I once had to extend my harvest window by 2 weeks after unexpected rain slowed pod drying.
To protect your seeds from moisture, harvest during clear skies and store them in a cool, dry place (like a paper envelope) until fully dried.
One common mistake I’ve seen is harvesting pods that are too dry. While brown pods are a good sign, they should still feel slightly plump, not hollow. Hollow pods mean seeds have already scattered.
To avoid this, I harvest just as pods begin to crack, not after they’ve fully opened. This ensures I capture the maximum seed yield without wasting effort.
For gardeners in containers or small spaces, timing is even more critical. Evening primrose plants in pots may ripen 1–2 weeks earlier than those in the ground due to warmer root zones.
I’ve found that hand-pollinating flowers with a soft brush can boost seed production if your plants are isolated. This is especially useful for heirloom varieties where seed purity matters.
Finally, don’t overlook the seed pod location. Mature pods often form at the base of the plant, near the stem. I’ve lost track of ripe pods hidden among foliage—always check the lower stems first.
Once harvested, lay pods on a screen or mesh bag to dry for 1–2 weeks in a shady, well-ventilated area. This final step ensures seeds are completely dry before storage, preventing mold and extending viability.
With these tips, you’ll never miss the perfect harvest window again. The satisfaction of collecting viable evening primrose seeds for next season’s garden—or sharing with fellow gardeners—makes the effort worthwhile. Happy harvesting! 🌾
Step-by-step evening primrose seed harvesting process for maximum yield
Harvesting evening primrose seeds at the right moment ensures high seed viability and a bountiful yield for next year’s garden. The key is patience—wait until the seed pods turn brown and begin cracking open naturally.
Rushing the process can lead to immature seeds that won’t germinate, while waiting too long risks losing seeds to birds or weather.
Before you begin, gather your harvesting tools: a pair of clean, sharp pruning shears, a small bowl or paper bag for collecting pods, and a labeling marker to track seed varieties.
Work on a dry, sunny day when humidity is low to prevent mold during drying. I always harvest in the morning to avoid evening dew, which can speed up seed deterioration.
- 1 Gently snip open pods with pruning shears—avoid crushing them. Place pods in a paper bag to catch falling seeds.
- 2 Extract seeds by lightly rubbing pods between your fingers over the bag. Discard empty husks to avoid contamination.
- 3 Air-dry seeds for 1-2 weeks in a cool, dark place (like a mesh bag hung in a garage). Avoid direct sunlight to prevent overheating.
- 4 Oven-dry alternative: Spread seeds on a paper towel at 95°F (35°C) for 2 hours if humidity is high. Monitor closely to avoid burning.
- 5 Store seeds in an airtight container with a desiccant packet in a cool, dark place. Label with the harvest year and variety for future reference.
For long-term storage, keep seeds in the fridge for up to 2 years—this slows moisture loss and maintains germination rates. I’ve had success storing mine in glass jars with silica gel, which absorbs excess humidity.
Test a few seeds annually by planting them in pots to check viability before committing to large-scale sowing.
If you’re harvesting for commercial use, consider batch processing with a seed cleaner to remove chaff and debris. For home gardeners, a simple sieve or fine mesh screen works perfectly. Always wear gloves to avoid handling seeds with oily residues, which can reduce germination.
Pro tip: Save seeds from your healthiest plants—this ensures the strongest offspring for next year. I’ve noticed that seeds from first-year blooms often produce more robust seedlings than those from over-mature plants. Rotate seed sources annually to maintain genetic diversity in your garden.
With these steps, you’ll maximize your evening primrose seed yield while ensuring high-quality seeds for years to come. Happy harvesting! 🌾