
How To
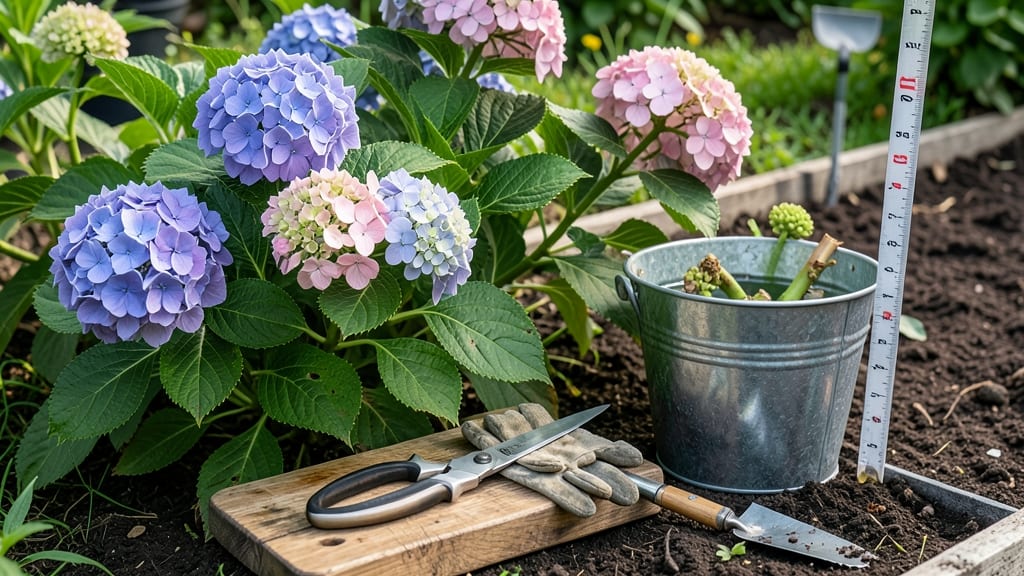
Harvesting hydrangeas at the right time turns their stunning blooms into long-lasting decorations or fresh bouquets 🌸 — but timing and technique make all the difference.
Picture this: you’ve waited all season for your hydrangeas to burst into color, only to cut them too early and watch the blooms wilt within days. Or worse, you miss the window entirely and end up with dry, brittle stems.
The key is knowing when those flower heads are at their peak—firm, vibrant, and ready to be transformed.
In this guide, I’ll walk you through the exact signs to look for (like bud hardness and leaf curling) so you never harvest too soon or too late.
You’ll also learn the best tools to use, how to cut stems without harming your plant, and creative ways to preserve those blooms for months.
Whether you’re growing mophead, panicle, or oakleaf varieties, these tips will help you maximize your harvest—and keep your hydrangeas thriving for years to come.

When to harvest hydrangeas: identifying the perfect ripeness stage
Harvesting hydrangeas at the right time transforms your garden into a floral treasure trove. The key lies in understanding subtle cues—like bud hardness and leaf curling—that signal peak ripeness. Miss these signs, and you risk wilting blooms or misshapen stems.
I’ve learned the hard way: harvesting too early means floppy, underdeveloped flowers, while waiting too long can leave you with dried, brittle stems. Let’s fix that!
Start by checking the flower buds in late summer—typically August to early September—when they begin to plump and firm. Press a bud gently; if it feels wooden or slightly rubbery (not mushy), it’s ready. This bud hardness test is your first clue.
Pair it with leaf behavior: healthy hydrangeas show leaves that curl slightly at the edges as they prepare for dormancy. These visual cues work together to confirm ripeness.
| Ripeness Cue | What to Look For | Action |
|---|---|---|
| Bud Hardness | Firm, slightly rubbery (not soft) | Press gently—if it resists, it’s ready! |
| Leaf Curl | Edges curl back naturally | Observe 3-4 leaves per stem |
| Flower Color | Deep, vibrant (no fading) | Pink/blue hues should pop! |
| Stem Strength | Sturdy, doesn’t bend easily | Grip firmly—shouldn’t snap |
| Time of Day | Early morning (cooler temps) | Harvest before 10 AM for longevity |
Color is another non-negotiable clue. Mophead hydrangeas (Hydrangea macrophylla) should display their deepest pink or blue hues—no pale or streaky blooms. For panicle types (H. paniculata), look for creamy-white or blush tones that haven’t turned brown.
A quick trick: hold a bloom up to the sky. If the color matches its natural vibrancy (not washed out), it’s harvest-ready.
Don’t overlook the stem’s role in ripeness. A ready-for-harvest stem feels thick and woody near the base, with a slight greenish-brown hue. If it bends too easily or oozes sap when cut, wait a few days.
Pro tip: Cut a test stem from a less visible branch first. If it holds its shape in a vase for 24+ hours, your hydrangeas are perfect for harvesting.
Avoid these common mistakes that sabotage harvests: harvesting after the first frost (which damages cell structure), cutting stems in direct afternoon sun (causes wilting), or ignoring pest signs like chewed leaves or sticky sap.
Always inspect stems for aphids or spider mites—these pests weaken the plant and shorten bloom life.
For dried arrangements, aim for late August when flowers are 70-80% open. This stage ensures they dry flat and sturdy without crumbling. Hang stems upside down in a dark, dry space for 2-3 weeks.
For fresh bouquets, wait until blooms are fully open (early September) and cut stems at a 45-degree angle to maximize water uptake.
Variety matters! Oakleaf hydrangeas (Hydrangea quercifolia) ripen slightly earlier (late July) and show deep red-purple foliage alongside blooms. Smooth hydrangeas (H. arborescens) stay fresh longer in vases—look for snowball-shaped clusters that feel dense and heavy.
Always match your harvesting method to the specific variety’s traits.
Timing isn’t just about the plant—it’s also about weather patterns. Harvest after a light rain (which hydrates stems) but before humid afternoons (which speed up wilting). I’ve found that morning harvests in 55-70°F temperatures yield the longest-lasting blooms.
Use a sharp, sterilized pruner to avoid crushing stems, and always leave 2-3 sets of leaves on each cut to support future growth.
Remember: patience pays off. Rushing the harvest means sacrificing vibrant color and structural integrity. Take 5 minutes to check buds, leaves, and stems—your future floral arrangements will thank you. With these cues, you’ll never miss the perfect ripeness window again! 🌸
Step-by-step guide to harvesting hydrangeas without damaging the plant
Harvesting hydrangeas the right way ensures your plant stays healthy while giving you stunning blooms for arrangements or drying. The secret lies in cutting at the correct angle, using the right tools, and knowing which stems to avoid.
If you’ve ever watched your hydrangea blooms wilt within days of cutting, you’re not alone—most gardeners make this one critical mistake.
I’ve harvested hydrangeas for years, and the difference between a thriving plant and a struggling one comes down to these simple steps. You’ll need just a few tools: sharp pruning shears, a clean bucket of water, and a rubbing alcohol wipe to sterilize your blades between cuts.
Skipping these prep steps can introduce diseases to your plant, so never skip them!
How to Harvest Hydrangeas Like a Pro
-
Step 1: Choose the Right Stems
Select fully open blooms with deep color and firm stems. Avoid stems with wilting petals or soft spots—these are past their prime. -
Step 2: Cut at a 45-Degree Angle
Use clean pruning shears and cut 4-6 inches below the bloom. This encourages new growth while keeping the plant balanced. -
Step 3: Handle Blooms Gently
Hold stems by the base of the stem, not the flowers, to prevent crushing. Place cuttings in a bucket of cool water immediately to hydrate them. -
Step 4: Sterilize Tools Between Cuts
Wipe blades with rubbing alcohol after each cut to prevent spreading bacteria or fungus to your hydrangea. -
Step 5: Store or Process Immediately
For fresh arrangements, trim stems underwater. For drying, hang upside-down in a dark, dry place with good airflow.
After harvesting, give your hydrangea some post-harvest TLC to keep it thriving. Water deeply at the base to replace lost moisture, and avoid fertilizing for 4-6 weeks—this lets the plant recover without encouraging new growth too soon.
I’ve found that mulching around the base with 2-3 inches of organic mulch helps retain moisture and protects roots during the cooler months.
One common mistake I see is harvesting too many stems at once, which can stress the plant. Limit yourself to no more than 1/3 of the plant’s blooms in a single session. This ensures your hydrangea has enough energy to rebound and produce even more stunning flowers next season.
For varieties like panicle hydrangeas, you can harvest later in the season—they often develop winter interest with their unique seed heads.
Pro tip: If you’re drying hydrangeas, wait until the blooms are fully mature but not yet brown. This gives you the best color retention. For fresh arrangements, recut stems every 2-3 days and change the water to keep them looking vibrant.
With these steps, your hydrangeas will stay healthy, and you’ll have beautiful blooms to enjoy for weeks—whether in a vase or as dried decorations.
Now that you’ve mastered the harvest, you’re ready to transform those blooms into everything from elegant bouquets to rustic centerpieces. Just remember: patience and care during the harvest pay off in a plant that keeps gracing your garden for years to come. Happy harvesting! 🌸