
How To
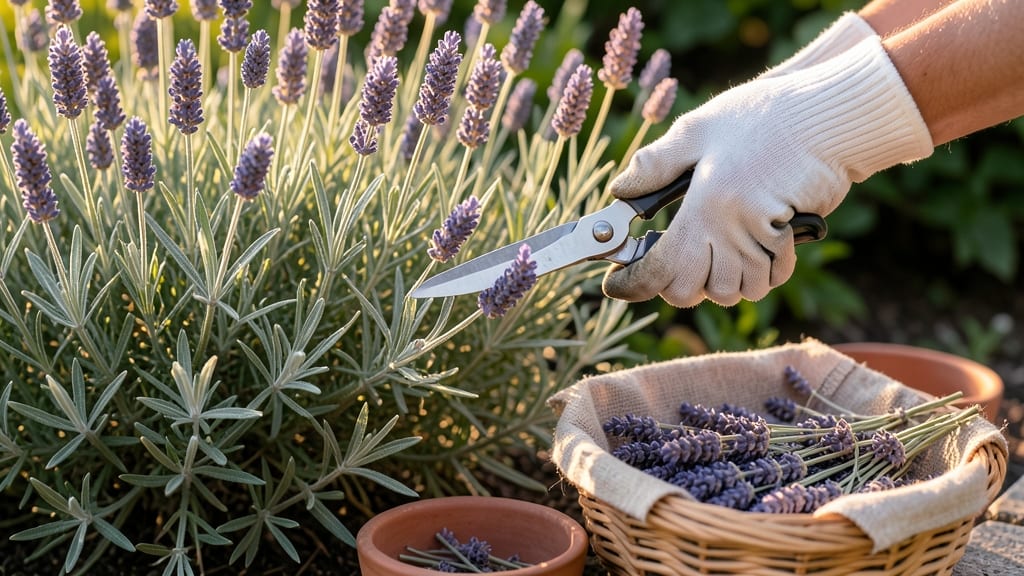
To harvest lavender for tea, you’ll want buds just beginning to bloom—this is when the essential oils peak for the best flavor and aroma.
Picture this: you’re about to steep a cup of lavender tea that tastes like sunshine, but your plant looks tired afterward. The secret isn’t just timing—it’s how you cut the stems and care for the plant afterward.
Too late, and the tea tastes bitter; too early, and it’s weak. I’ve made both mistakes, and I’m here to show you the best way.
Lavender thrives in USDA Zone 6a and loves full sun, but even the hardiest plants need gentle handling. Harvesting at the right stage—when buds are tight but not yet open—preserves the delicate oils that make your tea soothing.
Plus, proper pruning keeps your lavender bushy and healthy for years, so you always have a fresh supply.
Ready to turn your garden into a tea haven? I’ll walk you through the exact steps for cutting, drying, and storing lavender—plus how to avoid common pitfalls like over-harvesting or poor drying. Your next cup of tea is just a few snips away.

When and how to harvest lavender for maximum tea flavor
Harvesting lavender at the perfect moment transforms your garden into a fragrant tea treasure. The key lies in timing—picking flowers just as buds form but before they fully bloom preserves the essential oils that give lavender tea its signature flavor and aroma.
This delicate window ensures your tea stays rich and aromatic rather than bitter or weak.
Most lavender varieties reach their prime harvesting stage between late June and early August, depending on your climate. In warmer regions like USDA Zone 8-10, you might harvest as early as May, while cooler zones like Zone 5-6 may delay harvest until July.
Always check your specific lavender type, as some like English lavender mature faster than Spanish lavender.
Harvesting at the wrong stage can ruin your tea. Overripe flowers lose their volatile oils, making your tea taste dull. Meanwhile, harvesting too early means underdeveloped buds won’t release enough flavor.
The goal is to strike that sweet spot where buds are plump and just beginning to open, typically when they’re about 1/3 open.
Morning is the best time to harvest because dew hasn’t dried and temperatures are cooler, reducing oil loss. Avoid harvesting after rain or in the heat of the day, as this can cause the flowers to wilt or lose their fragrance.
Always use clean, sharp pruners or scissors to avoid crushing stems, which releases bitter compounds.
When harvesting, cut stems about 6 inches below the flower head to encourage bushier growth. This also prevents the plant from becoming woody at the base, which can reduce future yields.
Never cut more than 1/3 of the plant at once, as this stresses lavender and can lead to poor regrowth or even plant death.
Here’s a quick reference for the ideal harvesting conditions and techniques:
| Harvest Stage | Key Features | Best Time | Tea Flavor Impact |
|---|---|---|---|
| Bud Stage | Flowers closed, slight purple hue, woody stems | Morning, dry weather | Rich, floral, high in essential oils |
| Early Bloom | 1/3 open, stems firm, green leaves | Late morning, cool days | Balanced sweetness, aromatic |
| Full Bloom | Fully open, bright purple, soft stems | Avoid | Bitter, weak flavor, low oils |
After harvesting, bundle stems into small groups of 5-10 stems and tie them with twine or a rubber band. Hang them upside down in a dry, dark, well-ventilated space like a closet or shed.
Avoid direct sunlight, which can fade the color and degrade the oils. It typically takes 2-3 weeks for lavender to dry completely, but never rush the process—proper drying is crucial for preserving flavor.
Seasonal timing matters too. In spring-planted lavender, your first harvest won’t occur until the following year. Always prioritize healthy plant growth over aggressive harvesting. If your lavender looks stressed—yellowing leaves, sparse blooms—scale back and let it recover. A well-cared-for plant will reward you with years of fragrant harvests.
For the best tea flavor, store dried lavender in airtight glass jars away from light and moisture. Label the jar with the harvest date, as lavender loses potency over time. Used within 6-12 months, your dried lavender will maintain its full aromatic potential for steeping in hot water.
A little goes a long way—just 1 teaspoon per cup is perfect for a soothing, fragrant cup of tea.
With the right timing and techniques, your lavender harvest will be a flavorful success every season. Happy harvesting! 🌿✂️
Pruning lavender properly to boost tea yield and plant longevity
Pruning your lavender plants isn't just about keeping them tidy—it's the key to unlocking bountiful tea harvests year after year. When done correctly, proper pruning encourages denser growth, prevents woody stems, and maintains those aromatic buds that make your tea so special.
I've learned that timing and technique make all the difference between a thriving lavender bush and one that struggles to produce quality blooms.
Most gardeners make the mistake of pruning at the wrong time or using the wrong tools, which can actually damage the plant and reduce its ability to produce flavorful flowers.
The secret lies in understanding when to prune—typically after the first flush of flowers in early summer—and how to shape the plant to promote new growth without stressing it. Let me walk you through the essential steps and tools to keep your lavender productive and healthy.
⚠️ Warning: Pruning Mistakes That Kill Your Lavender
- Pruning too late in the season (after mid-August) can leave stems vulnerable to frost damage.
- Using dull or dirty shears spreads disease and creates jagged cuts that heal poorly.
- Cutting into old wood (brown stems) removes the plant's energy reserves, stunting future growth.
- Over-pruning more than 1/3 of the plant at once shocks lavender and reduces next year's bloom.
Start with the right tools: a pair of sharp bypass pruners (never hedge trimmers—they tear stems) and sterilized shears for clean cuts. I always disinfect my tools with rubbing alcohol before and after pruning to prevent bacterial infections.
The goal is to remove spent flowers and encourage new growth from the base of the plant. For established lavender, I cut back about 1/3 of the previous year's growth, focusing on the oldest stems first.
Seasonal pruning is crucial. In early spring, I do a light trim to shape the plant and remove any dead or crossing branches. This encourages fresh, vigorous growth before the main flowering season.
After the first flush of flowers in June or July, I do a more aggressive prune to promote a second bloom cycle. This second harvest often yields the most aromatic buds for tea, as the plant puts extra energy into producing flavorful flowers.
Never skip the post-pruning care. After cutting, I water the base of the plant deeply to help it recover, but I avoid overwatering—lavender hates soggy roots. I also apply a light mulch of gravel or coarse sand to keep moisture levels stable and prevent soil-borne diseases.
This simple step has dramatically improved the health of my lavender bushes over the years.
Watch for signs of over-pruning, like sparse foliage or leggy stems. If your lavender looks stressed, it's a sign you've pruned too aggressively. The key is balance: enough to shape the plant and encourage new growth, but not so much that you weaken it.
With practice, you'll develop an eye for just the right amount of pruning to keep your lavender bushy, productive, and full of tea-worthy blooms.
Remember, lavender is a low-maintenance perennial, but it does reward careful pruning with years of abundant harvests. The more you prune correctly, the more your plant will thrive—and that means more fragrant lavender for your tea stash every year. Happy pruning! ✂️🌿