
How To
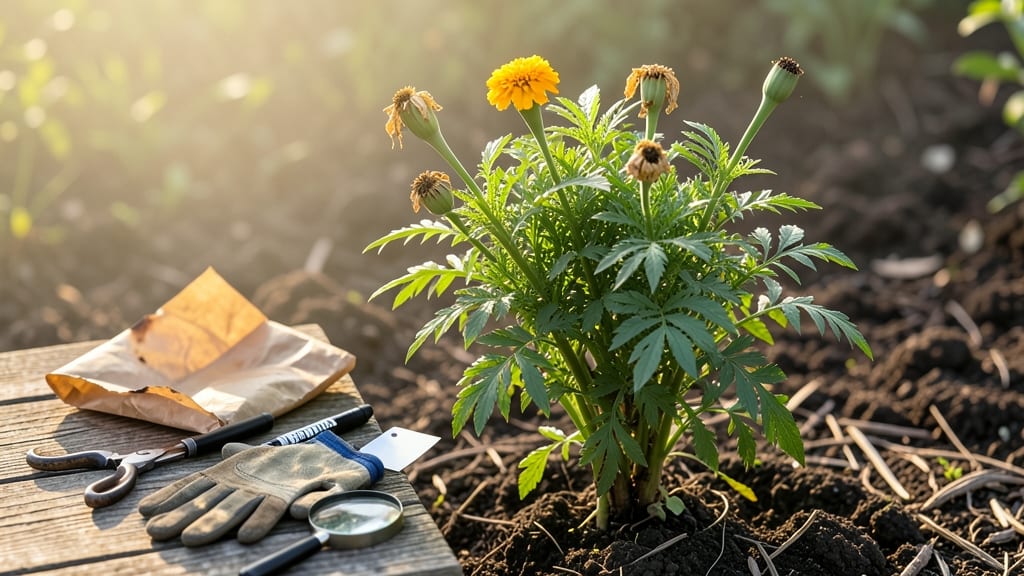
Harvesting marigold seeds requires timing those brown, cracked seed pods just right—wait too long, and the seeds scatter, leaving you with nothing to save for next year.
Marigolds aren’t just beautiful garden additions—they’re powerhouses for pest control and pollinator support, but only if you save their seeds properly. Knowing exactly when those brown, cracked seed pods are ready to harvest can mean the difference between storing viable seeds and wasting a season’s growth.
Most gardeners miss the window because they focus on the flowers instead of the seed heads. By the time the petals fade, the pods should already be drying out—turning from green to a deep, papery brown and making a faint rattling sound when shaken.
This is your cue that the seeds are mature and ready for collection.
In this guide, I’ll walk you through the step-by-step process for harvesting, drying, and storing marigold seeds so you can maximize your yield and ensure strong, healthy plants next spring.
You’ll learn how to spot the perfect seed pods, avoid common mistakes, and keep your seeds viable for years to come.

When to harvest marigold seeds: identifying the perfectly ripe seed pods
Timing the harvest of marigold seeds is all about watching for three key visual cues: color, texture, and sound. When the seed pods transition from green to a deep, papery brown, they’re signaling maturity. This change typically occurs 60-90 days after planting, depending on your climate and marigold variety.
In my Zone 6a garden, I usually spot these ready-to-harvest pods in late August, just before the first frost.
Don’t rely solely on the calendar—overripe pods can scatter seeds before you’re ready, leaving you with nothing to save. Instead, focus on the papery texture and the faint rattling sound when you gently shake the pod.
This indicates the seeds inside are fully mature and ready for collection. If you hear nothing, the seeds need more time.
The ideal harvest window is when the seed pods are fully brown but haven’t yet split open completely. At this stage, the pods will feel dry and brittle to the touch, almost like crumpled paper. If you press gently, they may crack slightly, but the seeds should still remain contained.
This is your golden moment—harvest too early, and the seeds won’t be viable; too late, and you’ll lose them to the wind.
Seasonal factors play a huge role in timing. In warmer climates, marigolds may produce seed pods earlier, sometimes as early as July. Conversely, in cooler regions, pods might not ripen until September or October.
Pay attention to your local frost dates—you’ll want to harvest before the first frost, which can damage the pods and reduce seed viability.
Another key indicator is the plant’s life cycle. As marigolds mature, their leaves begin to yellow and die back, signaling the plant is shifting its energy toward seed production.
This is your body’s way of telling you, “It’s time to harvest!” If you ignore this signal, the plant may drop its seeds naturally, wasting your effort.
Here’s a quick way to test readiness: Pick a seed pod and hold it up to the light. If you can see dark, plump seeds inside with no green remnants, it’s ready.
If the pod still contains green material, give it another 7-10 days to mature. This simple trick saves me from harvesting too soon and ending up with non-viable seeds.
| Stage | Visual Cues | Action | Timing |
|---|---|---|---|
| Not Ready | Green pods, firm texture, no rattling | Wait 7-10 days | Early season (June-July) |
| Perfectly Ripe | Brown pods, papery texture, faint rattling | Harvest immediately | Mid-late season (August-September) |
| Overripe | Split pods, scattered seeds, empty pods | Too late—save what’s left | Late season (October) |
One common mistake I see is harvesting based on flower color. Many gardeners wait until the petals fall before checking the seed pods, but by then, the pods may already be overripe.
Instead, start monitoring the pods as soon as the flowers bloom. This gives you plenty of time to track their progress and harvest at the perfect moment.
If you’re growing multiple marigold varieties, like French marigolds or African marigolds, know that their seed pods ripen at slightly different rates. French marigolds tend to mature faster, often ready by late July, while African marigolds may take until early September.
Keep a close eye on each variety separately to avoid missing the harvest window for any of them.
Pro tip: Harvest on a dry morning after the dew has evaporated. This reduces the risk of mold or moisture damage to your seeds. I like to use a small paper bag to collect the pods, then bring them indoors to dry further.
This method keeps the seeds contained and prevents any accidental scattering in the garden.
Finally, remember that seed viability decreases over time once the pods are fully ripe. If you’re unable to harvest immediately, place the pods in a cool, dry location (like a shaded porch) to slow down the ripening process.
But don’t delay—harvest within 24 hours of the pods turning fully brown for the best results.
Step-by-Step process for collecting and drying marigold seeds at home
Once you’ve identified those perfectly ripe marigold seed pods, the next step is harvesting them before they scatter. I recommend working on a dry, sunny day when humidity is low—this minimizes the risk of mold during drying.
Grab a pair of clean scissors or pruning shears and snip the seed heads just above the stem. Avoid pulling them off, as this can damage the plant and leave stubborn stems attached to your seeds.
After harvesting, you’ll need to decide between paper bags and mesh bags for drying. Paper bags are ideal for small batches because they allow airflow while keeping seeds contained. Mesh bags, on the other hand, work better for larger collections and prevent mold buildup by letting seeds breathe even more.
I’ve found that mesh bags reduce the chance of premature drying or seed spoilage in humid climates.
How to Harvest Marigold Seeds
- 🌾 Step 1: Wait for Seed Pods to Turn Brown
Harvest when pods are deep brown and slightly cracked, but before they split open completely. - 🌿 Step 2: Cut Seed Heads with Clean Shears
Snip the entire seed head (about 3-4 inches long) to ensure you capture all seeds. - 💨 Step 3: Shake Seeds into a Container
Place the seed head over a paper bag or mesh bag and gently shake to release seeds. - 🌡️ Step 4: Dry Seeds in a Warm, Dry Place
Spread seeds in a single layer on a tray or in a paper bag with holes for airflow. - ✂️ Step 5: Remove Remaining Seeds from Pods
Once fully dry (after 1-2 weeks), break open pods to extract any leftover seeds.
Drying marigold seeds properly is critical for viability. I’ve had the best success by placing seeds in a well-ventilated area with indirect sunlight, like a sunny windowsill or a seed drying rack.
Avoid direct sunlight, which can overheat and prematurely dry the seeds, reducing their germination rate. If you notice mold or musty smells, act fast—transfer seeds to a dry, airy location immediately to prevent spoilage.
Once seeds are completely dry (they should feel hard and papery to the touch), store them in a paper envelope or airtight container with a silica gel packet to absorb moisture. Label the container with the harvest date and marigold variety to keep track.
Most marigold seeds remain viable for 2-3 years if stored correctly, so proper drying is your first line of defense against losing your hard-earned seeds.
If you’re dealing with humid climates, consider using a dehumidifier or a seed dehydrator set to 95°F for faster, more controlled drying. I’ve also had luck using a fan on low speed to circulate air around seeds during drying—this speeds up the process and reduces mold risk.
Just avoid high heat, which can kill the seeds before they’re ready for storage.
Finally, test a few seeds before storing the rest. Place a handful in a moist paper towel and keep it in a warm, dark place for a week. If they sprout, your seeds are ready for long-term storage.
If not, you may need to re-dry them or try a different batch. This simple test saves you from wasted storage space and ensures you’re only keeping high-quality seeds.