
How To
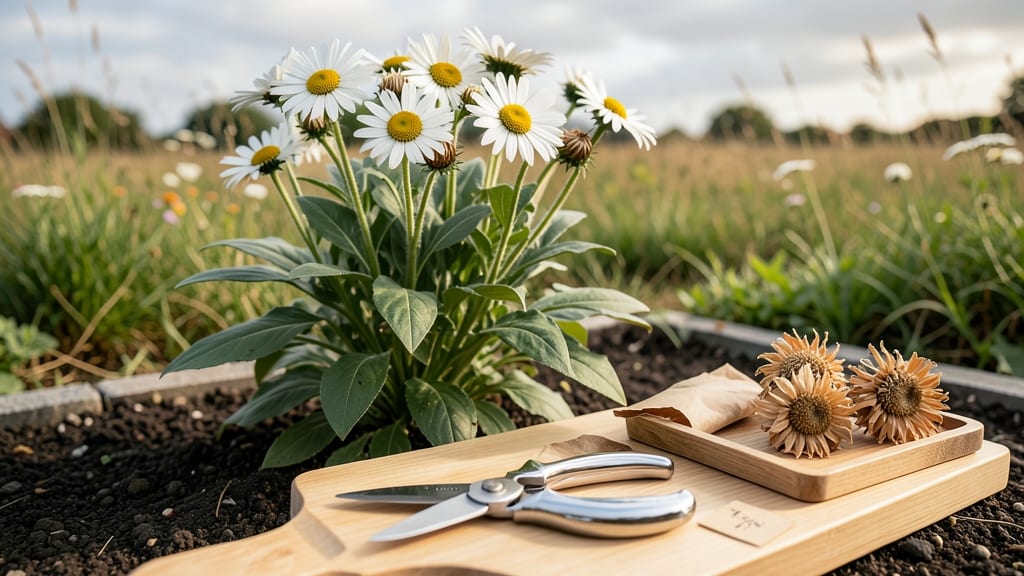
Harvesting Shasta daisy seeds 🌼 at the right time lets you grow more of these cheerful blooms for free next season—no nursery trips required.
Picture this: your late-summer garden filled with browned daisy heads that rattle with seeds, ready to be saved. But wait too long, and the wind or birds will snatch them first. Timing is everything, and I’ll show you exactly when to act.
Most gardeners miss the window because they don’t know the key signs—like dried petals and crisp seed heads—that mean it’s time to collect. Below, I’ll walk you through the step-by-step process, from cutting the heads to storing seeds so they stay viable for planting.
Whether you’re a beginner or a seasoned gardener, you’ll leave here with a foolproof method to double your daisies without spending a dime. Let’s get started!

When to harvest Shasta daisy seeds: signs heads are ready for collection
Timing is everything when harvesting Shasta daisy seeds—collect them too early, and you’ll waste viable seeds. Too late, and they’ll scatter into the wind or attract pests. The key is watching for brown, dry seed heads that naturally pop open, signaling perfect ripeness.
This usually happens in late summer to early fall, but climate and plant maturity shift that window slightly.
I’ve learned the hard way that rushing the harvest leads to low germination rates. Instead, focus on these three visual cues: the flower head must turn completely brown, petals should fall away on their own, and the seed head should feel dry and papery to the touch.
If you’re unsure, wait another week—patience ensures you collect the best seeds for next season’s garden.
Climate plays a huge role in harvest timing. In cooler regions (USDA Zones 3-5), seed heads may not dry until September or October. Warmer zones (6-9) often see readiness by August.
Even within the same zone, a dry summer speeds up drying, while humid conditions can delay it. Always check the seed head’s moisture level before harvesting.
Here’s what to watch for when your Shasta daisies are ready for seed collection:
| Stage | Visual Signs | Action | Best Time |
|---|---|---|---|
| Early Bloom | Bright white petals, green center | Observe plant health | Spring-Summer |
| Post-Bloom | Petals fall, center turns brown | Wait for full dryness | Late Summer |
| Ready to Harvest | Brown, dry, papery head; seeds rattle | Cut and dry indoors | August-September |
| Overripe | Seed head splits open; seeds scatter | Harvest immediately or lose seeds | Late Fall |
Plant maturity also affects harvest timing. First-year Shasta daisies often produce fewer seeds because they focus on root and foliage growth. By the second year, plants mature enough to devote energy to seed production, making their harvests more reliable.
If you’re growing from seed, wait until the plant is at least 2 feet tall before expecting viable seeds.
One trick I use is the "shake test": hold a seed head over a brown paper bag and give it a gentle shake. If seeds rain down easily, they’re ready. If not, wait another 3-5 days.
This simple test saves time and ensures you’re harvesting at peak viability. Just be sure to do this on a dry, calm day to avoid losing seeds to wind or rain.
Humidity can trick you into thinking seed heads are ready when they’re not. In high-humidity climates, seed heads may stay green longer or develop mold. If you notice dark spots or fuzzy growth on the heads, avoid harvesting—these seeds won’t germinate.
Instead, wait for a dry spell or harvest from plants in sunnier, drier parts of your garden.
Don’t forget to consider your local frost dates. If a frost is forecast before your seed heads dry, harvest them early and finish drying indoors. Shasta daisies are perennial, so they’ll regrow next year, but saving seeds from the current season ensures you have a backup for propagation.
In colder zones, I often bring entire plants indoors to dry if frost threatens before harvest time.
Finally, pay attention to the seed head’s structure. Mature heads should look like tiny brown dandelions, with seeds clustered tightly inside. If you see green streaks or moist centers, the seeds aren’t ready.
The goal is to harvest when the head is completely dry but hasn’t yet split open—this gives you the best chance for high-quality seeds.
With these signs in mind, you’ll never miss the perfect moment to harvest Shasta daisy seeds again. Next, we’ll cover how to collect and store them properly to ensure 90%+ germination rates for next season’s garden.
Step-by-Step guide: how to collect seeds without losing them to birds or wind
Once your Shasta daisy heads turn brown and dry, they become irresistible to birds and vulnerable to wind. The key is acting quickly but carefully—before seeds scatter. I’ve perfected a method that ensures you collect viable seeds without losing a single one to nature’s thieves.
Start by gathering your tools of the trade: a pair of sharp pruners or scissors, a paper bag (brown paper works best), and a small bowl for cleaning. Work on a dry, sunny day when humidity is low—this prevents mold and speeds up drying later.
🌾 Step-by-Step Seed Harvesting Process
- 🌼 Step 1: Cut the Seed Heads
Use clean pruners to snip the dry flower heads just above the stem. Place them immediately in your paper bag to prevent seeds from flying away. - 🧹 Step 2: Remove Excess Debris
Shake the heads gently over the bowl to dislodge loose petals and debris. Discard any green or moist material—only dry, brown heads contain viable seeds. - 🌡️ Step 3: Dry the Heads
Spread the heads on a tray lined with paper towels in a warm, dry spot (like a sunny windowsill). Let them dry for 3-5 days until completely crisp. - ✂️ Step 4: Extract the Seeds
Once dry, rub the heads between your fingers or use a fork to scrape out the seeds. Sift through the debris with a fine mesh strainer to collect pure seeds. - 📦 Step 5: Store Properly
Place seeds in a paper envelope or airtight container with a desiccant packet to absorb moisture. Label with the harvest year and store in a cool, dark place.
Never rush the drying process—moisture kills seeds. If your seeds feel damp after rubbing, return them to the drying tray for another day. Patience here ensures 90%+ germination rates next spring.
Pro tip: If you’re short on time, you can bag the seed heads immediately after cutting and let them dry inside the bag. Just poke a few holes for airflow to avoid mold. This works well for small batches or busy gardeners.
With these steps, you’ll have a stash of Shasta daisy seeds ready to plant next season—completely free and ready to brighten your garden again. Just imagine the cost savings and the joy of watching your daisies return year after year!