
How To
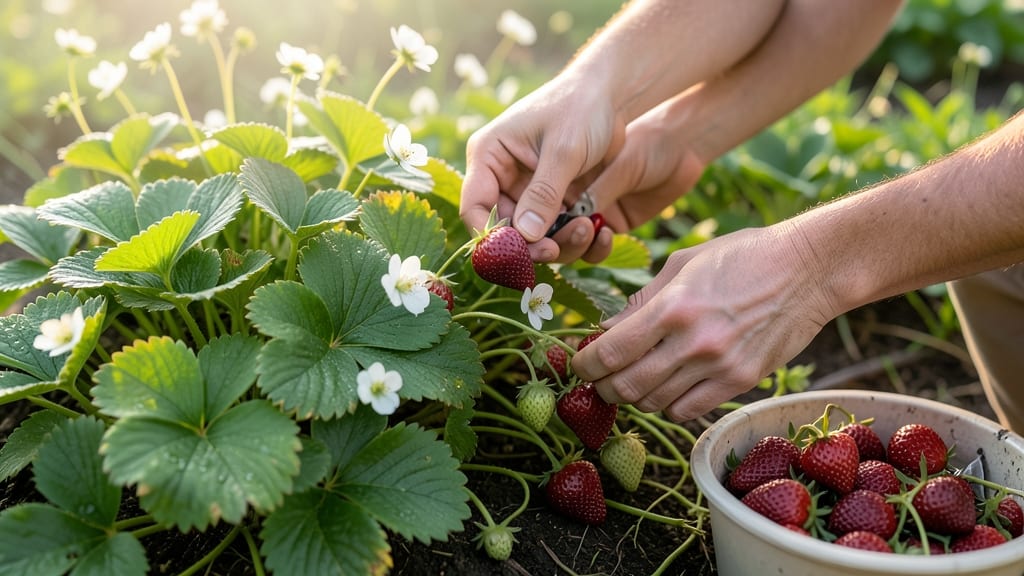
To harvest strawberries at their sweetest, you’ll want to pluck them when fully ripe—just as they’re bright red, slightly soft, and pull away cleanly from the plant 🍓.
Picture this: You’ve waited all spring for your strawberries to ripen, only to find them squished or still hard when you finally reach for them. The difference between a perfect berry and a ruined one often comes down to timing and technique.
Harvesting strawberries isn’t just about picking the fruit—it’s about protecting your plants for future yields. The right tools, gentle handling, and knowing when to harvest can mean the difference between a juicy, flavorful berry and one that’s bruised or overripe.
In this guide, I’ll walk you through exactly when to harvest (with foolproof ripeness cues), the best tools to use, and how to handle your strawberries so they stay fresh and your plants keep producing all season.

When to harvest strawberries: signs of ripeness and best picking times
Timing your strawberry harvest correctly ensures the sweetest flavor and healthiest plants. Picking too early means tart, underdeveloped fruit, while waiting too long risks bird damage or overripe berries. The key lies in recognizing three key ripeness cues: color, texture, and detachment ease.
These signs work for June-bearing, everbearing, and day-neutral varieties alike, though seasonal timing varies by USDA zone.
For Zone 6 gardens (like mine), the main harvest window stretches from late May to early July, peaking after the last frost date. In warmer zones (7-9), you’ll see berries ripen 2-4 weeks earlier, while cooler zones (4-5) may delay harvest until mid-June or July.
Everbearing varieties often produce two harvest waves: one in early summer and another in late summer/fall.
Here’s what to look for when scouting your patch:
| Ripeness Cue | What to Look For | Action to Take |
|---|---|---|
| Color | Fully red (or variety-specific color: yellow for 'Golden Jubilee', white for 'White Soul') with no green at the calyx | Harvest within 1-2 days—birds will target these first! |
| Texture | Slightly soft when gently squeezed (like a ripe peach), not mushy | Pick early morning when sugars peak and temps are cool |
| Detachment | Berries pull away cleanly with a gentle tug (no forcing!) | Use clean scissors or fingers—never twist or yank |
| Size | At least 1 inch in diameter (smaller berries often lack sweetness) | Leave small green berries—they won’t ripen further |
| Seasonal Timing | Peak harvest 60-70 days after flowering (varies by variety) | Check plants every 2-3 days during peak season |
The calyx (the green leafy top) holds the secret to ripeness. A fully colored calyx means the berry is ready, while any lingering green hints signal it needs more time.
I’ve learned the hard way that overripe strawberries (those with soft spots or leaking juice) are best used for jams or smoothies rather than fresh eating—they lose their signature bright flavor.
Harvesting at the right time of day matters too. I always pick early morning (between 6-8 AM) when berries are coolest and firmest. The sugar content peaks after a night’s chill, and the fruit won’t collapse under its own weight in the heat.
If you must pick later, choose overcast days to avoid sunscald on exposed berries.
Seasonal timing shifts with your USDA zone. In Zone 7-9, June-bearing varieties may start ripening as early as April, while Zone 4-5 gardeners might not see harvest until late June.
Everbearing types (like 'Seascape') often produce two crops: one in early summer and another in fall. To extend your harvest, plant a mix of June-bearing and everbearing varieties—this staggered approach gives you berries from May through September.
Watch for secondary cues like the aroma. A ripe strawberry releases a sweet, tangy scent—if your berries smell mild or earthy, they’re not ready. Also, check for pests like slugs or birds.
If you see pecked berries, harvest more frequently or use row covers to protect your crop. I’ve even hung old CDs from strings above my beds to deter birds without harming them.
Finally, don’t harvest in the rain. Wet berries bruise easily and are more prone to rot or mold. If rain is forecasted, pick 24 hours ahead and store berries in the fridge (they’ll keep for 3-5 days).
For long-term storage, wash and dry them first, then refrigerate in a single layer to prevent squishing.
By mastering these ripeness signs and seasonal windows, you’ll enjoy peak-flavor strawberries while keeping your plants productive for years. The first harvest is always the sweetest—literally! 🍓
Step-by-step strawberry harvesting technique to avoid plant damage
Harvesting strawberries the right way ensures juicy, flavorful fruit while keeping your strawberry plants healthy and productive. A gentle touch and proper technique prevent bruising, disease spread, and stress on the plant—so you can enjoy a bountiful harvest for years.
Even small mistakes like twisting berries or using dull tools can damage the plant's crown, reducing future yields.
Start by gathering the right harvesting tools and timing your pick to avoid midday heat stress. The key is to work early in the morning when berries are cool and firm, making them easier to handle.
Use a sharp pair of pruning shears or clean scissors to cut stems—never pull berries by hand, as this can uproot or damage the plant.
Look for fully colored fruit (red, yellow, or white depending on variety) with no green at the calyx (leafy top). Gently squeeze—ripe berries yield slightly to pressure.
Use clean pruning shears or sharp scissors to avoid crushing stems. Avoid fingers or dull tools that bruise berries or tear plant tissue.
Hold the berry gently and cut the stem ¼ inch above the fruit. This prevents the stem from tearing and spreading fungal diseases.
Place harvested berries in a shallow container lined with paper towels to prevent bruising. Avoid stacking or tossing them—gentle placement keeps them intact.
Pick berries between 6 AM and 9 AM when they’re cool and firm. This reduces sunburn risk and ensures peak flavor.
Wipe shears or scissors with rubbing alcohol after each use to prevent bacterial or fungal contamination between plants.
Keep harvested strawberries in the fridge for 3-5 days or eat them immediately. Never wash until ready to eat—excess moisture speeds up spoilage.
After harvesting, inspect your strawberry plants for any signs of damage or disease. Remove any overripe or spoiled berries left on the plant to prevent pests and mold. Prune yellowing leaves or damaged foliage to encourage new growth and improve airflow, which reduces the risk of botrytis rot.
If you’re harvesting in hot weather, work in the shade to avoid wilting the berries. Always carry a cooling spray bottle to mist berries if they feel warm to the touch. This simple step keeps them crisp and flavorful until you’re ready to enjoy them.
With these techniques, you’ll protect your strawberry plants while enjoying the sweetest, freshest berries possible. Happy harvesting! 🍓✂️