
How To
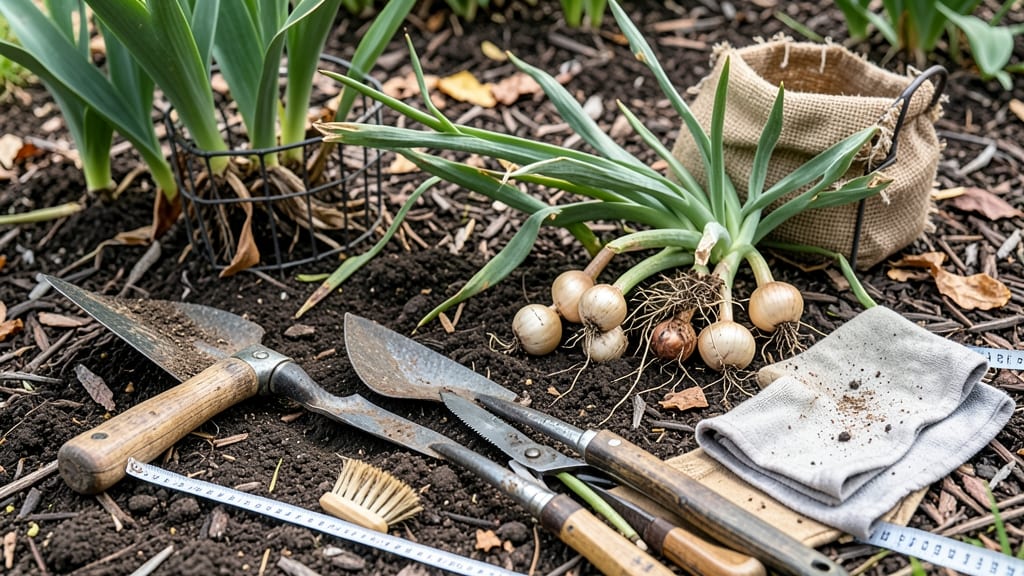
Harvesting tulip bulbs after their foliage dies back is the key to stronger blooms next spring—do it too soon, and you’ll stunt their growth.
Picture this: you’ve waited all season for your 🌷 tulips to shine, only to watch them fade into brown stems. But before you dig, timing is everything. Harvest too early, and you’ll weaken the bulb; wait too long, and it may rot.
In USDA Zone 6, the sweet spot is 6–8 weeks after flowering, when the leaves turn crispy and brown—but how do you know for sure?
This step-by-step guide covers when to dig, how to clean and store your bulbs, and the common mistakes that turn a great harvest into a gardening flop. Whether you’re replanting for next year’s show or forcing bulbs indoors, mastering this skill means bigger, brighter tulips for seasons to come.
Ready to save those bulbs? Let’s break down the exact process—from the right tools to the perfect storage conditions—to ensure your tulips return stronger than ever.

When and how to know your tulip bulbs are ready for harvesting
Harvesting tulip bulbs at the right time ensures they’ll thrive next spring. The key is waiting until the foliage has completely died back—usually 6 to 8 weeks after blooming.
Digging too early weakens the bulb, while waiting too long risks over-maturity, which reduces next year’s flowers. Timing varies by climate and tulip variety, so watch for specific signs.
For early-blooming tulips (like Darwin Hybrid or Fosteriana), harvest in late June to early July. Late-bloomers (such as Parrot or Fringed tulips) may need to wait until mid-to-late July. In cooler climates (USDA Zones 3-5), foliage may linger longer, so adjust your timeline accordingly.
| Harvest Stage | Key Signs | Action Required | Climate Adjustment |
|---|---|---|---|
| 6 Weeks Post-Bloom | Foliage turns yellow-brown and wilts | Monitor for 2-3 weeks of dormancy | Cooler zones: Wait 1-2 weeks longer |
| Fully Dormant | Leaves are crispy and dry; no regrowth | Dig bulbs with a hand fork or trowel | Hot zones: Harvest earlier to avoid heat stress |
| Over-Mature | Bulbs feel soft or shriveled; leaves stay green | Discard or replant immediately | Rainy seasons: Speed up drying process |
One of the most reliable harvest indicators is the foliage’s condition. When leaves turn completely brown and crispy, it’s time to dig. Gently squeeze a bulb—if it feels firm and dry, it’s ready.
If it’s still soft or mushy, wait another week. Never harvest if green shoots reappear, as this signals the bulb is still actively growing.
Climate plays a huge role in harvest timing. In hot, dry regions (like the Southwest), bulbs may need harvesting by mid-July to prevent heat damage. In cooler, wetter climates (like the Pacific Northwest), foliage might stay green longer, so extend your harvest window to early August.
Watch for regrowth signs after the first frost. If new green shoots emerge from the bulb, it’s not yet dormant. Tulips in container gardens often need earlier harvesting because their soil dries out faster. Once you spot crispy, brown leaves, mark your calendar for digging in 5-7 days.
Harvesting too early is a common mistake that weakens bulb strength for next year. If you dig when foliage is still green, the bulb won’t store enough nutrients.
On the flip side, over-mature bulbs (harvested too late) may sprout prematurely in storage or fail to bloom. Aim for that sweet spot of 6-8 weeks post-bloom.
For late-blooming varieties, like Parrot tulips, extend your harvest window to late July or early August. These types need extra time to replenish energy stores before dormancy. If your garden experiences unseasonably warm fall weather, bulbs may start growing again—dig them immediately to avoid spoilage.
Pro tip: Label your bulbs by variety before storing. This helps you replant specific types in the right spots next spring. Use a permanent marker on small tags or twist ties.
For climate-specific adjustments, note your region’s last frost date—bulbs in Zone 5 or colder may need a 1-2 week delay.
Once you’ve confirmed the bulbs are ready, dig carefully to avoid damaging the delicate skin. Use a hand fork or trowel to lift them gently.
Brush off excess soil, but don’t wash them—this removes protective layers. Let them cure in a dry, shaded spot for 1-2 weeks before storing.
Step-by-step guide to digging, cleaning, and storing tulip bulbs for replanting
Once your 🌷 tulip foliage has turned crispy brown and died back completely, it’s time to harvest those bulbs—but timing and technique make all the difference. Digging too soon starves the bulb of energy, while waiting too long risks rot.
The key is patience: 6–8 weeks after flowering is your window, and you’ll need the right tools to do it gently.
Gather your supplies first: a hand fork or digging spade, a bucket for bulbs, and a soft brush for cleaning. Work on a dry, sunny day when the soil is warm—this helps the bulbs dry faster and reduces disease risk.
If your garden soil is heavy clay, add a layer of sand or compost to the bucket to cushion the bulbs during transport.
- 1 Mark the area with a garden hose or stakes to avoid damaging nearby plants. Tulip bulbs grow 6–8 inches deep, so dig carefully to prevent cuts.
- 2 Loosen the soil around the bulb with a hand fork, working in a circular motion to avoid piercing the bulb itself. Lift gently—tulip bulbs are fragile and bruise easily.
- 3 Brush off soil with a soft brush or rinse gently in lukewarm water if heavily caked. Avoid pressure washers—they can damage the papery tunic that protects the bulb.
- 4 Cure the bulbs in a dry, shaded spot for 1–2 weeks. Spread them in a single layer on a wire rack or mesh screen to allow airflow and prevent mold.
- 5 Store in a cool, dark place at 40–50°F with 40–60% humidity. Use a paper bag or mesh container to allow airflow—plastic traps moisture and causes rot.
After curing, inspect your tulip bulbs for signs of pests or rot. Discard any that feel soft, smell foul, or have mold—these won’t survive storage. Healthy bulbs should feel firm and dry, with no signs of damage.
For long-term storage, place them in a well-ventilated cardboard box or mesh bag and check monthly for moisture or pests.
When replanting in fall (September–November), choose a sunny, well-draining spot and plant bulbs 6–8 inches deep, with the base of the bulb 2–3 inches below soil.
Water lightly after planting, then reduce watering until spring. With proper storage, your tulip bulbs can last 3–5 years and reward you with bold, vibrant blooms year after year.
Pro tip: Label your bulbs by variety if you’re storing multiple types—some Darwin Hybrid tulips or Parrot tulips need extra care in storage. A simple twist-tie with the name saves headaches come replanting time!