
Picking
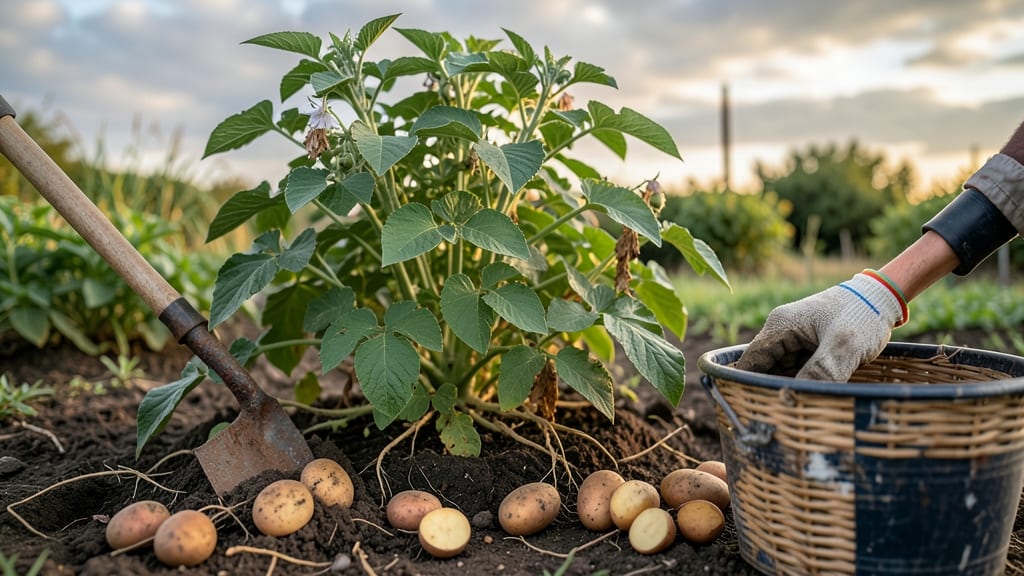
Harvesting potatoes from your garden at the right time means the difference between flavorful, tender spuds and tough, shriveled ones.
Picture this: you’ve spent weeks tending to your 🥔 plants, and now the moment of truth arrives. Dig too soon, and you’ll miss out on full-sized tubers.
Wait too long, and those perfect potatoes turn mealy or even sprout in the ground. The key? Learning when the soil and plants signal it’s time—without guessing.
In this guide, I’ll walk you through the three foolproof tests to know when your potatoes are ready, whether you’re growing early varieties or letting them mature. Plus, I’ll share how climate and soil type can shift your harvest window by weeks.
By the end, you’ll harvest your 🥔 at peak perfection—no more wasted effort, no more sad, small yields. Let’s get those spuds out of the ground the right way.

3 Soil tests to determine when to harvest potatoes perfectly
Knowing when to harvest potatoes from your garden can make the difference between tender, flavorful spuds and tough, shriveled ones. While most gardeners wait for the foliage to yellow, three simple soil tests can give you precise timing—especially for early vs. late varieties.
These methods help you avoid digging too soon (and missing out on larger tubers) or waiting too long (and risking rot or pests).
First, let’s tackle the flower test, which is ideal for new potatoes or early-maturing varieties. When your potato plants bloom and the flowers begin to fade, it’s a clear signal that small tubers are forming just below the soil.
This is perfect for harvesting baby potatoes—gently dig around the plant’s base to check for 1-2 inch tubers. If the flowers are still vibrant, wait a few days.
Next, observe the leaf yellowing method, which works for most mature potato varieties. When about 75% of the foliage turns yellow and starts to die back, it’s time to act. This usually happens 2-3 weeks before full maturity.
For late varieties, like Russets, this might coincide with the first frost in cooler climates. Pro tip: If your plants flop over completely, they’re past their prime—dig them up immediately to prevent rot.
Now, let’s get hands-on with the soil probing technique, my favorite for pinpoint accuracy. Using a trowel or garden fork, gently dig down 4-6 inches into the soil near the plant’s base. If you find firm, 2-3 inch tubers with rough skin, they’re ready.
For new potatoes, look for smaller, smooth-skinned tubers when the plant is still green. If the soil is too dry or tubers feel shriveled, wait a few more days.
| Test Method | Signs to Look For | Best For | Action |
|---|---|---|---|
| Flower Test | Flowers fade and drop | New potatoes, early varieties | Dig for small tubers (1-2 inches) |
| Leaf Yellowing | 75% foliage turns yellow | Mature potatoes, late varieties | Harvest within 1-2 weeks |
| Soil Probing | Tubers 2-3 inches, rough skin | All varieties, precise timing | Dig carefully to avoid damage |
For early varieties, like Yukon Gold or Red Pontiac, the flower test is your best friend. These potatoes mature faster (70-90 days), so you can harvest new potatoes as soon as the flowers fade.
If you’re growing late varieties, such as Russet Burbank, rely more on the leaf yellowing and soil probing methods, as they take 100-120 days to reach full size.
One common mistake is assuming all potatoes are ready at the same time. Early varieties often mature 2-3 weeks before late ones, so check each plant individually. If you’re unsure, do a spot test: dig up one plant and examine the tubers.
If they’re the right size and firmness, it’s time to harvest the rest. This method saves you from digging too soon and missing out on larger yields.
Timing your harvest also depends on your climate zone. In warmer regions, potatoes may mature faster, while cooler climates can slow growth. If frost is approaching, prioritize harvesting late varieties first, even if the foliage isn’t fully yellow.
Potatoes can tolerate light frosts but will spoil if left in the ground during hard freezes. Always aim to harvest before the first killing frost of the season.
Once you’ve mastered these soil tests, you’ll never guess when to harvest potatoes again. The key is to act quickly once you spot the signs—whether it’s fading flowers, yellowing leaves, or firm tubers in the soil.
With these methods, you’ll enjoy perfectly sized, flavorful potatoes every season, whether you’re growing new potatoes for salads or mature tubers for storage.
Pro tip: After harvesting, let your potatoes cure in a dark, dry place for a week to thicken their skins and improve storage life. This simple step ensures your harvest stays fresh for months—no more shriveled spuds!
How to harvest potatoes without damaging the tubers: step-by-step guide
Once you’ve confirmed your potatoes are ready to harvest, the next challenge is getting them out of the ground intact. A rough harvest leads to bruised tubers or even disease risk from open wounds.
The key is patience, the right tools, and ideal weather conditions. I’ve harvested thousands of potatoes over the years, and I’ll share my pro tips to ensure your harvest stays perfect.
Timing your harvest isn’t just about the plants—it’s also about the weather. Digging when the soil is too wet can crush tubers, while dry soil makes them harder to extract cleanly.
Aim for a day with dry, warm conditions (60-75°F) and no rain in the forecast for at least 48 hours. This gives the soil time to firm up just enough for easy digging without falling apart.
Step-by-Step Potato Harvest Guide
-
Step 1: Gather Your Tools
Grab a garden fork, sharp knife, gloves, and a large basket or tarp. Avoid using a shovel—it can slice tubers. -
Step 2: Cut the Foliage
Use a clean knife to trim the stems about 2 inches above the soil. This prevents disease from spreading to the tubers. -
Step 3: Loosen the Soil Gently
Insert the garden fork about 6-8 inches deep and wiggle it side-to-side to loosen the soil without piercing the tubers. -
Step 4: Lift Tubers Carefully
Gently pull up the plant, shaking off excess soil. Avoid dropping tubers—place them directly into your basket or on a tarp. -
Step 5: Cure the Potatoes
Leave them in a dark, dry place (60-70°F) for 7-10 days to develop a protective skin. This step prevents bruising and extends shelf life. -
Step 6: Store Properly
Once cured, store in a cool, dark place (40-50°F) with good airflow. Use a ventilated container or mesh bag.
After harvesting, never wash your potatoes until you’re ready to use them. The natural curing process thickens their skin, making them last longer. If you must clean them, use a soft brush and dry them thoroughly to avoid moisture buildup, which can lead to rot.
Store them in a well-ventilated container away from onions or apples—they release gases that speed up spoilage.
Pro tip: If you’re harvesting new potatoes (small, tender ones), you can dig them earlier by gently brushing back the soil and picking the largest tubers. Just be sure to replace the soil afterward to protect the remaining potatoes from sun exposure, which turns them green and toxic.
One common mistake I see is leaving potatoes in the ground too long after the foliage dies back. This can lead to sprouting or even disease from moisture trapped in the soil.
If you’re unsure, do a quick soil test: dig down 6 inches—if you find tubers larger than a golf ball, it’s time to harvest. The sooner you get them out, the better they’ll store.
With these steps, you’ll harvest perfect, damage-free potatoes every time—no more wasted effort or sad, shriveled spuds. Happy digging! 🥔