
How To
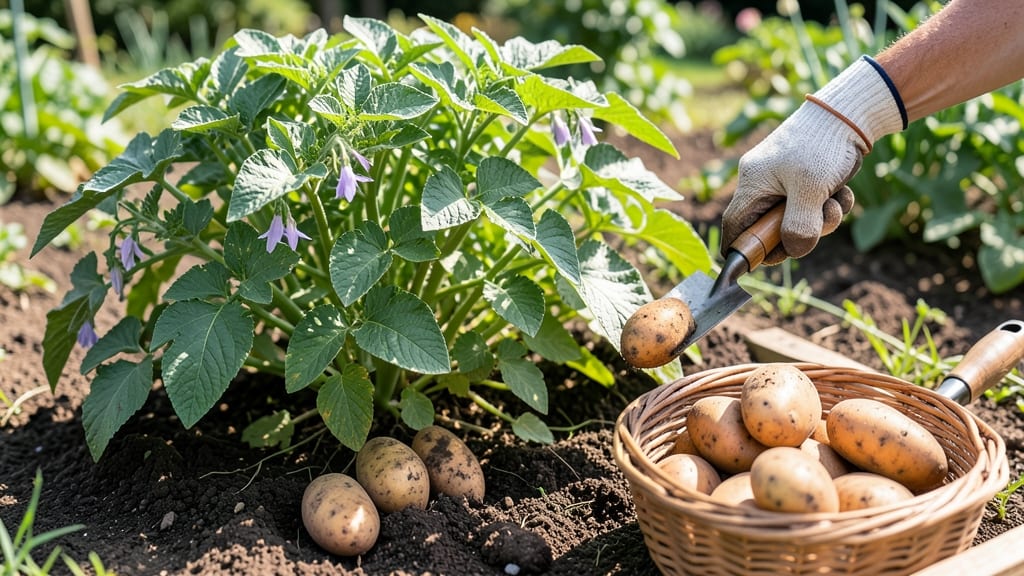
Harvesting russet potatoes at the right time ensures flavorful, firm tubers that store well—so knowing when to dig is the key to avoiding mealy, shriveled 🥔 spuds.
Picture this: you’ve spent weeks nurturing your russet patch, only to pull up potatoes that are either too small or already sprouting in the ground. That’s the difference between a perfect harvest and wasted effort.
Most russets are ready between 90 and 120 days after planting, but the real clues lie in the plant itself—yellowing foliage, paper-thin skin, and tubers that resist a gentle squeeze. Miss these signs, and you risk losing flavor or storage quality.
In this guide, I’ll walk you through the exact visual cues, regional timing tips, and post-harvest tricks to keep your russets fresh until next winter—no guesswork required.

How to check russet potato maturity: skin, size & plant signals
Harvesting russet potatoes at the right time means the difference between fluffy, flavorful spuds and tough, waterlogged messes. These potatoes mature based on three key signals: skin texture, tuber size, and plant health.
Ignoring these cues can lead to wasted effort—or worse, spoiled potatoes that won't store well. Let’s break down exactly what to look for in your garden.
First, focus on the skin color and thickness. Mature russets develop a paper-thin, bark-like skin that resists pressure when gently squeezed. Early harvests yield potatoes with smooth, thin skin that bruises easily.
The skin should also show a deep, consistent russet color—no green patches, which indicate solanine buildup (toxic if consumed).
| Maturity Signal | What to Look For | Action |
|---|---|---|
| Skin Texture | Paper-thin, rough, resists thumbnail pressure | Harvest immediately for best flavor |
| Tuber Size | 3-5 inches in diameter (ideal for storage) | Dig when most tubers reach this size |
| Plant Signals | Yellowing foliage, wilting flowers, stems snap easily | Harvest within 1-2 weeks to avoid rot |
| Early Harvest | New potatoes (2-3 inches), thin skin | Use fresh; won’t store long |
| Late Harvest | Over-mature, shriveled tubers, rot risk | Avoid; reduces yield quality |
Next, check the size of your russet potatoes. For storage potatoes, aim for 3-5 inches in diameter. Smaller tubers (2-3 inches) are called new potatoes and are perfect for immediate use but won’t keep long.
Larger potatoes (over 5 inches) may be over-mature, with tougher flesh and higher risk of disease or rot during storage.
Pay close attention to your potato plant’s health. When the foliage turns yellow and dies back naturally, it’s a clear sign the tubers are nearing maturity. Additionally, the flowers will wilt and stems will snap easily when bent—this is your plant’s way of signaling it’s time to dig.
If you wait too long after these signs, the tubers may sprout or rot in the ground.
For early harvests, you can dig new potatoes as early as 60 days after planting, but these won’t store well. If you’re growing for long-term storage, wait until 90-120 days for full maturity.
In warmer climates, russets may mature faster, while cooler regions could extend the timeline. Always adjust based on your local growing season.
One common mistake is harvesting based solely on days after planting. While russets typically take 90-120 days, factors like soil temperature, water availability, and sunlight can speed up or slow down maturity.
Always check the plant signals first—this is the most reliable method. If your potatoes are in sandy soil, they may mature earlier than in clay-heavy soil.
If you’re unsure whether your russets are ready, perform the thumbnail test: Gently press your thumbnail into the skin. If it doesn’t puncture easily and the skin feels thick, they’re ready.
If the skin bruises or tears, wait another week. This simple test saves you from digging too soon and risking small, underdeveloped tubers that won’t store properly.
Finally, consider your climate and frost risk. In areas with early frosts, harvest russets before the first frost to prevent damage. If frost is imminent, dig immediately even if the potatoes aren’t fully mature—they’ll still be usable for immediate cooking.
In hotter climates, russets may mature faster, so monitor them closely to avoid over-maturity.
By combining skin texture, tuber size, and plant signals, you’ll never miss the perfect harvest window again. The key is consistent monitoring and acting when your russets show all three signs of maturity.
With practice, you’ll develop an eye for spotting the ideal moment to dig—ensuring a bountiful, high-quality harvest every season. 🌱
Best harvesting methods for russet potatoes: tools, techniques & storage tips
Once your russet potatoes reach maturity, the next critical step is harvesting them properly to preserve flavor, texture, and storage life. I’ve learned through years of gardening that using the right tools and techniques makes all the difference between a perfect harvest and a disappointing one.
Whether you’re growing in a cool climate or a warm region, timing and method matter.
Russets thrive when harvested after the foliage yellows and dies back, but before the first frost. In USDA Zone 6a, this typically falls between late July and early September, though early varieties may be ready as soon as June.
The key is to dig when the skin is paper-thin and firm, signaling peak maturity. If you miss this window, your potatoes may become shriveled or sprouted.
- 📅 Step 1: Wait for Foliage Signals
- 🌱 Step 2: Choose the Right Day (overcast or early morning)
- ✂️ Step 3: Use Proper Tools (garden fork or hands)
- 🌡️ Step 4: Cure Potatoes (1-2 weeks at 50-60°F)
- 🥔 Step 5: Store Correctly (cool, dark, humid)
Harvest when 70-80% of foliage turns yellow and begins to die back. This indicates the starch conversion is complete, ensuring sweet, flavorful potatoes.
Step 2: Choose the Right Day
Pick a cool, overcast day or harvest in the early morning to prevent skin damage from direct sunlight. Avoid harvesting after rain to reduce soil compaction.
Step 3: Use Proper Tools
For loose soil, use a garden fork to gently loosen the earth. In tight soil, dig by hand with a trowel or gloved hands to avoid puncturing tubers.
Step 4: Cure Potatoes
Spread harvested russets in a single layer in a warm (50-60°F), humid space for 1-2 weeks. This thickens the skin and develops flavor. Avoid washing before curing!
Step 5: Store Correctly
Store cured russets in a cool (40-50°F), dark, humid environment like a root cellar or basement. Use wooden crates or burlap sacks to prevent bruising.
For gardeners in warmer climates (Zones 8-10), russets may mature earlier, often by June or early July. In these regions, focus on partial harvests to extend the growing season.
Dig a few potatoes for immediate use, leaving others in the ground to mature further while protecting them with straw mulch.
After harvesting, always brush off excess soil but avoid washing until you’re ready to use or store them. Russets are highly perishable if not cured properly, so never skip this step.
A well-cured russet will store for 4-6 months, while poorly cured ones may sprout or rot within weeks.
Pro tip: Save a few potatoes for seed next season by storing them in a paper bag in the fridge until planting time. This ensures you’ll have healthy, disease-free seed potatoes ready for your next crop. With these methods, you’ll enjoy homegrown russets all winter long! 🌱