
How To
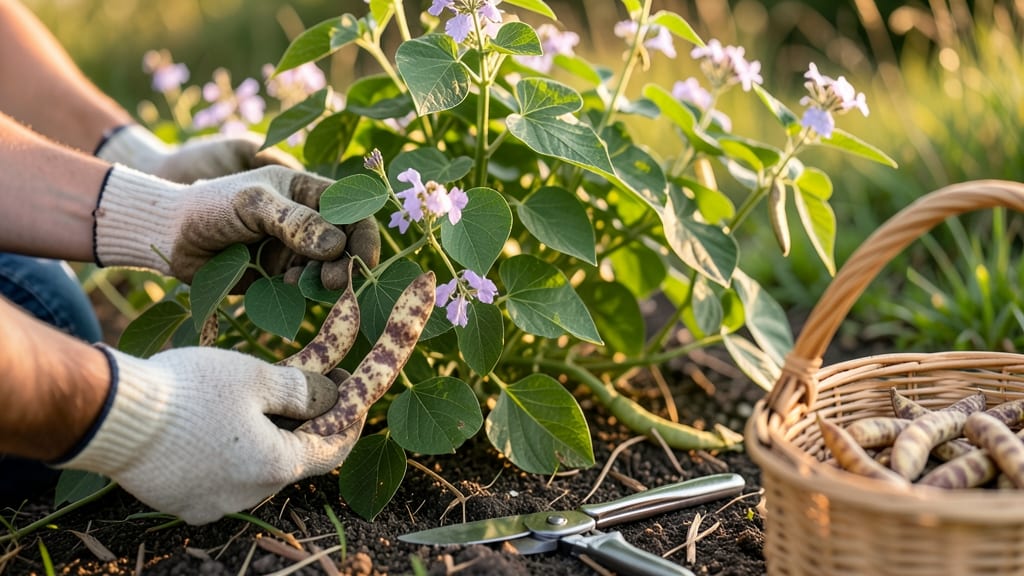
Harvesting pinto beans at the right time ensures plump, flavorful pods 🌱—but wait too long, and you’ll end up with shriveled, tough beans that taste like sawdust.
Most gardeners miss the sweet spot because they rely on days-to-maturity charts instead of checking the pods themselves. The truth? A simple touch test and a peek at the color can tell you exactly when to pick—before the beans turn dry or split open.
In this guide, I’ll walk you through the visual and texture cues that signal peak ripeness, plus how to extend your harvest window so you don’t lose a single pod. You’ll also learn the best post-harvest care to keep your beans fresh for months.
Ready to turn your garden into a bean bonanza? Let’s dive into the secrets of harvesting pinto beans like a pro—no guesswork, just perfect timing.

When to harvest pinto beans: visual and touch cues for perfect timing
Pinto beans reach their peak flavor when harvested at the right moment—too early and they’re bland, too late and they turn tough and dry. The key lies in combining visual cues with a simple touch test to catch them at the perfect stage.
Unlike many beans, pinto beans change color dramatically as they mature, making them easier to identify than you might think.
Most gardeners make the mistake of waiting until the pods turn completely brown, but by then the beans inside are often shriveled and tough. Instead, focus on the reddish-brown hue that signals they’re ready to pick.
This subtle shift in color is your first clue that the beans are nearing peak ripeness, but you’ll still need to confirm with a touch test.
Here’s the secret: ready-to-harvest pods should be firm to the touch but not rock-hard. Gently squeeze a pod between your thumb and forefinger—if it feels dry and snaps slightly when bent, it’s time to harvest.
This texture indicates the beans inside are fully developed but haven’t yet lost their moisture. Ignore this cue, and you’ll end up with pods that split open on the vine, releasing seeds that attract pests.
One of the biggest mistakes I see gardeners make is harvesting pinto beans based on days to maturity alone. While most varieties take 60-75 days to reach harvest, environmental factors like temperature and sunlight can shift this timeline by weeks.
Instead of relying on a calendar, focus on the pod’s physical characteristics—they’re far more reliable.
For example, in hot climates, pinto beans may mature faster, while cooler weather can stretch out the process. If you notice your pods turning reddish-brown earlier than expected, check them daily to avoid missing the window.
Pro tip: Harvest in the morning when pods are cool and crisp—this ensures the best texture and flavor. Waiting until afternoon can lead to slightly softer pods due to heat.
Another common pitfall is assuming all beans on a plant are ready at the same time. Pinto bean plants produce pods over a 3-4 week window, so you’ll need to check individual pods regularly.
Start by harvesting the lower pods first, as they tend to mature slightly earlier than those higher up. This staggered approach ensures you don’t miss any beans and maximizes your yield.
If you’re unsure whether a pod is ready, perform the snap test: hold the pod between your fingers and gently bend it. A ready pod will snap cleanly with a slight crackling sound, while an immature one will bend without breaking.
This simple test saves you from harvesting beans that are still too young or letting them overripe on the vine.
Once you’ve identified the perfect pods, use a sharp pair of pruning shears or scissors to cut the stems about 1 inch above the pod. Avoid pulling pods off by hand, as this can damage the plant and leave it vulnerable to disease.
After harvesting, spread the pods out in a well-ventilated, dry area for 1-2 days to complete the drying process before storing.
Remember, the goal is to harvest pinto beans when they’re at their peak—firm, flavorful, and fully colored but not yet dried out. With these visual and touch cues, you’ll never again miss the perfect moment and can look forward to a bountiful harvest of delicious, homegrown beans every season.
How long do pinto beans take to mature? A seasonal growth timeline
Pinto beans typically take 60 to 75 days to mature from planting to harvest, but this timeline shifts dramatically based on your climate and growing conditions.
In warmer regions like USDA Zone 8-10, you might see pods ready in as little as 55 days, while cooler zones like Zone 5-6 could stretch it to 80 days or more. Understanding these variations helps you plan for the best harvest window.
Your planting date is the first factor—sowing too early in cold soil delays germination, while waiting until after the last frost (usually mid-April in Zone 6a) ensures faster growth.
I’ve found that planting in late April or early May gives my beans the ideal 165 frost-free days to reach maturity before fall sets in.
- Days 1-14: Germination & Seedling Stage – Tiny sprouts emerge, needing warm soil (60°F+) and consistent moisture to avoid damping off.
- Days 15-30: Vegetative Growth – Plants reach 1-2 feet tall with 5-7 leaf sets. Side-dress with compost to boost nitrogen for leafy growth.
- Days 31-45: Flowering Begins – White to purple flowers appear, signaling pod formation in 7-10 days. Prune lower leaves to improve air circulation and reduce disease risk.
- Days 46-60: Early Pod Development – First green pods (1-2 inches) form. Check for pest activity (e.g., bean beetles) and apply neem oil if needed.
- Days 61-75: Maturation & Harvest Window – Pods turn reddish-brown and firm. Harvest every 2-3 days to extend the season and prevent overripening.
Extending your harvest window is easier than you think. In short-season climates, opt for earlier-maturing varieties (like 'Early Golden') that mature in 50-55 daysblack plastic mulch to warm the soil early in the season, shaving off 5-7 days from the growth timeline.
For gardeners in hotter climates, the opposite challenge arises—beans can bolt prematurely if stressed by heat. Provide shade cloth (30-50%) during peak afternoon sun and mulch heavily to retain moisture.
This slows maturation just enough to align with cooler fall temperatures, giving you a second harvest wave in late summer.
One pro tip I swear by? Succession planting every 2 weeks after the initial sowing. This staggered approach ensures a continuous harvest from July through September, even if your first batch matures quickly. Just be sure to mark your planting dates—overcrowding from multiple batches can reduce pod quality.
Finally, don’t forget that soil fertility plays a hidden role in maturation speed. A balanced fertilizer (5-10-10) applied at planting and again when flowers appear can cut 5-10 days off your timeline.
I’ve seen beans mature 10% faster when grown in soil amended with well-rotted compost and a sprinkle of bone meal for phosphorus.