
How To
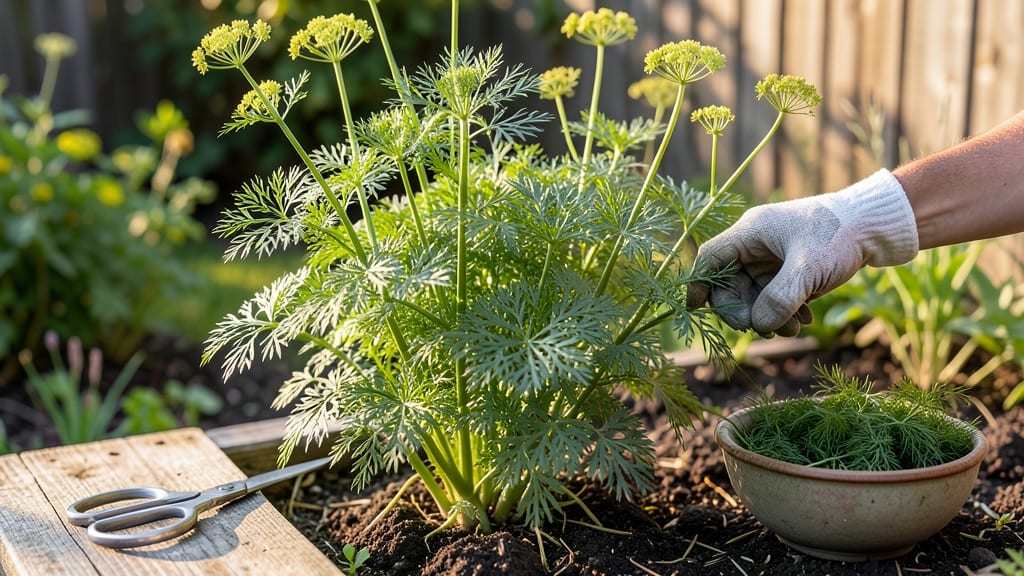
To harvest fresh dill at its peak flavor, you’ll want to snip stems when they’re 12–18 inches tall and just before flowering—this is where the magic happens.
Fresh dill isn’t just a garnish—it’s the secret ingredient that elevates soups, salads, and pickles from good to extraordinary. But harvesting it at the right time and using the proper techniques ensures you get the most flavorful stems without sacrificing future growth.
If you’ve ever wondered whether to cut the whole plant or just a few stems, or how to store your harvest to keep it fresh, this guide breaks it all down in simple, easy steps.
You’ll learn the best tools to use, how to encourage regrowth, and even how to preserve your harvest for months—so you can enjoy that bright, tangy dill flavor all year long.

When and how to harvest fresh dill for maximum flavor
Timing your dill harvest correctly is the key to unlocking its bold, anise-like flavor. The best time to harvest is when the plant reaches 12-18 inches tall and has developed fully opened leaves but hasn't yet flowered.
This window—typically 60-75 days after planting—ensures you get the most aromatic stems while keeping your plant productive for future harvests.
Harvesting too early means missing out on flavor development, while waiting too long risks the plant becoming woody or bolting (flowering). The ideal harvest time is just before flowering begins, when the stems are firm but still tender.
This balance guarantees both maximum flavor and continued growth for a longer harvest season.
Now, let's dive into the step-by-step process to harvest your dill like a pro:
- 1 Choose the right tools: Grab a pair of clean, sharp pruning shears or a sharp knife. Avoid using your fingers to pinch stems, as this can damage the plant.
- 2 Select the stems: Look for healthy stems that are at least 6-8 inches tall. Focus on the outer stems first to encourage new growth in the center.
- 3 Cut at the right angle: Make your cut just above a leaf node (the point where leaves grow out). This encourages the plant to branch out and produce more stems. Avoid cutting too close to the base, as this can harm the plant.
- 4 Leave some foliage: Never harvest more than one-third of the plant at a time. This ensures your dill has enough energy to regrow and continue producing flavorful stems for weeks to come.
- 5 Harvest in the morning: Always harvest your dill in the early morning after the dew has dried. This ensures the stems are at their peak freshness and flavor.
- 6 Encourage regrowth: After harvesting, give your plant a light drink of water and place it back in full sun. Within 2-3 weeks, you’ll see new growth ready for another harvest.
One of my favorite techniques is to harvest dill leaves gradually throughout the growing season. By picking just a few leaves at a time, you can enjoy fresh dill for up to 8 weeks from a single plant.
This method also prevents the plant from becoming too leggy or woody, which can dull its flavor.
If you're growing dill for seeds, wait until the plant begins to flower and the seeds turn brown. At this stage, you can harvest the entire plant, tie it in a bundle, and hang it upside down in a dry, well-ventilated area to dry completely before collecting the seeds.
Remember, consistent harvesting is the secret to a productive dill plant. By following these steps, you’ll enjoy a steady supply of fresh, flavorful dill all season long—perfect for garnishing, pickling, or adding to your favorite dishes.
Pro tip: If your dill starts to bolt (send up flower stalks), don’t panic! You can still harvest the stems and leaves for flavor, though the plant will eventually go to seed. Just enjoy what you can while it lasts, and consider saving some seeds for next year.
Best practices for storing and preserving harvested dill
Once you’ve harvested your fresh dill, the next challenge is preserving its vibrant flavor and nutrients. Unlike some herbs, dill loses its potency quickly if not stored properly.
The good news? With the right methods, you can enjoy your homegrown dill for months—whether in the fridge, freezer, or even as dried bundles.
I’ve tested every method—from simple refrigeration to homemade dill oil—and here’s what works best. Each technique has its own advantages, depending on how soon you plan to use your harvest and whether you prefer convenience or long-term storage.
For short-term use, refrigeration is the simplest method. Wrap your dill stems in a damp paper towel and place them in a sealed container. This mimics the humidity of a garden and keeps the leaves crisp for up to 3 weeks.
Avoid washing until just before use—excess moisture speeds up spoilage.
If you’re planning ahead, freezing is my go-to for preserving dill’s flavor. Chop the stems finely and store them in ice cube trays with water or oil (1 cube = 1 tsp).
Once frozen, transfer to a labeled freezer bag. This method works perfectly for soups, pickles, and marinades without compromising taste.
For long-term storage, drying is unbeatable. Bundle 5–6 stems together and hang them upside down in a dark, dry, well-ventilated spot for 2–3 weeks. Once completely dry, strip the leaves and store them in an airtight container.
Dried dill retains its aroma for 12+ months, making it ideal for spice blends and winter cooking.
Finally, if you love the bold flavor of dill oil, making your own is easier than you think. Simply blend fresh dill with a carrier oil (like olive oil) and let it infuse for 2 weeks.
Strain and store in a dark bottle—this concentrated oil adds depth to dressings and finishes dishes with a restaurant-quality touch.
No matter which method you choose, always label your stored dill with the date of harvest. This ensures you use the freshest flavor first and avoid waste. With these techniques, you’ll never run out of homegrown dill—even in winter!