
How To
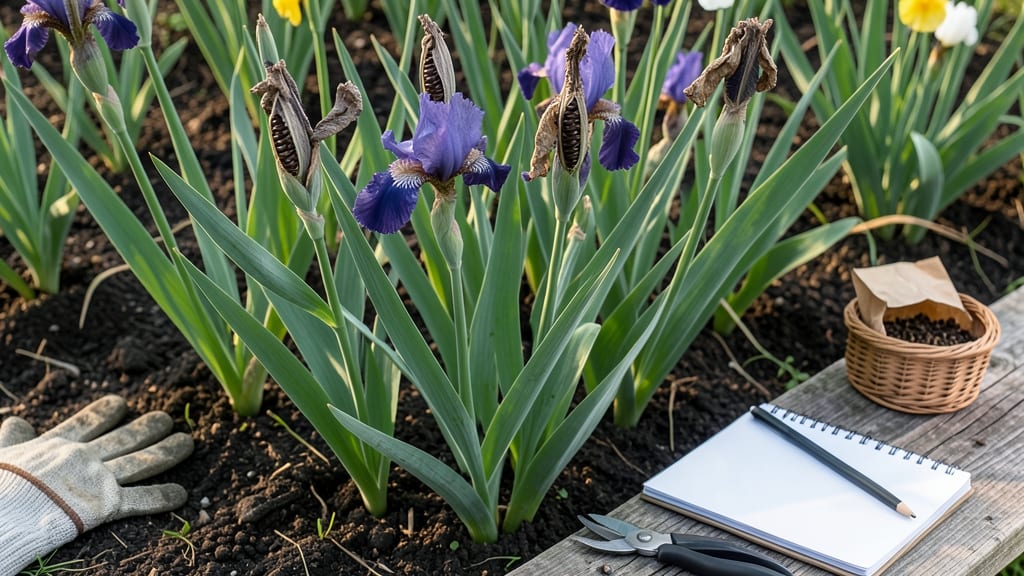
Harvesting iris seeds when the pods turn brown and pop open naturally is the key to propagating new blooms—if you know what to watch for and when to act.
Picture this: you’re tending to your 🌸 iris garden in late summer, and those once-green seed pods have dried to a papery brown. One day, you notice a faint crack—then pop!—and tiny, flat seeds spill onto the soil.
That’s your cue. But miss this window, and the seeds scatter or lose viability, leaving you with nothing but empty pods. The difference between success and disappointment often comes down to timing and technique.
Below, I’ll walk you through how to spot perfectly ripe iris seed pods, the safest ways to collect them without damaging the seeds, and what to do next to maximize your chances of growing new plants. No guesswork, just proven steps for Zone 6a gardeners (and beyond).
Ready to turn those seeds into next year’s showstopping irises? Let’s get started—because the best time to harvest is now, while the pods are dry but still intact.

When to harvest iris seeds: identifying ripe pods & optimal timing
Harvesting iris seeds at the perfect moment transforms your garden from a one-time bloom to a self-sustaining iris family. The key lies in watching for three critical signs: color change, texture shift, and natural pod splitting.
Miss this window, and you risk collecting seeds that won’t germinate—or worse, losing them entirely to wind or rain.
I’ve learned the hard way that green pods mean wait, while brown, brittle pods mean act fast. Regional differences also play a role—cooler climates may extend the harvest window by weeks compared to hotter zones.
Understanding these cues ensures you don’t rush or delay, both of which can halve your germination success.
Timing is everything—iris seed pods mature between late summer and early fall, typically 90-120 days after flowering. In USDA Zone 6a (like my garden), I aim to harvest by mid-October before the first frost. But if you’re in Zone 8 or warmer, you might have until November.
| Sign of Ripeness | What to Look For | Action Required | Best Time to Harvest |
|---|---|---|---|
| Pod Color | Fully brown/dry (vs. green) | Harvest immediately—pods split open within days | Late August-September (Zone 6a) |
| Pod Texture | Brittle and papery (squeezes easily) | Gently twist pods to avoid seed loss | Early September-October (Zone 8+) |
| Seed Release | Pods crack open naturally (🔓 emoji) | Collect seeds + debris before scattering | September-November (varies by climate) |
| Seed Appearance | Flat, dark seeds (💎 emoji) | Store in paper envelope for stratification | Before first frost (critical) |
| Weather Cue | Dry, calm days (no rain forecast) | Harvest on morning for freshest seeds | Weekdays (avoid windy weekends) |
I’ve found that morning harvests work best—seeds are driest and least damaged by dew or overnight humidity. If rain is forecasted, harvest early even if pods aren’t fully brown, as moisture can ruin viability.
Pro tip: Use a fine-mesh bag to collect seeds and debris; sifting later helps separate viable seeds from chaff.
Regional timing shifts dramatically. In cooler northern climates (Zones 3-5), pods may not ripen until late September or October, while southern gardens (Zones 8-10) can harvest as early as August.
Pay attention to your local first frost date—seeds must be indoors and dry before temperatures drop below 40°F.
One mistake I made early on was harvesting green pods to "get a head start." These seeds won’t germinate—they’re still developing. Always wait until pods are fully brown and dry, even if that means waiting 2-3 weeks past flowering. Patience here triples your success rate.
Environmental cues matter too. If your irises are in partial shade, pods may take longer to mature—sometimes 4-6 weeks extra. In full sun, pods dry faster, so check them weekly after flowering.
I mark my calendar with flowering dates and set reminders to inspect pods every 7-10 days starting 60 days post-bloom.
Don’t overlook seed pod location—some irises produce pods near the base of the plant, hidden by foliage. I now tie tags to stems after flowering to track pod development. This simple trick saved me from missing entire harvests behind dense leaves.
Finally, remember that iris seeds are tiny—often 1/8-inch long—and flat like coins. Their dark brown/black color makes them easy to spot against lighter debris. If you’re unsure whether a seed is viable, plant a few test seeds—you’ll know within 2-3 weeks if your timing was right.
How to collect iris seeds without damaging the pods or seeds
Once you’ve spotted those brown, split-open iris seed pods, the real challenge begins: harvesting the tiny seeds without crushing them or losing them to the wind. Iris seeds are delicate, and a single misstep can mean wasted months of growth.
The key lies in gentle handling and timing—picking pods at the right moment and using the proper tools to preserve their viability.
I’ve learned the hard way that rushing the process or using the wrong tools can turn a promising seed harvest into a frustrating mess. Whether you’re working with bearded irises, siberian irises, or dwarf varieties, the principles remain the same: patience, precision, and a few trusted techniques.
Let’s break down how to collect iris seeds safely, from the moment the pods mature to storing them for planting.
-
Step 1: Wait for Full Maturity
Only harvest when pods are completely brown, dry, and naturally cracked open. Green or partially brown pods won’t yield viable seeds. -
Step 2: Use Clean Tools
Wear gloves and use tweezers or small scissors to avoid crushing seeds. A paper bag or envelope works best for collection. -
Step 3: Gently Remove Seeds
Open pods carefully with your fingers or tweezers. Tap pods lightly over the bag to release seeds—never shake violently. -
Step 4: Dry Seeds Thoroughly
Spread seeds on paper towels in a cool, dry place for 1–2 weeks. Avoid direct sunlight or heat, which can reduce germination rates. -
Step 5: Store in Airtight Containers
Place dried seeds in paper envelopes or breathable bags with a silica gel packet to prevent moisture. Label with the harvest date.
If you’re harvesting in windy conditions, work quickly and place a tray or shallow dish under the pods to catch seeds that might escape.
Some gardeners swear by placing a white sheet or towel beneath the plant to create a stark contrast, making it easier to spot the tiny, dark seeds against the fabric. This trick has saved me from losing seeds to the breeze more than once!
After drying, test a few seeds by pressing them between your fingers—they should feel firm and dark, not soft or discolored. Soft seeds are a sign of poor storage conditions or immaturity.
Once properly stored, iris seeds can remain viable for 1–2 years, though germination rates drop over time. For best results, plant them within a year of harvest.
Remember, iris seeds are notoriously slow to germinate—often taking 2–3 years to bloom. But the reward of watching those first delicate flowers emerge from seeds you collected by hand? Priceless. With these techniques, you’ll maximize your chances of success and enjoy a homegrown iris legacy for seasons to come. 🌸