
How To
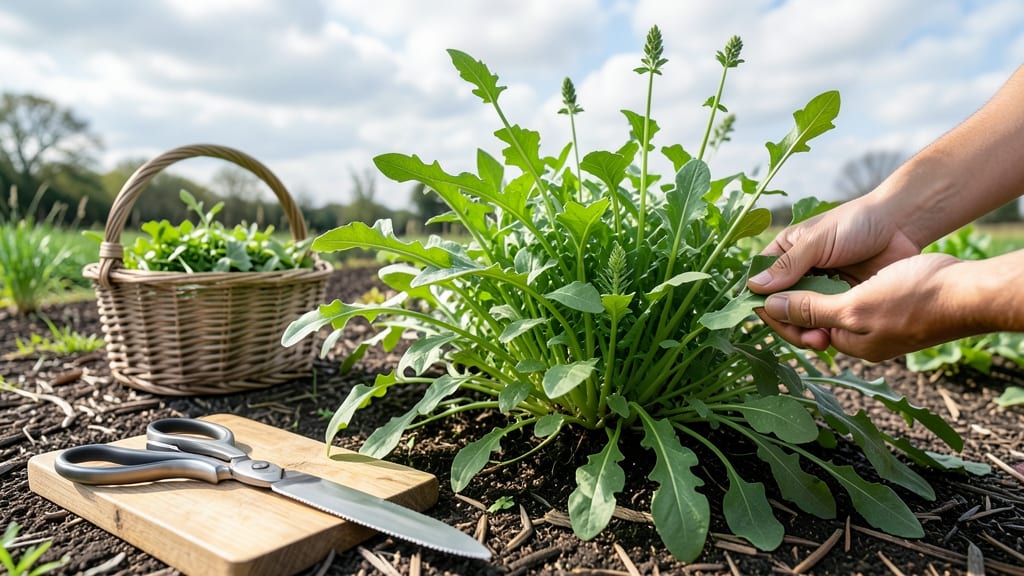
Harvesting arugula at the right time ensures you get the freshest, most flavorful leaves 🥬 — and skipping this step means missing out on that signature peppery kick.
Picture this: you’ve nurtured your arugula for weeks, only to pull a leaf that tastes disappointingly mild or worse, bitter. The difference between a great harvest and a failed one comes down to knowing exactly when to cut and how to do it without harming the plant.
In this guide, I’ll walk you through three simple tactile tests to determine peak harvest time, plus the best cutting techniques to keep your arugula producing for weeks. You’ll also learn how to store your harvest so it stays crisp and flavorful—no more wilted greens going to waste.
Whether you’re a beginner or a seasoned gardener, these steps will transform your arugula harvest from hit-or-miss to consistently delicious. Let’s get started!

3 Tactile tests to harvest arugula at peak freshness
Arugula’s peppery flavor reaches its peak when harvested at the right moment. Unlike many greens, arugula doesn’t give obvious visual cues—you need to feel and observe the leaves to determine perfection. Overlooking these tactile signals often leads to bland or bitter harvests, which can ruin salads and pesto.
My garden’s arugula used to taste disappointingly mild until I learned these three simple tests that transform my harvests into restaurant-quality bites.
Timing your harvest correctly isn’t just about leaf size—it’s about texture, color, and stem resilience. When you harvest too early, the leaves lack the bold peppery kick we love. Too late, and the plant bolts, sending up flower stalks that turn leaves bitter.
The solution? Use these three hands-on tests to identify the exact moment your arugula is ready for the table.
-
1. Leaf Firmness Test
Press a leaf between your thumb and forefinger. Ready leaves should feel crisp and slightly resistant—like biting into a fresh apple. If it feels soft or mushy, wait 2-3 days. -
2. Stem Snap Test
Gently pinch the stem near the base of a leaf. If it snaps cleanly with a slight resistance, it’s harvest-ready. A bendy or weak stem means it needs more time. -
3. Color Contrast Check
Hold a leaf up to sunlight. Ready leaves show deep green veins with a slightly bluish tint on the underside. Pale or yellowing leaves are past their prime.
Start with the leaf firmness test—this is your first indicator of readiness. I always begin by examining the outer leaves since they mature first. These leaves should measure about 2-3 inches long and feel thick enough to hold their shape when pinched.
If they collapse between your fingers, the plant needs more time to develop flavor and texture. Pro tip: Harvest in the morning after dew dries for the crispest results.
The stem snap test is my favorite because it reveals the plant’s internal readiness. Arugula stems should break cleanly with a faint crackling sound—like snapping a celery stalk. If the stem bends instead of snapping, the leaf isn’t fully mature.
This test also helps you avoid over-harvesting, which stresses the plant. I’ve learned that harvesting only the outer 1/3 of the plant at a time preserves regrowth while maintaining flavor.
Don’t overlook the color contrast check, which often catches subtle cues that other tests miss. The underside of arugula leaves should have a faint bluish-gray hue—this indicates optimal chlorophyll activity and flavor development.
If the underside looks pale or yellow, the leaf has likely bolted or gone to seed, making it too bitter to eat. I keep a small notebook by my garden to track color changes, which has helped me predict harvest windows more accurately.
Common mistakes like harvesting when leaves are still small or waiting until they yellow can ruin your crop. I once left my arugula too long in the heat, and within days, the entire plant bolted—turning my salad greens into seedy, bitter stalks.
Since then, I set a weekly reminder to check my plants using these three tests. This simple habit has saved me from wasted harvests and ensured my arugula always tastes fresh and vibrant.
For container-grown arugula, these tests work just as well—though you’ll need to harvest more frequently since roots have less space. I’ve found that dwarf varieties like ‘Astro’ or ‘Salad Bowl’ mature faster and are perfect for small gardens or windowsills.
Always use clean, sharp scissors to avoid crushing stems, which can lead to rot. After harvesting, rinse leaves in cool water and pat dry to remove dirt while preserving crispness.
Seasonal timing also plays a role in flavor. Spring and fall harvests tend to be sweeter and more tender than summer crops, which can develop a sharper, almost spicy bite in hot weather.
I adjust my harvesting schedule based on temperature—harvesting more frequently in spring when growth is rapid, and less often in summer when the plant slows down. This balance keeps my arugula productive and delicious year-round.
Once you master these tactile tests, harvesting arugula becomes second nature. Your garden will reward you with consistently flavorful greens, and you’ll never again wonder why your arugula tastes bland or bitter. The key is patience and observation—two skills that every gardener develops over time.
With practice, you’ll be able to harvest arugula at its peak with just a glance and a gentle touch.
🌱
Step-by-step harvesting techniques for maximum yield
Arugula thrives when you harvest it strategically, ensuring both flavor and regrowth. The key lies in selective cutting—never removing more than one-third of the plant at once. This method preserves the plant’s energy while delivering a steady supply of peppery, crisp leaves.
I’ve found that timing matters just as much as technique, especially in spring and fall when arugula bolts quickly if left unchecked.
Start harvesting when the outer leaves reach 2–3 inches in length, as these mature first. Use a sharp pair of scissors or pruners to avoid tearing the stems, which can invite disease.
Always cut just above a leaf node (the point where leaves attach to the stem) to encourage new growth from that spot. This precise approach keeps your arugula productive for weeks instead of forcing a single, bitter harvest.
How to Harvest Arugula Without Damaging the Plant
- Step 1: Wait for outer leaves to reach 2–3 inches (use a ruler for precision).
- Step 2: Hold the leaf firmly and cut with clean scissors at a 45-degree angle, 1/4 inch above the leaf node.
- Step 3: Harvest only outer leaves first to protect the inner rosette (the heart of the plant).
- Step 4: Repeat every 7–10 days to maintain continuous regrowth.
- Step 5: For full harvest, cut the entire plant at soil level when leaves turn bitter or bolt.
🌿 Pro Tip: Harvest in the morning when leaves are crispest and flavor brightest.
If you’re growing arugula for a baby leaf harvest, you can snip individual leaves as they reach 1–2 inches, but this method slows overall plant growth. For maximum yield, focus on the outer leaves first—they mature faster and shield the tender inner leaves from sun scorch.
I’ve seen home gardens double their harvest by sticking to this rule, especially in cool-season crops.
Frequency is just as critical as technique. Harvest every 7–10 days during active growth to prevent bolting (when the plant sends up a flower stalk). In hot weather, arugula bolts faster—so harvest more aggressively or opt for shade cloth to extend the season.
I’ve had success growing arugula under 30% shade cloth in summer, which buys me an extra 4–6 weeks of harvests.
When the entire plant bolts, it’s time for a final harvest. Cut the whole plant at the base and enjoy the milder, sweeter leaves before seeds form. Save the seeds for next year if you’re growing heirloom varieties!
After harvesting, rinse leaves in cool water and pat dry to remove dirt and pests. Store in a ventilated container in the fridge for up to 5 days to keep them crisp.
Remember, arugula’s flavor intensifies when harvested young and softens if left too long. By mastering these techniques, you’ll enjoy restaurant-quality greens straight from your garden—no bitterness in sight! 🥬