
How To
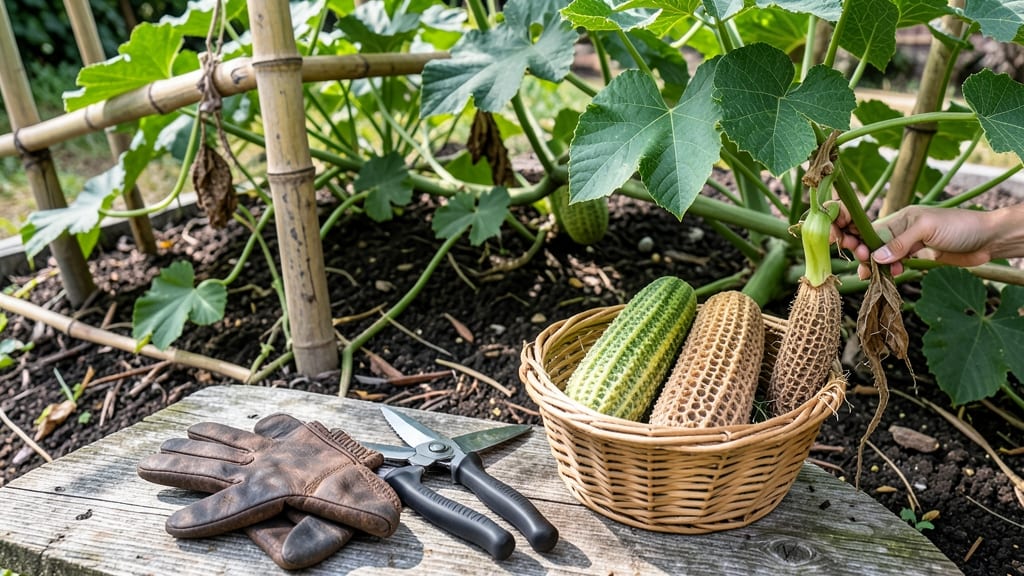
Harvesting loofah sponges from your mature 🍃 plants turns a simple garden task into a rewarding craft—if you time it right, you’ll end up with soft, long-lasting sponges that outshine anything store-bought.
Picture this: your loofah vines have climbed their trellis, the stems are turning yellow-brown, and the pods rattle when you shake them. That’s your cue—harvest too early, and you’ll get a mushy mess; too late, and the sponges turn brittle.
The 3-5 day window between these signs is your sweet spot for perfect results.
But how do you know when it’s exactly the right moment? I’ll walk you through the key visual cues—like crispy stems, dry leaves, and that telltale seed rattle—so you never miss the harvest.
Plus, I’ll cover the step-by-step process, from cutting to drying, and the common mistakes that turn good sponges into garden flops.
By the end, you’ll confidently transform those towering vines into luxurious, reusable sponges—no more guessing, just foolproof techniques that work every time.

When and how to identify perfectly ripe loofah stems for harvesting
Harvesting loofah sponges at the right moment transforms your garden's hard work into soft, luxurious natural sponges. The key is timing—wait too long, and you get brittle fibers; harvest too early, and you'll end up with a mushy mess.
I've learned the hard way that loofahs ripen in a 3-5 day window, so knowing the exact signs saves hours of frustration.
Start by checking the vine color. When the vines turn from vibrant green to a crisp yellow-brown, it's your first clue. This color change signals the plant is redirecting energy to seed maturation, which is when the loofah's fibrous structure develops.
I always compare my plants to photos—it's shocking how different ripe and unripe vines look!
Next, examine the seed pods. A perfectly ripe loofah will have a hard, fibrous skin that feels almost woody when pressed. If you shake it gently, you'll hear seeds rattling inside—a telltale sign of readiness.
I test this every morning during harvest season; it's like listening for a tiny drum inside each pod!
The leaves also give away the harvest window. When they start yellowing and dropping, it's time to act fast. I've noticed that leaves on ripe loofahs curl slightly at the edges before falling completely. This is your final check before harvesting—don't ignore these subtle cues!
I've found that morning harvests work best because the loofahs are cooler and firmer after the night's dew has dried. The 3-5 day window is critical—once the pods start cracking open naturally, they're past their prime.
I mark my calendar when the first pods turn yellow-brown and check them daily until I see the seeds rattling.
One pro tip I learned from experienced growers is to harvest on a dry day. Wet loofahs take longer to dry properly and are more prone to mold.
I always check the weather forecast before planning my harvest—there's nothing worse than waiting weeks for perfect conditions only to have rain ruin your hard work!
Don't rely on just one sign—combine all three cues for the best results. I've harvested loofahs that looked ripe by vine color but were still too soft inside. Always test the pod texture and listen for those seeds. When all three signs align, that's your perfect harvest moment!
Remember that loofahs continue ripening after harvest, so don't rush the drying process. Once you've identified the perfect pods, the next step is proper cutting and drying—which we'll cover in the next section. The key is patience; great loofah sponges aren't made in a day!
🌱🔊🍃
Step-by-step loofah harvesting process from vine to sponge
Once your loofah vines show those telltale yellow-brown stems and crispy leaves, it’s time to act fast! Harvesting at the right moment transforms tough gourds into luxurious natural sponges. The process only takes 10-14 days from vine to ready-to-use sponge, but proper technique prevents mold and ensures durability.
I’ll walk you through each critical step with my foolproof method—no more brittle failures!
Your first move is identifying the perfect harvest window. Look for dry, papery vines and hardened loofah pods that rattle when shaken. These ripe loofahs will yield the softest sponges.
If you miss this window, the pods may become too brittle or develop mold. Grab your pruners and let’s begin the transformation!
🌱 Step-by-Step Loofah Harvesting Guide
-
Step 1: Cut the Stems
Use clean pruners to snip 1-2 inches below the loofah pod. Leave the stem attached to prevent rot during drying.
-
Step 2: Remove the Seeds
Slice open the hardened loofah lengthwise and scoop out all seeds using a spoon. Save seeds for next year’s garden!
-
Step 3: Rinse Thoroughly
Soak pods in lukewarm water for 10 minutes to remove dirt. Scrub gently with a soft brush to avoid damaging fibers.
-
Step 4: Choose Your Drying Method
Sun Drying: Hang pods in full sun (3-5 days) for a faster cure. Shade Drying: Place on a mesh rack in partial shade (5-7 days) to prevent overheating.
-
Step 5: Cure for 10 Days
Store dried pods in a well-ventilated area for 10 days. Check daily for mold signs—discard any with fuzzy spots immediately.
💡 Pro Tip: Rotate pods every 24 hours during drying to ensure even curing!
After 10 days of curing, your loofahs should feel lightweight and fibrous. Test by gently rubbing a pod—if it crumbles easily, it’s over-dried. The ideal sponge will have soft, springy fibers that cleanse without scratching.
Store finished sponges in a dry, airy space to maintain their texture for months.
Mold is the #1 enemy of loofah drying, so never skip the 10-day curing process. If humidity is high, extend drying to 12-14 days and use a dehumidifier nearby.
Once cured, these sponges will last years—far longer than store-bought versions! With this method, you’ll never waste another loofah again.
Now that you’ve mastered the harvest, experiment with dying your sponges using natural plant-based dyes like turmeric or beet juice. Happy harvesting—and enjoy your eco-friendly, zero-waste gardening wins! 🌿