
How To
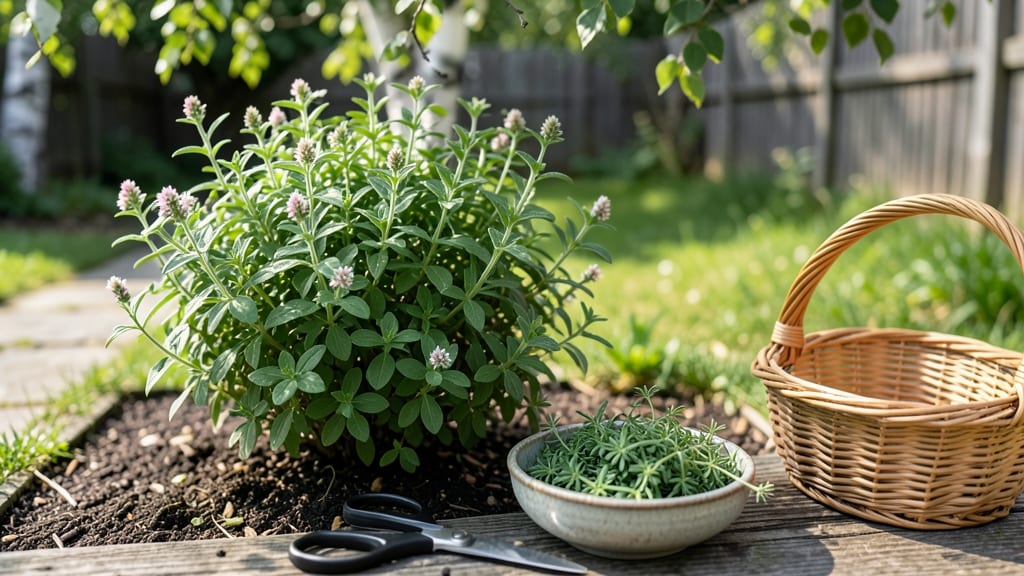
Harvesting marjoram at the right time ensures you get the most flavor and fragrance from your 🌿 plants.
Picture this: you’ve nurtured your marjoram all season, and now it’s time to reap the rewards—but how do you know when it’s truly ready? The secret lies in three simple tactile tests that reveal peak quality before you even touch the leaves.
Marjoram thrives in USDA Zone 6a when planted in spring, and by mid-summer, your plants are begging to be harvested. The key is timing: wait until the stems firm up and the leaves release a rich, piney scent when crushed.
In this guide, I’ll walk you through the exact steps to harvest marjoram—from cutting techniques that encourage regrowth to drying and storing methods that preserve its magic for months.

When to harvest marjoram: 3 tactile tests for peak quality
Marjoram’s fragrant leaves reach their peak flavor just before flowering, but how do you know when they’re truly ready? The answer lies in your hands and nose. Unlike many herbs, marjoram doesn’t rely on color changes—it’s all about texture and aroma.
I’ve learned that harvesting too early means weak flavor, while waiting too long risks bitter notes and woody stems. The sweet spot? When your plant whispers “now” through these three simple tests.
First, let’s talk about leaf size. Young marjoram plants produce tiny, tender leaves that lack the bold flavor you crave. Aim for leaves that are 1-2 inches long and fully unfurled.
These leaves will have developed their signature piney-sweet aroma, a far cry from the bland baby greens you might harvest too soon. Pro tip: Run your thumb along a leaf—if it feels slightly fuzzy and releases a strong scent, it’s ready.
Next, focus on stem firmness. The stems should feel slightly woody when you gently squeeze them between your fingers. If they’re still soft and bend easily, the plant needs more time. Woody stems indicate maturity and a concentrated flavor profile.
I’ve made the mistake of harvesting when stems were too tender, resulting in a milder taste that didn’t hold up in cooking. Always check this before cutting.
Here’s where your nose becomes your best tool: crush a leaf between your fingers and inhale deeply. At peak harvest time, marjoram releases a rich, earthy-pine scent that’s unmistakable. If it smells faint or grassy, wait a few more days.
This test is foolproof—I’ve used it for years to ensure my marjoram is at its aromatic best. The stronger the scent, the more flavor-packed your harvest will be.
🌿 How to Harvest Marjoram: 3 Tactile Tests
-
1. Leaf Size Test
📏 Leaves should be 1-2 inches long and fully unfurled. Pinch a leaf—if it feels fuzzy and releases a strong scent, it’s ready! -
2. Stem Firmness Test
💪 Gently squeeze stems—they should feel slightly woody. Soft stems mean wait longer; woody stems mean harvest now! -
3. Aroma Intensity Test
👃 Crush a leaf—if it smells rich and piney, it’s peak harvest time. Faint scents mean more waiting!
Timing is everything when it comes to avoiding bitter flavors. If you harvest too late, marjoram develops a harsh, almost medicinal taste. The key is to cut stems just as the first flowers begin to form—this is when the plant’s energy shifts from leaf production to seed development.
I’ve found that harvesting in the morning after the dew has dried yields the freshest flavor, as the oils are most concentrated.
Another pro tip: harvest regularly to encourage bushier growth. Instead of cutting all stems at once, snip outer stems first, leaving the inner growth intact. This method keeps your marjoram productive all season and prevents it from becoming leggy.
I’ve seen plants that were nearly bare after aggressive harvesting—don’t let that be you! A little patience and strategic cutting go a long way.
For longer shelf life, focus on harvesting when the plant is dry to the touch. After watering, wait until the leaves feel crisp rather than damp. This reduces the risk of mold during drying.
I’ve experimented with harvesting at different moisture levels and found that dry-leafed marjoram holds its flavor for up to 12 months when stored properly. The secret? Combine tactile tests with environmental awareness.
Don’t overlook the visual cues that complement these tactile tests. Look for deep green leaves with a slight gray-green tint—this indicates maturity. Avoid harvesting if you see yellowing leaves or signs of pests, as these can compromise flavor and quality.
I always inspect my plants for aphids or spider mites before harvesting, as these pests can leave a bitter aftertaste. A quick rinse under cold water removes any unwanted hitchhikers.
Finally, remember that marjoram’s flavor intensifies when dried. Fresh leaves are delicious, but dried marjoram packs a punch that’s perfect for winter cooking. The tactile tests you use for fresh harvest apply to drying too—start with the firmest, most aromatic stems for the best dried product.
I like to bundle stems and hang them upside down in a dark, dry place for 1-2 weeks. The result? A fragrant, flavorful herb that’s ready to elevate any dish.
Step-by-step harvesting guide: tools, techniques, and storage tips
Now that you’ve mastered the tactile tests for peak marjoram quality, let’s dive into the hands-on process of harvesting, drying, and storing your crop. The right tools and techniques make all the difference between fresh, vibrant marjoram and something that loses its magic in storage.
I’ve perfected my method over years of gardening—here’s exactly how I do it to preserve that piney-sweet aroma for months.
First, gather your essential harvesting tools: a pair of sharp pruning shears or clean scissors (never dull blades—they crush stems), a large basket or bowl for immediate collection, and a small spray bottle with water for quick rinses if needed.
I keep a dedicated harvesting kit near my garden to stay organized. The goal is to work efficiently and gently—marjoram’s delicate stems bruise easily, which can lead to mold during drying.
🌿 Step-by-Step Marjoram Harvesting Guide
-
1. Choose the Right Stems
🌱 Select outer stems with 1-2 inches of leaves. Avoid cutting into the center—this encourages bushier regrowth. -
2. Cut at the Base
✂️ Use clean shears to cut stems at a 45-degree angle, about 1/4 inch above a leaf node. This prevents water from pooling and causing rot. -
3. Rinse Gently (If Needed)
💧 Hold stems under cool water for 10 seconds to remove dirt/pests. Pat dry immediately with a clean towel—never let leaves sit wet. -
4. Bundle for Drying
🪢 Tie stems in small bunches (5-7 stems) with twine or rubber bands. Hang upside down in a dark, dry, well-ventilated space like a pantry or closet. -
5. Air-Dry Completely
⏳ Dry for 1-2 weeks until leaves crisp easily when touched. Test by rubbing a leaf—it should crumble like dry paper. -
6. Store Properly
📦 Remove leaves from stems and store in airtight containers (glass jars work best). Keep in a cool, dark place for up to 12 months.
For alternative drying methods, you can also try air-drying on a screen or using a dehydrator at 95°F (35°C) for 2-3 hours.
I prefer hanging because it preserves the most natural oils, but dehydrators work in a pinch—just avoid high heat, which can burn the leaves and strip their flavor. Once dried, store your marjoram in small batches to maintain freshness.
I label my jars with the harvest date so I can use the oldest batches first.
One critical storage tip: never store marjoram in the refrigerator or freezer if it’s already dried—humidity causes condensation, which leads to mold.
For fresh marjoram, you can wrap stems in a damp paper towel and store in a plastic bag in the fridge for up to 1 week. But for long-term use, drying is the way to go.
I’ve had marjoram last over a year when stored this way, and the flavor only intensifies with time.
To encourage regrowth after harvesting, always leave at least half the plant intact. Marjoram is a perennial herb in warm climates, so with proper care, it can produce multiple harvests per season. I’ve had my marjoram plants thrive for 5+ years with consistent pruning and care.
Just avoid cutting more than 1/3 of the plant at once, or you’ll stress the roots. After each harvest, give your marjoram a light watering and a quick inspection for pests—this keeps it healthy and productive.
Finally, remember that harvesting frequency depends on your climate. In hotter regions, marjoram grows faster and may need harvesting every 2-3 weeks. In cooler areas, stretch it to 3-4 weeks between harvests.
Pay attention to your plant’s signals—if it looks leggy or sparse, it’s time to prune and fertilize lightly to encourage new growth. With these techniques, you’ll have a never-ending supply of fragrant marjoram all season long.