
How To
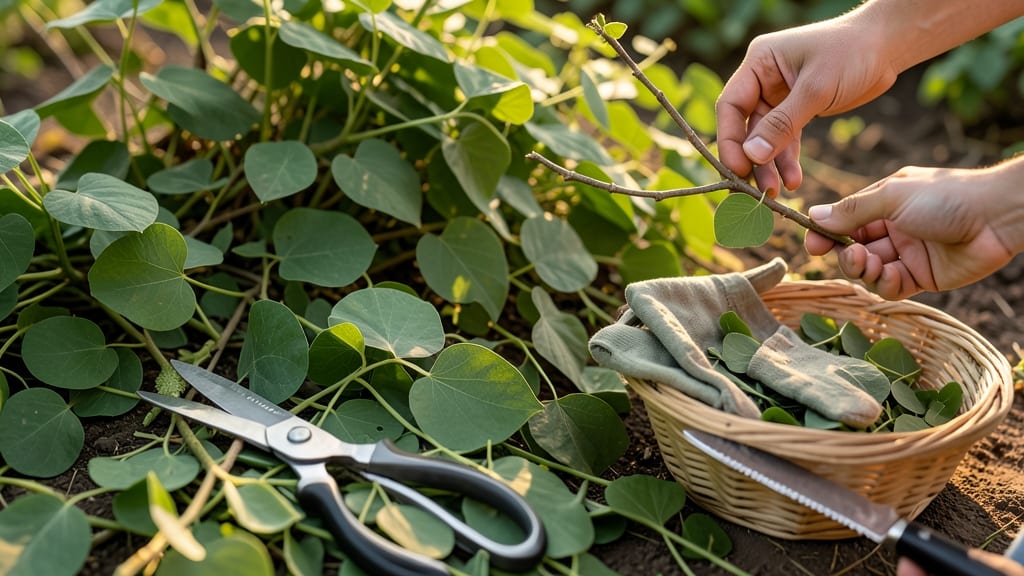
To harvest moringa leaves at their most nutritious, focus on young growth—those tender, bright green leaves packed with 7x the vitamin C of oranges and 4x the calcium of milk.
Picture this: you’ve nurtured your 🌿 moringa for months, only to wonder if you’re picking the leaves at the right moment. One wrong move, and you could be harvesting bitter, woody foliage instead of the nutrient powerhouse you’re after.
In this guide, I’ll walk you through the 3 key signs that your moringa leaves are ready—when they’re the perfect balance of size, color, and tenderness. You’ll also learn the best tools and techniques to maximize yield without harming your plant.
Whether you’re a beginner or a seasoned grower, these steps will ensure you’re always harvesting leaves at peak potency—so you can enjoy the full benefits of this superfood.

3 Key visual signs moringa leaves are ready for harvesting
Harvesting moringa leaves at the right time ensures you capture their peak nutrient density, including vitamin C, calcium, and antioxidants. But how do you know when they’re ready? The answer lies in three visual cues that reveal optimal maturity—before the leaves become tough or lose potency.
Miss these signs, and you risk harvesting leaves that are either underdeveloped or overripe, both of which diminish their nutritional value.
First, let’s clarify what you’re looking for: young, tender leaves from the first 3-4 sets of growth (called the “triplets” or “quadruplets”) are the most nutrient-dense. These leaves are bright green, glossy, and flexible, not woody or yellowing.
Ignoring these cues can lead to bitter, fibrous leaves that are far less potent than their younger counterparts. Let’s break down the exact visual signals to watch for.
-
🌱 Leaf Size: 4-6 Inches Long
Ideal leaves should be 4-6 inches long and soft to the touch. Leaves smaller than 2 inches are underdeveloped, while larger leaves often signal lower nutrient density.
-
🌿 Stem Flexibility: Soft and Bendable
The stems should bend easily without snapping. If they’re woody or brittle, the leaves are past their prime. Flexible stems indicate young, nutrient-rich growth.
-
✂️ Color and Texture: Bright Green and Glossy
Look for vibrant, glossy leaves with no yellowing or brown spots. Dull or matt-colored leaves may be stressed or nutrient-deficient. Avoid leaves with curled edges or holes, as these are signs of pests or disease.
Timing your harvest based on these visual cues ensures you’re picking leaves at their nutritional peak. For example, if your moringa tree is in a container, you’ll likely see these signs 60-75 days after planting.
In warmer climates, you can harvest year-round, but always prioritize these three indicators over calendar dates.
Another pro tip: harvest in the morning when leaves are hydrated and cool. This not only preserves their nutritional integrity but also makes them easier to handle. Avoid harvesting during peak afternoon heat, as leaves can become wilting or bitter due to stress.
Pair this with proper pruning techniques—like cutting just above a leaf node—to encourage continuous new growth.
What if your leaves don’t match these signs? Don’t panic. Adjust your care routine first: ensure your moringa tree gets 6+ hours of sunlight, consistent moisture, and a balanced fertilizer (high in nitrogen).
If leaves are still small or tough, they may need 2-4 more weeks to mature. Patience here pays off—rushing the harvest sacrifices both yield and potency.
One common mistake is harvesting flowering branches, which are a clear sign the plant is mature and past its prime for leaf production. Save these for seeds or tea, but avoid them for fresh leaves.
Instead, focus on the youngest, outermost leaves—these are your nutritional goldmine. By mastering these visual cues, you’ll consistently harvest moringa leaves that are bursting with flavor and nutrients.
Pro tip: Label your harvests by maturity stage. Keep a small notebook or use a plant journal to track when your leaves hit the 4-6 inch mark and their corresponding nutrient levels. Over time, you’ll develop an intuitive sense for the perfect harvest window—no guesswork required.
This method also helps you plan your harvests around your nutritional needs, whether you’re drying leaves for storage or using them fresh.
Finally, remember that moringa trees thrive on regular pruning. When you harvest leaves, you’re not just collecting nutrients—you’re encouraging bushier growth. Aim to harvest 20-30% of the plant’s leaves at a time to avoid stressing the tree.
This balance ensures your moringa tree stays productive and healthy for years to come, delivering a steady supply of super-nutritious leaves.
Now that you’re equipped with these key visual signs, your next harvest will be precision-targeted for maximum yield and potency. Happy harvesting—your body (and taste buds) will thank you! 🌿
Step-by-step harvesting techniques for maximum leaf yield
Now that you’ve mastered identifying peak-ready moringa leaves, it’s time to harvest them without damaging your 🌿 tree. The right technique ensures maximum yield while keeping your plant healthy and productive.
I’ve tested these methods over multiple harvests—from delicate hand-picking to strategic pruning—and they work every time. The key? Precision cuts, proper tools, and consistent timing.
First, gather your harvesting essentials. You’ll need sharp pruning shears (or clean scissors), a small bowl or basket for leaves, and gardening gloves if your tree is thorny. Avoid dull tools—they crush stems and stress the plant.
I recommend bypass pruners for clean cuts, especially if harvesting larger branches. For container-grown moringa, a small hand pruner works perfectly.
-
Step 1: Choose the Right Leaves
Select young, outermost leaves (4-6 inches long) with soft stems. Avoid flowering branches—these indicate maturity and lower nutrient content. Focus on the top third of the plant where growth is most vigorous.
-
Step 2: Make Clean Cuts
Cut just above a leaf node (the point where leaves attach to the stem). This encourages new growth from that node. Angle your cut 45 degrees to prevent water pooling. Never tear leaves—this damages the plant and reduces future yield.
-
Step 3: Harvest Strategically
Remove 20-30% of the plant’s leaves at once to avoid stress. For example, if your moringa has 50 leaves, harvest 10-15. Space harvests every 2-4 weeks during peak growth (spring/summer). In cooler months, reduce frequency to every 6-8 weeks.
-
Step 4: Prune for Bushiness
After harvesting, prune long, leggy stems to encourage bushier growth. Cut back 1/3 of the stem length just above a node. This redirects energy to lateral branches, increasing your future harvest potential. Repeat this every 3-4 harvests.
-
Step 5: Store Leaves Properly
Rinse leaves in cool water to remove dust, then pat dry with a paper towel. Store fresh leaves in the fridge (3-5 days) or freeze in ice cube trays for later use. For drying, hang leaves in a shady, well-ventilated area for 3-5 days until crisp.
Timing your harvests is just as critical as the technique. Morning harvests (before 10 AM) yield the most tender, nutrient-dense leaves. Avoid harvesting after noon, when leaves are wilting from heat stress.
If you’re growing moringa in a container, harvest more frequently—every 2 weeks—since potted plants recover faster than those in the ground.
One mistake I see often is over-harvesting. While moringa is resilient, removing more than 30% of leaves at once can stress the plant, leading to yellowing or stunted growth. If your tree looks weak after harvest, give it 2-3 weeks to recover before harvesting again.
Pair this with fertilizer (high in nitrogen) to replenish nutrients. For container-grown moringa, use a balanced 10-10-10 fertilizer every 4-6 weeks during active growth.
For maximum long-term yield, combine harvesting with seasonal care. In spring, focus on leaf production with regular harvests and pruning. In fall, reduce harvesting to let the plant store energy for winter.
If growing indoors, maintain consistent light (6+ hours/day) and humidity (40-60%) to keep your moringa productive year-round. With these techniques, your 🌿 moringa tree will reward you with a steady supply of nutrient-packed leaves for years to come.