
How To
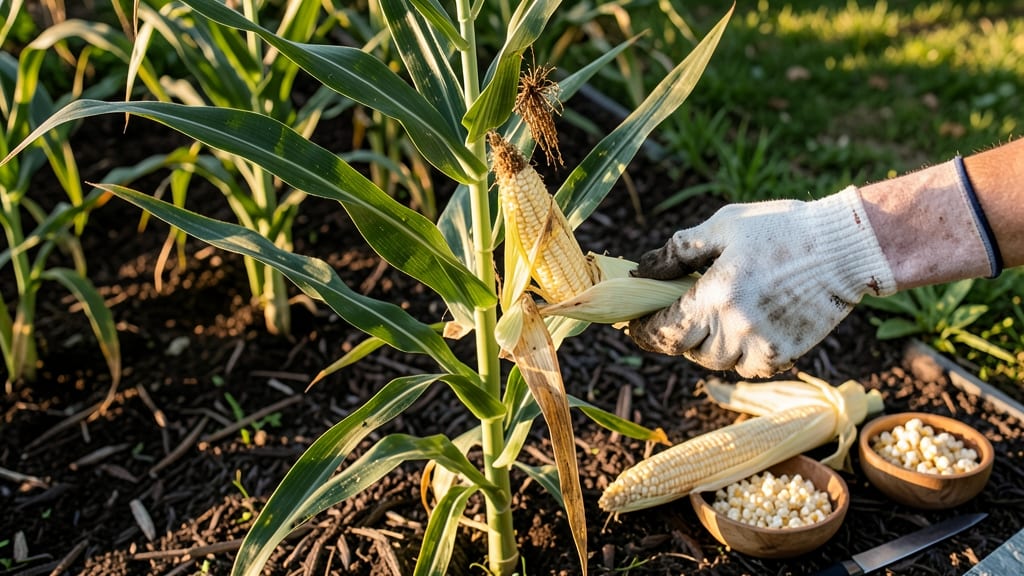
To harvest popping corn at its peak, look for dry husks, plump kernels, and a telltale rattle when you shake the ear 🌽—these are the signs your homegrown kernels are ready for the pot.
Picture this: you’ve nurtured your plants all season, and now the moment of truth arrives. One wrong move, and you could end up with tough kernels that refuse to pop—or worse, wasted effort. But with the right timing and technique, you’ll unlock the secret to perfect puffs every batch.
This guide covers everything from spotting the ideal harvest window to drying and storing your corn for long-term popping success. No more guesswork—just crispy, golden results straight from your garden.
Ready to turn your harvest into movie-night magic? Let’s dive into the step-by-step process that ensures your popping corn delivers every time.

When and how to tell popping corn is ready for harvest
Harvesting popping corn at the right moment transforms your garden into a treasure trove of crispy, golden kernels. The key lies in watching for three critical signs: husk color, kernel firmness, and tassel dryness.
Skip this window, and you risk tough, unpoppable kernels or wasted effort. Let’s break down how to spot perfection before the first frost hits.
First, focus on the husks’ color and texture. Mature popping corn husks turn a straw-brown color and feel dry and papery to the touch.
If they’re still green or slightly damp, the kernels aren’t ready. Pro tip: Gently peel back a husk—if the kernels underneath are milky white or translucent, they need more time on the stalk.
Next, check the kernels’ moisture and firmness. Press a kernel between your thumb and forefinger—it should feel hard and dry, not soft or squishy. A heavy ear with kernels that rattle when shaken is another telltale sign.
If the ear feels light or hollow, it’s not mature enough. Humidity plays a role here: High moisture levels can delay drying, so aim for dry, sunny days before harvesting.
Don’t overlook the tassels at the top of the plant. They should be completely dry and crumbly, breaking off easily. If they’re still green or moist, the kernels inside aren’t ready. Environmental factors like temperature drops or early frost can rush maturity, so stay vigilant as fall approaches.
Now, let’s talk common mistakes that ruin harvest quality. One is harvesting too late, which leads to shriveled, unpoppable kernels. Another is ignoring kernel color—if they’re yellow or brown instead of white, they’ve overripe.
Finally, high humidity during harvest can trap moisture, causing mold. Always harvest on a dry, sunny day to avoid this.
| Sign of Readiness | What to Look For | Action to Take |
|---|---|---|
| Husk Color | Straw-brown and dry | Harvest if fully dry |
| Kernel Firmness | Hard and dry to touch | Test with thumb and finger |
| Tassel Condition | Dry and crumbly | Break off easily |
| Ear Weight | Heavy and solid | Shake to hear rattle |
| Kernel Color | Milky white or translucent | Avoid yellow or brown |
Timing is everything when it comes to environmental factors. Harvest popping corn in the morning after a dry night to ensure maximum moisture has evaporated. Temperature matters too: Ideal harvest temps are between 60°F and 75°F.
If it’s too hot, the kernels may dry too quickly; if too cold, they’ll stay damp. Humidity above 60% can also delay drying, so check your local forecast before harvesting.
For organic gardeners, avoid synthetic drying methods. Instead, use natural airflow by hanging ears upside down in a well-ventilated, shaded area. This preserves kernel quality while preventing mold. Patience is key: Properly dried corn should take 7-10 days to cure fully.
Rush this step, and you’ll compromise popping performance.
One final tip: harvest a few ears early to test their popping quality. Remove the husks, dry them thoroughly, and pop a small batch. If they don’t puff up or taste stale, the rest of your crop needs more time.
This simple test saves hours of drying and storage effort later.
Mastering the harvest means crispy, perfect popcorn every time. Keep an eye on those husks, kernels, and tassels, and you’ll never miss the window again. Now, grab your pruners and get ready for a golden harvest! 🌾
Step-by-step guide to harvesting and drying popping corn
Once your popping corn reaches maturity, the next critical step is harvesting and drying it correctly to ensure perfect popping results. Timing matters—harvest too early, and kernels won’t pop; too late, and they’ll be tough or shriveled.
With the right tools and techniques, you’ll preserve that garden-fresh flavor and texture for months.
Start by gathering your essential tools: a sharp pruning shears, a clean knife or corn knife, a bucket or basket, and a well-ventilated drying space. Weather plays a role too—aim for a dry, sunny day with low humidity to speed up the drying process naturally.
How to Harvest Popping Corn
- 1 Cut the stalks at the base using pruning shears, leaving about 2-3 inches of stalk attached to each ear. This helps with handling and drying.
- 2 Remove the outer husks by peeling back the dry, brown layers to expose the silks and kernels. Use your fingers or a knife to trim away any remaining silks.
- 3 Shake the ears gently to listen for a hollow, popping sound. If kernels rattle like maracas, they’re ready for drying. If not, leave them on the stalk for 1-2 more days.
- 4 Choose a drying method: Hang ears upside-down in a well-ventilated, dry space (like a garage or barn) or spread them on a screen or mesh tray in direct sunlight for 2-3 weeks.
- 5 Test kernel readiness by removing one ear from drying after 10-14 days. If the kernels pop easily when shaken and feel dry to the touch, they’re ready. If not, continue drying for 3-5 more days.
- 6 Shell the corn once fully dry by rubbing the ear between your palms or using a corn sheller. Store the kernels in an airtight container in a cool, dark place for long-term use.
For even drying, avoid stacking ears or placing them in direct sunlight for extended periods, which can cause uneven moisture loss. Humidity is your enemy—aim for 40-50% humidity or lower to prevent mold. If your climate is damp, consider using a dehumidifier or drying indoors with a fan.
Once dried, store your popping corn kernels in paper bags or glass jars with a silica gel packet to absorb excess moisture. Label them with the harvest date to track freshness—properly stored corn can last 6-12 months without losing popping quality.
With these steps, you’ll transform your garden harvest into a year-round treat, ready to pop at a moment’s notice. There’s nothing like the satisfaction of enjoying corn you grew, harvested, and dried yourself—straight from your backyard to your bowl!