
How To
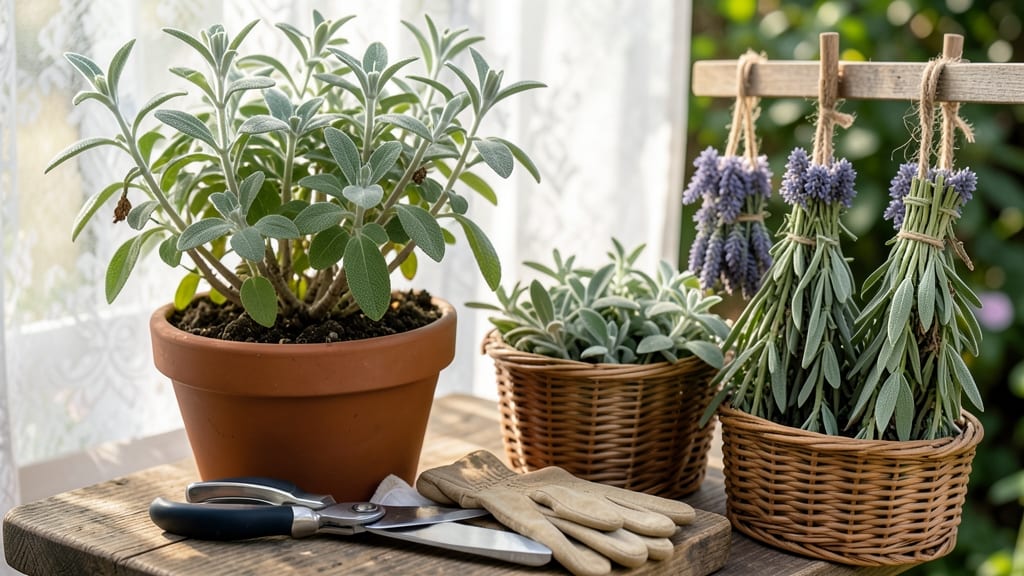
Harvesting sage for winter preserves its rich, earthy flavor and lets you enjoy homegrown seasoning all year long—no store-bought substitutes needed.
Picture this: you’ve just spent months nurturing your 🌿 sage plants in zone 6a, and now the late-summer heat means it’s time to act. Skip this step, and you’ll miss the peak flavor window, leaving you with dull, woody stems that won’t cut it for cooking or crafting.
But do it right, and you’ll have aromatic bundles ready for everything from Thanksgiving stuffing to dried wreaths.
Timing is everything—harvesting too early means weak flavor, while waiting too long turns the leaves bitter. The secret lies in cutting stems in the morning, just before flowering, when the oils are at their strongest.
From there, drying methods like air-drying, dehydrating, or low-heat oven techniques determine whether your sage stays vibrant or fades into blandness.
In this guide, I’ll walk you through the best harvesting techniques, step-by-step drying methods, and storage tips to keep your sage potent until spring. No more settling for grocery-store herbs—just pure, homegrown flavor whenever you need it.

Best sage harvesting techniques to maximize flavor and color retention
Harvesting sage at the right time ensures you capture its peak flavor and vibrant green color before it loses potency. The best window is late summer to early fall, ideally between August and October, when the plant is mature but hasn't yet flowered.
This timing preserves the aromatic oils that make sage so valuable in cooking and crafts.
For optimal results, focus on harvesting young, tender leaves rather than woody stems. These leaves contain the highest concentration of volatile oils, which give sage its distinct aroma. Avoid harvesting leaves from the bottom third of the plant, as they’re often older and less flavorful.
Instead, target the middle to upper sections where the leaves are lush and fragrant.
Timing your harvest is crucial—morning is ideal because the essential oils are most concentrated after a night’s rest. Wait until after dew has dried but before the midday heat sets in.
This ensures the leaves are dry enough to handle but still packed with flavor. Use sharp pruning shears to avoid crushing the stems, which can accelerate browning.
When harvesting, cut stems at a 45-degree angle just above a leaf node to encourage bushier growth. This method also prevents water from pooling on the cut, which can lead to rot or fungal issues.
Aim to harvest no more than one-third of the plant at a time to avoid stressing it. Regular, light harvesting throughout the season yields more flavorful leaves than a single heavy harvest.
| Harvest Stage | Key Characteristics | Best Practices | Seasonal Window |
|---|---|---|---|
| Early Growth | Small, tender leaves; minimal aroma | Avoid harvesting; focus on plant establishment | Spring to early summer |
| Prime Harvest | Large, fragrant leaves; woody but flexible stems | Harvest young leaves before flowering; cut in morning | Late summer to early fall |
| Late Season | Leaves may yellow; stems become brittle | Harvest remaining leaves; avoid woody stems | Fall (before frost) |
| Winter Prep | Dormant plant; no active growth | Prune lightly; prepare for drying/storage | Late fall to winter |
After harvesting, handle sage with care to prevent oxidation and browning. Immediately strip the leaves from the stems and spread them in a single layer on a clean, dry surface. Avoid piling leaves, as this traps moisture and accelerates spoilage.
If you’re drying whole stems, bundle them with twine or rubber bands and hang them upside down in a well-ventilated, dark area.
To maximize color retention, avoid exposing sage to direct sunlight during drying, as UV rays can cause leaves to turn brown or yellow. Instead, choose a spot with indirect airflow, like a pantry or shed with good circulation.
Proper drying takes 1 to 2 weeks, depending on humidity levels. Test for readiness by crushing a leaf—if it crumbles easily and feels dry, it’s ready for storage.
For gardeners in cooler climates, timing is even more critical. Harvest sage before the first frost, which typically occurs around mid-October in many regions. If frost hits early, prioritize harvesting and drying indoors immediately.
Sage can tolerate light frosts, but freezing temperatures destroy its flavor and texture, making it unusable for cooking or crafts.
Once dried, store sage in airtight containers like glass jars or vacuum-sealed bags. Keep it in a cool, dark place to preserve its color and aroma. Label containers with the harvest date to track freshness—properly stored sage retains its potency for up to a year.
For long-term storage, consider freezing dried sage in ice cube trays with water or oil for easy use in winter recipes.
Regular harvesting throughout the growing season encourages bushier, more productive plants. By following these techniques, you’ll enjoy vibrant, flavorful sage all winter long, whether you’re using it for cooking, potpourri, or decorative wreaths. Happy harvesting! 🌿
Top 3 sage drying methods compared: Pros, Cons, and flavor impact
When it comes to preserving your homegrown sage, the drying method you choose directly impacts flavor, color, and even texture. I’ve tested all three popular techniques—air-drying, dehydrator drying, and oven drying—to help you decide which works best for your kitchen or craft projects.
Each method has unique advantages, from hands-off simplicity to precise control over moisture levels.
For culinary use, flavor preservation is key. Air-drying delivers the most authentic earthy notes but requires patience, while dehydrators offer speed and consistency. Oven drying is a budget-friendly option but demands careful temperature management.
Let’s break down each method’s pros, cons, and flavor impact so you can pick the perfect fit for your needs.
How to Harvest Sage for Winter: Drying Method Comparison
✅ Pros: Preserves natural oils, no equipment needed, ideal for decorative bundles
❌ Cons: Slow (2-4 weeks), risk of mold if humid
✅ Pros: Fast (4-6 hours), uniform drying, great for large batches
❌ Cons: Requires equipment, higher energy use
✅ Pros: No special tools, good for small batches
❌ Cons: Risk of burning, less flavor retention than air-drying
🌿 Flavor Preservation Rating:
9/10
Air-Drying
7/10
Dehydrator
6/10
Oven
Air-drying sage in bundles is my go-to for culinary use because it preserves the most flavor. Hang stems upside down in a dry, dark, well-ventilated space for 2-4 weeks. The leaves will crisp up naturally, retaining their vibrant green color and robust aroma.
This method is perfect if you’re making herb bundles for gifts or want the most authentic taste in your cooking.
Using a dehydrator is the fastest way to dry sage, especially if you’re working with a large harvest. Set the temperature to 95°F (35°C) and dry for 4-6 hours, checking frequently to avoid over-drying.
The downside? Dehydrators can strip some of the essential oils, resulting in slightly less potent flavor. However, it’s ideal for uniform, crumbly dried sage that works well in spice blends.
Oven drying is the most accessible method if you don’t own a dehydrator. Preheat your oven to its lowest setting—170°F (77°C) or less—and place sage stems on a baking sheet lined with parchment paper. Prop the door open slightly to allow moisture to escape, and dry for 1-3 hours.
While convenient, this method risks burning if you’re not vigilant, and the flavor may not be as rich as air-dried sage.
For decorative purposes, like wreaths or potpourri, air-dried bundles win again. Their natural shape and color make them visually appealing, while dehydrated or oven-dried sage works better for culinary seasoning where texture matters more than appearance.
Whichever method you choose, always store your dried sage in airtight containers away from light and moisture to keep it fresh all winter.
Pro tip: Test your dried sage by crushing a few leaves between your fingers. If they release a strong, aromatic scent, you’ve nailed the drying process! Weak or no smell means it’s time to rethink your method or harvest fresh stems.