
Vegetables
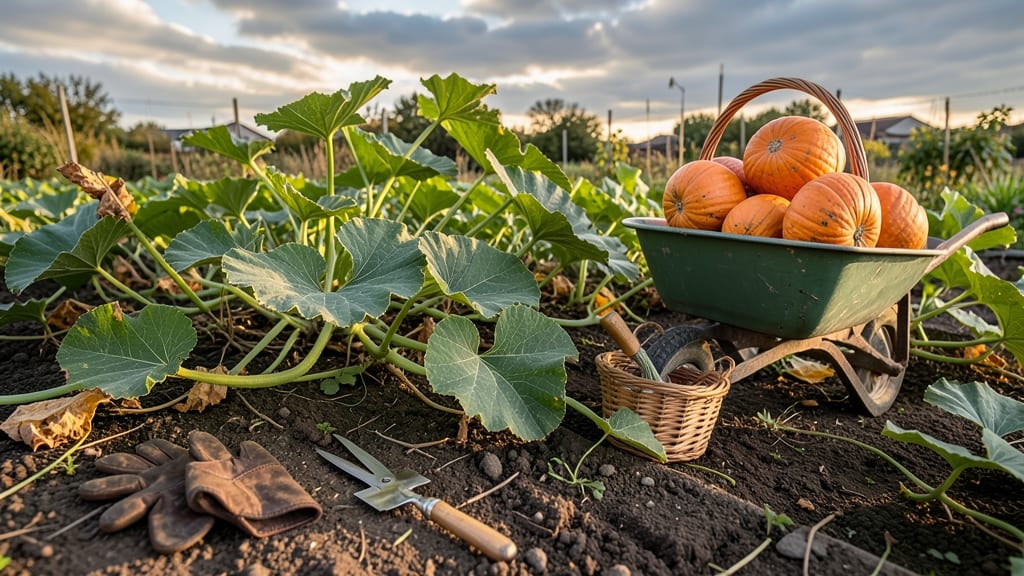
Harvesting pumpkins at the right time turns your garden into a 🎃 goldmine—when vines wither and skin hardens like armor, you’ve got a perfect specimen.
Picture this: you’ve spent months tending to your pumpkins, and now the moment of truth arrives. One wrong move, and you could end up with a squishy mess instead of a prize-worthy gourd.
The key? Knowing exactly when to pull them—before the first frost or when the stem dries out and separates easily.
In USDA Zone 6a, that window usually falls between September and October, but timing can shift based on your local climate. Too early, and the pumpkin won’t ripen fully; too late, and frost ruins everything.
I’ll walk you through the visual cues—like skin color and vine dieback—that tell you it’s harvest time.
Once you’ve nailed the harvest, the next challenge is storage. Learn how to keep your pumpkins fresh for weeks (or even months) and what to do if you miss the window entirely—because even a slightly overripe pumpkin can still be saved for cooking or composting.

How to tell when pumpkins are ready for harvest by vines and skin
Harvesting pumpkins at the right time ensures sweet, firm flesh and prevents rot. The key lies in observing two main indicators: vine condition and skin texture. When vines start dying back and the skin hardens like armor, your pumpkins are ready.
Ignoring these signs often leads to overripe pumpkins that spoil quickly or underripe ones that lack flavor.
First, focus on the vines—they’re nature’s calendar. Healthy vines stay vibrant green, but as pumpkins mature, the leaves near the fruit turn yellow and crisp. This vine dieback signals the plant is redirecting energy to the pumpkins.
If more than 50% of the vine shows yellowing or browning, it’s time to check the pumpkins themselves.
Next, examine the skin for hardness. A ripe pumpkin’s rind should be so tough you can’t pierce it with your fingernail. Press gently near the stem—if it feels like thick leather, it’s ready. Avoid harvesting if the skin still dents easily, as the pumpkin may not have fully matured.
Color also plays a role, but it’s not the sole indicator. Most pumpkins develop their full mature color (orange, white, or green) when ripe, but some varieties stay pale until fully hardened. For example, Cinderella pumpkins turn golden only after reaching full size.
| Sign | What to Look For | Action |
|---|---|---|
| Vine Condition | 50%+ of leaves yellow/brown, crispy | Check skin hardness |
| Skin Texture | Hard like leather, no nail-pierce | Harvest within 1-2 days |
| Color Change | Fully developed, consistent hue | Confirm with stem test |
| Stem Condition | Dries, separates easily from vine | Harvest immediately |
Avoid harvesting based on size alone—some pumpkins stop growing before reaching their full potential. Instead, combine all three cues: vine dieback, skin hardness, and color consistency.
For example, a Jack Be Little pumpkin might be small but still ripe if its skin is tough and vines are dying back.
Timing matters too. Harvest before the first frost (typically late September to October in most U.S. zones). Frost damages pumpkins, causing soft spots and rot.
If you’re in a warmer climate (like Zone 10), pumpkins may stay on the vine longer, but monitor for overripeness—skin cracks or softens when left too long.
One common mistake is waiting until the stem dries completely before harvesting. By then, the pumpkin may already be overripe. Instead, harvest when the stem is dry but still attached—it should snap off cleanly with a small stem stub remaining. This ensures the pumpkin’s internal quality stays intact.
Pro tip: Use a serrated knife to cut the stem (leave a 2-inch stub) rather than twisting it off. Twisting can tear the skin, creating entry points for bacteria.
After harvesting, cure your pumpkins for 7–10 days in a warm (80–85°F), dry place to toughen the skin further and extend shelf life.
If you’re unsure, test one pumpkin first. Cut it open—ripe pumpkins have bright orange flesh and a thick rind. If the flesh is pale or the rind is thin, wait a few more days.
Remember, patience pays off—a perfectly timed harvest means pumpkins that last months and taste sweeter.
Best pumpkin harvest techniques: tools, timing, and storage tips
Now that you’ve mastered the art of spotting ripe pumpkins, let’s talk about the harvest process itself. Using the wrong tools or timing can turn a perfect pumpkin into a bruised mess.
I’ve learned the hard way—twisting stems too hard once led to a pumpkin with a jagged wound that rotted within days. The secret? A clean cut, dry weather, and proper post-harvest care.
For harvesting, pruners or a sharp serrated knife are your best friends. Avoid dull tools that crush the stem or tear the skin. Cut the stem 2 inches above the pumpkin, leaving a small stub.
This prevents moisture loss and reduces rot risk. Work on dry mornings when dew has evaporated—wet conditions encourage fungal growth. If rain is forecasted, harvest early to avoid soggy pumpkins.
- 🌱 Step 1: Choose the Right Tools
Use sterilized pruners or a sharp knife to avoid damaging the pumpkin’s skin. Disinfect tools with rubbing alcohol to prevent disease spread. - 🌿 Step 2: Harvest on a Dry Day
Pick pumpkins when the weather is sunny and dry (morning is ideal). Avoid harvesting after rain to reduce rot risk. - ✂️ Step 3: Cut the Stem Cleanly
Leave a 2-inch stem stub—this helps the pumpkin heal and last longer. Never twist; cutting prevents skin tears. - 💧 Step 4: Handle with Care
Place pumpkins in a shaded, well-ventilated area immediately after harvest. Avoid stacking to prevent bruising. - ☀️ Step 5: Cure for 7–10 Days
Store pumpkins in a warm (80–85°F), dry place for curing. This toughens the skin and extends shelf life to months.
After harvesting, curing is non-negotiable if you want pumpkins that last. Place them in a single layer in a spot with good airflow, like a garage or shed. Avoid direct sunlight, which can cause skin cracks.
The curing process toughens the rind, making it more resistant to pests and rot. Once cured, store pumpkins in a cool (50–55°F), dark place with high humidity—a basement or root cellar works perfectly.
If you’re storing pumpkins long-term, inspect them weekly for soft spots or mold. Discard any pumpkins that develop dampness or foul odors—these are signs of spoilage. For short-term storage (up to 2 weeks), keep pumpkins at room temperature but away from heat sources like radiators.
Pro tip: Wrap the stem end with plastic wrap to slow moisture loss.
Regional differences matter too. In cooler climates (Zones 3–5), harvest pumpkins before the first frost (usually by late September). In warmer zones (Zones 8–10), pumpkins can stay on the vine longer, but monitor for overripeness—skin cracks or softens when left too long.
For example, Cinderella pumpkins in Zone 9 might need harvesting in November instead of October.
One final tip: If you’re growing pumpkins for carving or display, prioritize hard-skin varieties like Howden or Gladiator. These hold up better to carving tools and last longer. For culinary use**, choose sugar pumpkins like Sugar Pie—they’re sweeter and softer when cooked.
Either way, proper harvest and storage techniques ensure your pumpkins stay firm, flavorful, and flawless all season.