
How To
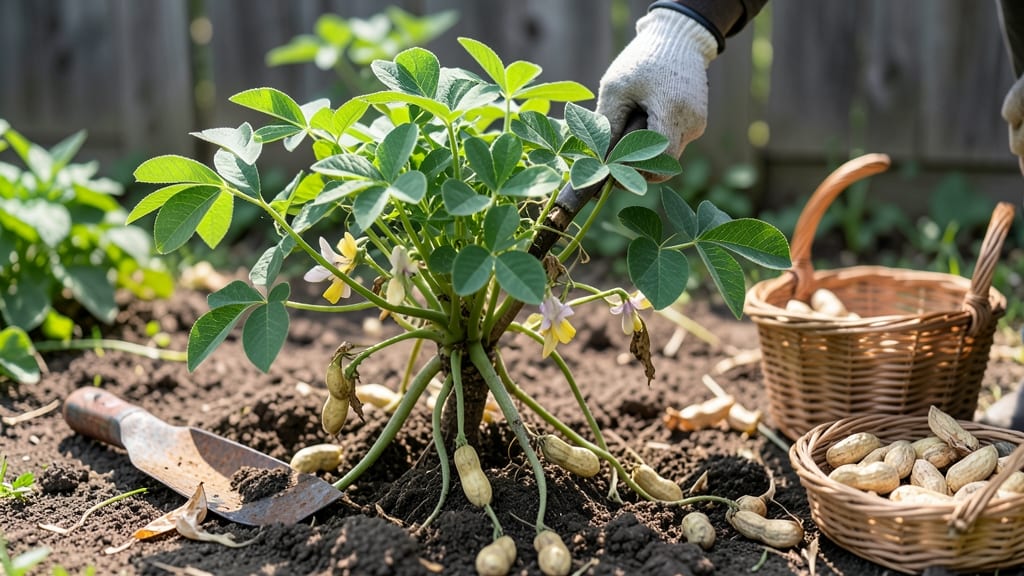
Harvesting peanuts at the right time is all about catching them when the pods are plump and the foliage signals maturity — and missing that window means bitter, shriveled nuts that won’t store well.
Unlike tomatoes or beans, peanuts won’t ripen on the vine—they need to be dug up when the leaves turn yellow and the soil cools, usually between September and October in most growing zones.
One wrong move, and you’ll end up with a crop that’s either too small or too tough to enjoy.
Here’s how to tell when your 🥜 plants are ready: check for yellowing leaves, listen for the telltale rattle of mature pods, and confirm the soil temperature has dropped below 80°F. These three simple tests are the key to unlocking perfect peanuts every time.
In this guide, I’ll walk you through the exact steps to test maturity, harvest without damage, and cure your peanuts for long-term storage—so you can enjoy them fresh or save them for later.

How to test peanut maturity using 3 simple hands-on methods
Harvesting peanuts at the perfect time ensures sweet, plump kernels with maximum storage life. Unlike other vegetables, peanuts mature underground, so you can't judge readiness by color alone. Instead, focus on three key indicators: leaf color, pod development, and the dig test.
Each method gives you a different clue about when your peanuts are ready to pull from the soil.
Start by monitoring your peanut plants for foliage changes—this is often the first sign that maturity is near. When the leaves begin turning yellow and drying out, it’s a strong signal that the underground pods are developing.
However, this alone isn’t enough to guarantee perfect timing. You’ll also need to check the shell color and perform the dig test to confirm readiness.
3 Hands-On Tests for Peanut Maturity
Watch for yellowing foliage and dried leaves.
- Leaves turn yellow-brown and crisp
- Plant stops producing new growth
- Occurs 4-6 weeks before harvest
Check pod color by carefully digging up a few peanuts.
- Shells turn tan or light brown
- Avoid green shells (not mature)
- Peels easily with gentle pressure
The most reliable way to confirm maturity.
- Dig up a small test plant
- Check for fully formed pods (1-2 inches long)
- Kernels should be plump and white
For the leaf yellowing test, begin monitoring your plants about 100-120 days after planting, depending on your variety. Early-season types may show signs sooner, while late varieties could take up to 150 days.
Pay special attention to the older leaves first—they’ll yellow before the younger ones. If you notice more than 50% of leaves turning yellow, it’s time to move to the next test.
The shell color test requires a bit more effort but gives you a direct look at pod maturity. Use a small hand trowel to carefully dig up a few peanuts from the plant’s base. Look for shells that are tan or light brown—these indicate maturity.
If the shells are still green or white, wait another week and test again. Remember, peanuts won’t ripen further once harvested, so timing is critical.
When performing the dig test, focus on the plant’s outer edges where pods tend to develop first. Gently loosen the soil around the roots and check for pods that are 1-2 inches long.
If the kernels inside are plump and white (not shriveled or hollow), your peanuts are ready. If the kernels are still small or underdeveloped, wait another 5-7 days before harvesting.
One common mistake gardeners make is waiting too long after the leaves yellow. By the time the foliage is completely brown and crispy, the peanuts may already be overmature, leading to shriveled kernels.
To avoid this, perform the dig test as soon as you see 50% leaf yellowing, even if the shells aren’t fully tan. This gives you the best chance of harvesting at peak maturity.
For cooler climates (USDA Zones 7-9), adjust your timing slightly. Peanuts grow more slowly in these areas, so monitor for maturity signs 2-3 weeks later than in warmer zones. If frost threatens before your peanuts mature, consider using row covers to extend the growing season.
However, never harvest peanuts if temperatures are below 60°F, as cold soil can damage the pods.
Once you’ve confirmed maturity using all three tests, harvest your peanuts on a dry, sunny day. Use a garden fork to gently loosen the soil around the plants, then pull them up by the foliage.
Shake off excess dirt and let them dry in the sun for 2-3 hours before storing. Proper drying is essential to prevent mold and ensure long-term storage.
With these three simple methods, you’ll never guess when to harvest peanuts again. The key is patience and observation—don’t rush the process, and always test a few plants before committing to a full harvest. Happy digging! 🥜
Peanut harvesting timeline: month-by-month guide by USDA Zone
Knowing when to harvest peanuts depends heavily on your USDA growing zone and the specific variety you’re growing. Early-season types like Early Spanish mature faster, while late varieties such as Virginia-type peanuts need more time.
In Zones 7-9, expect harvests between September and October, while gardeners in Zones 10-11 can extend harvests into November due to warmer climates.
Peanuts thrive in warm soil, so cooler zones like Zone 7 may need row covers to protect young plants from late frosts. Conversely, gardeners in Zone 11 might face challenges with heat stress if planted too early.
Always adjust your timeline based on soil temperature—peanuts grow best when soil stays above 70°F.
In Zone 7, start monitoring for maturity signs around mid-August, as cooler nights slow growth. Use black plastic mulch to warm the soil and extend the season.
For Zone 9, you’ll have a longer window—early varieties may be ready by late August, while late varieties can wait until October.
Gardeners in Zones 10-11 face different challenges, like heat stress or pests that thrive in warm climates. Plant early varieties in spring (March-April) and late varieties in summer (June-July) to stagger harvests. Always check soil temps—peanuts won’t develop properly if the ground stays above 90°F for extended periods.
For all zones, leaf yellowing is your first clue, but confirm with the dig test (from Section 1) to avoid overripe or underdeveloped pods. If frost threatens before harvest, use row covers to protect plants, but never harvest in cold soil—wait until temps rise above 60°F.
Once you’ve confirmed maturity, harvest on a dry, sunny day to speed drying. Cure peanuts in a well-ventilated, shady area for 7-10 days before storing. Proper timing ensures sweet, plump peanuts that store well for months! 🥜