
How To
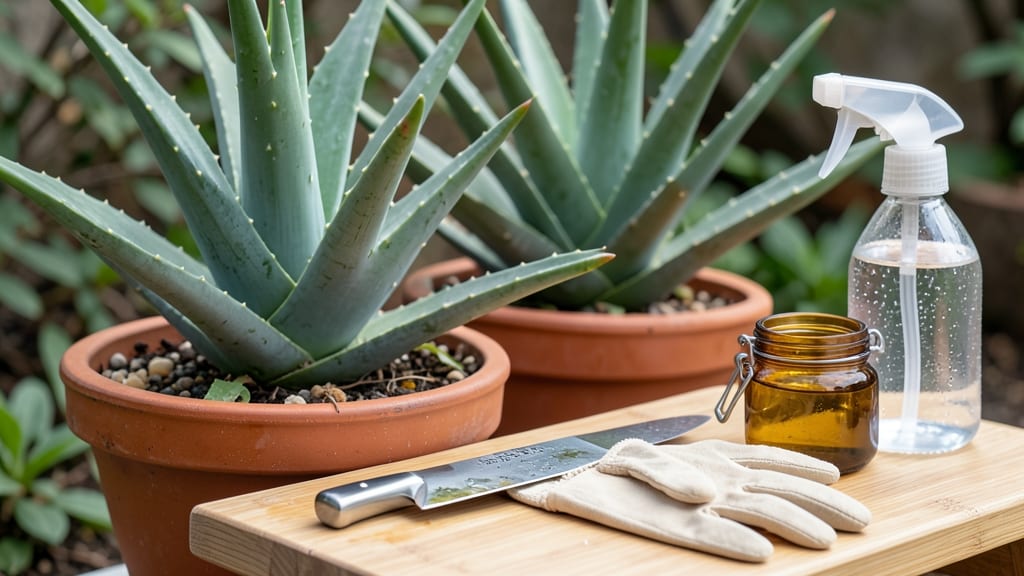
To harvest an aloe plant safely, focus on mature leaves—those thick, plump outer ones that are at least 8 inches long and ready for use.
Aloe vera’s healing gel is a natural remedy for burns, skin irritations, and even hair care—but harvesting it wrong can damage your plant. Follow this precise leaf-by-leaf guide to extract fresh, sterile gel without harming your 🌵 aloe vera, whether you’re a beginner or seasoned gardener.
Most people skip the prep work and end up with bitter gel or a stressed plant. The key? Using the right tools, cutting at the base (not mid-leaf), and letting the sap drain before processing.
I’ll walk you through every step—from selecting the perfect leaf to storing your gel for months.
By the end, you’ll know how to harvest aloe like a pro, repurpose every part of the leaf, and keep your plant thriving for future harvests. No wasted gel, no sad, shriveled leaves—just clean, usable aloe every time.

Step-by-step aloe leaf harvesting process for maximum gel yield
Harvesting aloe vera leaves correctly ensures you get the maximum gel yield while keeping your plant healthy. The key is selecting the right leaves and using the proper cutting technique to avoid damaging the plant's core.
I’ve harvested aloe for years, and I’ve learned that timing, tools, and aftercare make all the difference between a thriving plant and a struggling one.
Before you begin, gather your tools: a sharp knife or pruning shears, a clean bowl for the gel, and a spray bottle with water. You’ll also need a pair of gloves to protect your hands from the aloe latex, which can irritate skin.
Work in a clean, well-lit area to minimize contamination of your gel.
Now, let’s dive into the step-by-step process. Follow these instructions carefully to ensure a successful harvest without harming your aloe vera.
Timing is everything when harvesting aloe. I recommend harvesting in the spring or early summer when the plant is actively growing. Avoid harvesting during the winter months when the plant is dormant, as this can stress it unnecessarily.
If you’re harvesting multiple leaves, space them out by at least 2-3 months to give your aloe time to recover.
One of the biggest mistakes I see is over-harvesting. Never remove more than one-third of the plant’s leaves at once, or you risk stunting its growth. If you’re new to aloe care, start with just 1-2 leaves to test your technique and observe how your plant responds.
This approach also helps you gauge the gel yield and quality before committing to larger harvests.
After harvesting, you might notice some yellowing or browning at the cut site. This is normal and part of the plant’s healing process. To speed up recovery, you can apply a thin layer of activated charcoal powder or cinnamon powder to the cut area.
These natural antiseptics help prevent infection and promote faster healing.
If your aloe plant looks stressed after harvesting, don’t panic. With proper care, it should bounce back within 4-6 weeks. Keep an eye out for new growth emerging from the center of the plant, which is a positive sign that your aloe is recovering well.
How to extract and store aloe vera gel safely for medical or cosmetic use
Once you’ve harvested your aloe vera leaves, the next step is extracting the sterile gel for medical or cosmetic use. The process requires careful handling to avoid bacterial contamination while preserving the gel’s healing properties.
I’ve found that sterilization methods like blending, straining, or freezing each have unique benefits—depending on your needs. Let’s break down the safest ways to process and store your aloe gel at home.
Before diving in, remember that aloe vera gel oxidizes quickly when exposed to air, turning yellow and losing potency. To maximize shelf life, you’ll need to work fast and use airtight containers.
For medical use, always prioritize sterile conditions—even a small amount of bacteria can compromise the gel’s effectiveness. I recommend dedicating a clean workspace and sanitizing all tools before starting.
| Method | Sterility Level | Shelf Life | Best For |
|---|---|---|---|
| Blending + Straining | Moderate (requires clean tools) | 3-5 days (refrigerated) | Immediate use, DIY lotions |
| Freezing Fresh Gel | High (prevents oxidation) | Up to 6 months | Long-term storage, medical use |
| Commercial Extraction | High (industrial-grade) | 12-24 months (preservatives) | Large-scale cosmetic use |
For DIY extraction, start by slicing off the spiky edges of your harvested aloe leaf. Then, use a sharp knife to cut open the leaf lengthwise and scoop out the translucent gel with a spoon. Place the gel in a blender or food processor and blend until smooth.
Strain the mixture through a fine-mesh sieve or cheesecloth to remove any remaining pulp or yellow latex—this is key for sterile gel. Store the strained gel in a dark glass jar with a tight seal in the fridge for up to 5 days.
If you’re planning to store the gel long-term, freezing is your best bet. After extracting the gel, portion it into ice cube trays or small containers. Freeze solid, then transfer to a sealed bag or container.
Frozen aloe gel retains its potency for up to 6 months, making it ideal for medical use or batch-making skincare products. Just thaw overnight in the fridge before use to preserve texture.
Don’t throw away the leftover aloe pulp! It’s packed with nutrients and can be repurposed. Rinse the pulp thoroughly to remove any residual latex, then blend it with water to create a fertilizer tea for your plants.
The potassium-rich liquid is perfect for houseplants or garden beds. Alternatively, dry the pulp in a dehydrator or oven at 200°F (93°C) for 2-3 hours to make a natural exfoliant for DIY scrubs.
When it comes to contamination risks, always work in a clean environment and use sterilized tools. If you notice any discoloration, foul smells, or mold after storage, discard the gel immediately.
For commercial-grade purity, consider investing in a small food-grade centrifuge to separate the gel from latex and pulp more efficiently—though this requires an upfront cost.