
How To
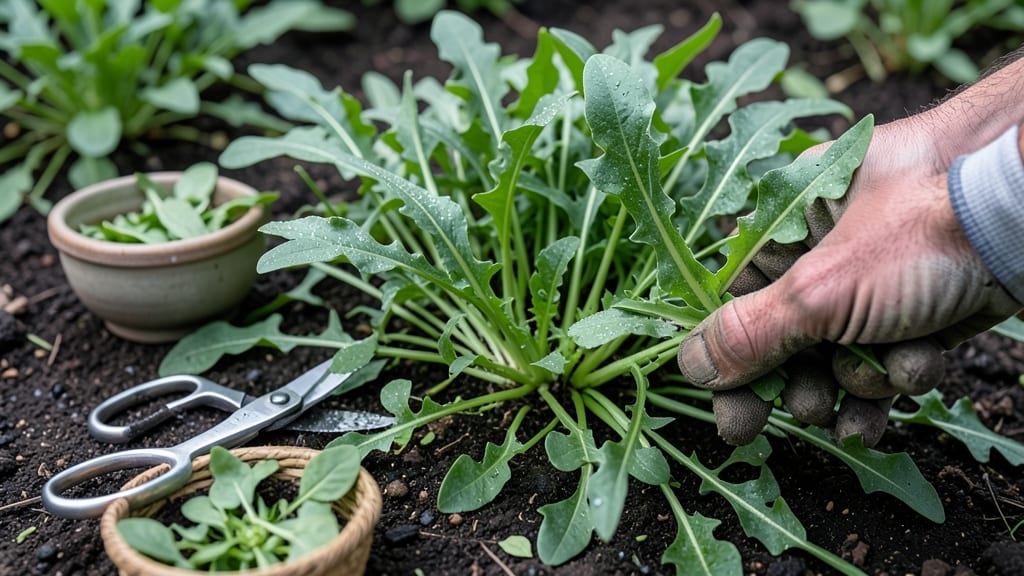
To harvest arugula so it keeps growing, use the cut-and-come-again method by snipping outer leaves when they reach 2-3 inches—this triggers bushier regrowth and prevents bolting.
Struggling to keep your 🌱 arugula thriving after harvest? Many gardeners pull too many leaves at once or cut too close to the base, which stunts future growth.
The secret lies in precision timing and technique—harvesting just the outer leaves while leaving the inner ones intact lets the plant recover faster and produce more.
This method works best in spring and fall, when temperatures are mild, but even in zone 6a, you can extend harvests by providing afternoon shade during heatwaves. With the right approach, a single plant can yield multiple harvests over 6-8 weeks, giving you fresh greens without replanting.
Below, I’ll walk you through the exact cutting technique, soil care tips to boost regrowth, and how to spot (and fix) common mistakes that leave your arugula looking sad instead of abundant.

Step-by-step guide to harvesting arugula for continuous regrowth
Arugula is one of the easiest greens to grow, but many gardeners struggle with harvesting without killing the plant. The secret lies in the cut-and-come-again method, which lets you enjoy fresh leaves repeatedly without sacrificing future growth.
Unlike other leafy greens, arugula responds beautifully to proper harvesting techniques, producing bushier plants with tender leaves if done correctly.
Timing your harvest is everything. You’ll want to wait until your arugula reaches 2-3 inches in length—this is when the leaves are fully mature but still tender. Harvesting too early means smaller yields, while waiting too long risks bolting (flowering) and bitterness.
The key is patience and precision, ensuring you leave enough foliage for the plant to recover and regrow.
🌱 Step-by-Step Harvesting Guide for Arugula Regrowth
-
Step 1: Wait for the Right Size
Harvest when outer leaves reach 2-3 inches long. Use your thumb and index finger to gently pinch the leaf at the base—it should pull away cleanly without tearing. -
Step 2: Choose the Right Leaves
Pick the largest, most mature outer leaves first. Avoid cutting into the center rosette—this ensures the plant keeps producing new growth from the heart. -
Step 3: Use Sharp Scissors or Fingers
For cleaner cuts, use clean, sharp pruning shears or simply pinch leaves by hand. Cut at a 45-degree angle just above a leaf node to encourage branching. -
Step 4: Leave Enough Foliage
Never remove more than 1/3 of the plant at once. Aim to leave 4-6 healthy inner leaves intact—they’ll power regrowth and keep the plant thriving. -
Step 5: Water Immediately After
Give your arugula a deep watering right after harvesting. This replenishes moisture lost during the process and helps the plant recover faster. -
Step 6: Fertilize Lightly (Optional)
If your soil is nutrient-poor, apply a balanced, high-nitrogen fertilizer (like 5-10-10) 2-3 days after harvesting. Avoid over-fertilizing—it can cause bolting or leaf burn. -
Step 7: Monitor for Regrowth
New leaves should emerge in 7-10 days. If growth stalls, check for pests, poor soil, or heat stress—common issues that halt regrowth.
One of the biggest mistakes gardeners make is cutting too aggressively or harvesting from the center. This disrupts the plant’s ability to photosynthesize and produce new leaves. Instead, think of arugula like a haircut—you’re shaping it, not shaving it bald.
By focusing on the outer leaves, you encourage the plant to branch out and fill in, giving you a continuous supply of fresh greens.
After your first harvest, your arugula should bounce back within 1-2 weeks, depending on growing conditions. If you’re growing in hot, dry climates, provide afternoon shade to prevent bolting. In cooler weather, arugula thrives with full sun exposure and regular watering.
The goal is to create an environment where the plant feels stressed enough to regrow but not so stressed it bolts.
Pro tip: If your arugula starts to bolt (send up flower stalks), don’t panic. You can still harvest the leaves before the stalks harden—just cut them at the base and enjoy them in salads while they’re still tender.
To prevent bolting in future harvests, succession plant every 2-3 weeks for a steady supply of fresh greens all season.
For container growers, the same rules apply, but be extra mindful of root space. Arugula in pots can regrow just as well as in-ground plants, but overcrowding leads to smaller leaves and slower recovery.
If your container is packed, consider thinning seedlings early to give roots room to expand after harvest.
Finally, keep an eye on soil health. Arugula is a heavy feeder, so if your soil lacks nutrients, regrowth will suffer. Amend your beds with compost or aged manure before planting, and top-dress with worm castings between harvests for a nutrient boost without risking burn.
With these steps, you’ll enjoy abundant, continuous harvests of peppery arugula all season long—no more sad, wilted plants after a single cut! The key is patience, precision, and post-harvest care. Happy harvesting! 🌿✂️
Pro tips for maximizing arugula regrowth after harvest
Arugula's ability to regrow depends on three key factors: soil nutrition, consistent moisture, and stress-free conditions. After each harvest, your plants need a quick nutrient boost to recover.
I’ve found that adding a balanced organic fertilizer (like fish emulsion or compost tea) right after cutting stimulates new growth within 5-7 days. The goal is to mimic the rich, nitrogen-packed soil arugula loves naturally.
Most gardeners overlook the importance of watering schedules post-harvest. Arugula roots are shallow, so they dry out fast. I water mine deeply every morning for the first week after cutting, keeping the soil consistently moist but never soggy.
Mulching with straw helps retain moisture while preventing soil-borne diseases that can stunt regrowth.
💡 Pro Tip: The 30% Rule
Never remove more than 30% of leaves in a single harvest. This preserves the plant's energy reserves. For example, if your arugula has 10 mature leaves, cut only 3 outer leaves at a time. Use clean, sharp scissors to avoid tearing stems.
Environmental stress is the silent killer of arugula regrowth. In hot climates (zones 8+), I provide afternoon shade using a lightweight row cover or shade cloth to prevent bolting.
Even in cooler zones, sudden heatwaves can trigger flowering. Arugula thrives in 60-70°F temperatures, so I monitor weather forecasts and adjust shade coverage accordingly.
Organic fertilizers work wonders for regrowth. My go-to is a 5-10-10 NPK ratio applied every 4-6 weeks during active growth. For a quick fix after harvest, I mix 1 tablespoon of compost into the top inch of soil.
This provides immediate nitrogen while improving soil structure. Avoid synthetic fertilizers—they can burn tender arugula roots and disrupt regrowth.
One mistake I see often is overcrowding. Arugula needs space to regrow. If your plants are too close, thin them to 4-6 inches apart after harvest. This improves airflow, reducing fungal risks like powdery mildew. I also rotate crops annually to prevent soil depletion, which directly impacts regrowth vigor.
To extend your harvest season, succession plant every 2-3 weeks in spring and fall. This ensures a continuous supply while giving your existing plants time to recover. In zone 6a, I start my last succession planting by August 15th to harvest before the first frost.
Pair this with proper regrowth care, and you’ll enjoy fresh arugula for months.