
How To
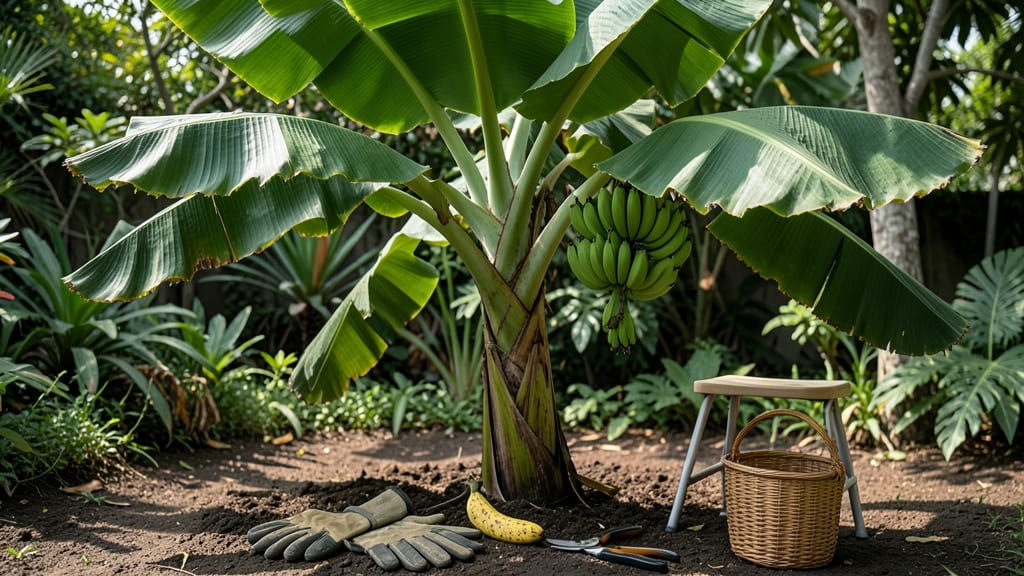
To harvest bananas at their sweetest, watch for the peel to turn from green to yellow with a few brown spots—this is the perfect moment before they overripen.
Bananas are nature’s sweetest reward—but only if you harvest them at the perfect moment. Picking too early means bland, starchy fruit, while waiting too long risks overripe messes. Here’s how to master banana harvesting for peak flavor and yield.
In tropical regions (USDA Zones 10-12) or container-grown 🍌 in cooler zones, timing is everything. A ripe banana’s stem should snap easily when bent, and the fruit should yield slightly to gentle pressure—these cues signal it’s ready to pick.
Below, I’ll walk you through the three stages of ripeness, safe cutting techniques, and post-harvest care to maximize sweetness, even if you harvest a little early.

3 Clear stages of banana ripeness (with visual cues for perfect timing)
Harvesting bananas at the right moment transforms bland, starchy fruit into sweet, creamy perfection. The key lies in understanding the three distinct ripeness stages—each marked by unique color, texture, and flavor cues.
Whether you're growing Dwarf Cavendish in containers or Gros Michel in tropical climates, these visual signals ensure you never miss the sweet spot.
Climate plays a surprising role in ripening speed. In humid tropical zones, bananas may ripen 2-3 days faster than in cooler microclimates. A dry, sunny day can also accelerate color changes, while overcast conditions slow the process. Pay attention to these environmental factors to adjust your harvesting timeline accordingly.
Pro Tip: Use a gentle finger squeeze as your primary test—ripe bananas yield slightly to pressure without feeling mushy. Combine this with visual cues for foolproof results every time.
Let's break down each stage with actionable details so you can spot the perfect moment. The unripe stage (fully green) is the hardest to detect—bananas in this phase contain resistant starch that digests like fiber. If you harvest too early, you'll miss the natural sugar conversion that happens during ripening.
During the perfectly ripe stage, bananas develop 1-2 brown spots on the peel—this is your golden cue. The peel may also start to curl slightly at the tips. At this point, the fruit's sugar content peaks at 14-18%, making it ideal for eating fresh.
In tropical climates, this stage arrives 7-10 days faster than in cooler regions.
The overripe stage is where bananas become soft and speckled with dark brown. While still edible, they're best suited for baking or smoothies. Overripe bananas also release more ethylene gas, which can accelerate ripening in nearby fruit.
If you notice this stage creeping up too quickly, consider harvesting earlier or storing unripe bananas in a cool, dark place.
Climate affects ripening speed dramatically. In USDA Zone 11 (tropical), bananas may go from green to ripe in 5-7 days, while in Zone 10 (subtropical), it can take 10-14 days.
Container-grown bananas in Zone 9 often ripen 30% slower due to temperature fluctuations. Monitor your local humidity levels—high humidity (above 70%) speeds up ripening, while dry air slows it.
For container gardeners, ripening timing can vary even more. Bananas grown in 5-gallon pots may ripen 1-2 days earlier than those in 15-gallon containers because of root competition.
Always check the stem attachment—if it separates easily from the bunch, that's another sign of ripeness. This natural separation reduces stress on the plant when harvesting.
Remember: Never harvest bananas based on size alone. A banana can be large but still unripe, or small but perfectly sweet. Always combine color, texture, and stem tests for the best results. With these cues, you'll never waste another underripe or overripe bunch again.
🌱
Step-by-step guide to cutting bananas from the bunch (without damaging the plant)
Harvesting bananas correctly ensures sweet, flavorful fruit while keeping your banana plant healthy for future harvests. The key is timing—cutting too soon stalls ripening, while waiting too long risks overripe fruit and plant stress.
I’ll show you how to remove bananas safely, whether you’re using your hands or tools, and how to care for the mother plant afterward to encourage regrowth.
Start by selecting bananas that are yellow with a few brown spots. These are ripe and ready to pick. Avoid cutting green bananas—they won’t ripen properly off the plant.
For dwarf varieties like ‘Dwarf Cavendish’, you can often harvest by hand, but taller varieties may require a sharp pruning saw or knife to reach the top bunches safely.
How to Cut Bananas Safely
- 1 Prepare your tools: Use a sterilized knife or pruning saw to avoid introducing bacterial or fungal infections. Wear gloves for hygiene.
- 2 Locate the stem: Find the small stem where each banana attaches to the bunch. This is your cutting point—1-2 inches below the fruit.
- 3 Make a clean cut: Angle your blade 45 degrees downward and cut quickly and firmly to avoid tearing the stem. For hand-harvesting, gently twist the banana until it separates.
- 4 Disinfect the wound: After cutting, apply a copper-based fungicide or diluted hydrogen peroxide to the stem to prevent rot or disease.
- 5 Support the plant: If the bunch is heavy, prop up the stem with a stake or tie it to a support to prevent stem breakage from the remaining weight.
After harvesting, inspect the mother plant for any signs of stress or disease. Remove any yellowing leaves or damaged foliage to redirect the plant’s energy toward regrowth. In tropical climates, your banana plant may produce sucker shoots at the base—these can be transplanted to create new plants.
For container-grown bananas, like ‘Lady Finger’ varieties, reduce watering slightly after harvest to encourage dormancy if you’re in a cooler zone. In tropical zones, maintain consistent moisture and fertilize lightly with a balanced 10-10-10 fertilizer every 6-8 weeks to promote new growth.
With proper care, your plant can produce 2-3 harvests per year!
Pro tip: Store harvested bananas at room temperature to ripen naturally. If you’ve picked them too early, place them in a paper bag with an apple to speed up ripening using ethylene gas. Avoid refrigerating until fully ripe to preserve flavor.