
Vegetables
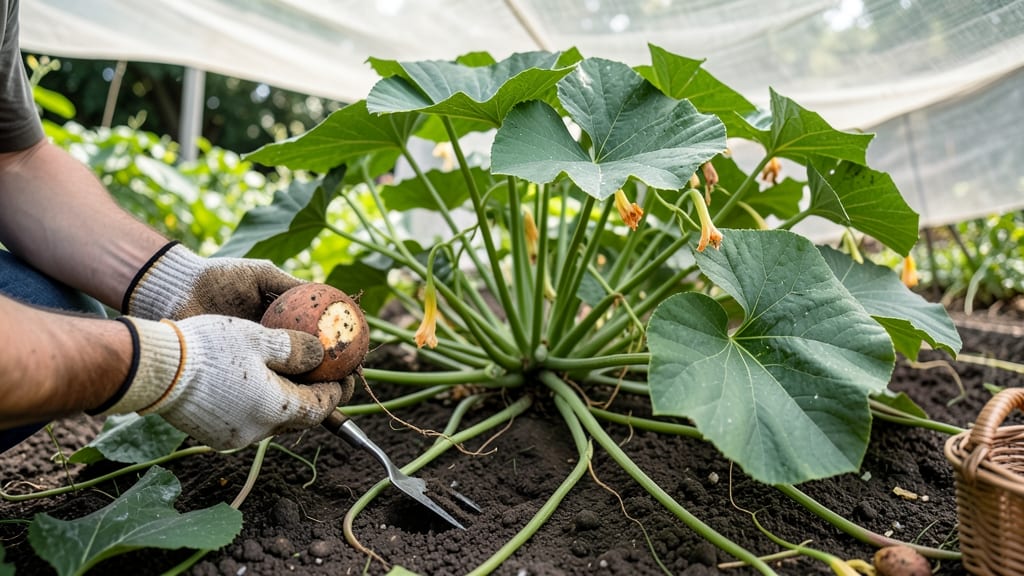
Timing your sweet potato harvest correctly ensures the best flavor and storage life 🍠—between 90 and 120 days after planting, when vines yellow and skin hardens.
Sweet potatoes left in the ground too long turn woody and lose sweetness—but harvest them too early, and you sacrifice storage potential. Getting this right means the difference between a pantry full of sweet, storable tubers and a harvest that spoils before winter.
In USDA Zone 6a, aim for October to December, when frost threatens and vines begin to die back. The key is watching for tough skin and shriveled foliage—signs the roots have reached peak maturity.
Below, I’ll walk you through the exact visual cues to look for, how to harvest without damaging the tubers, and the best post-harvest care to keep them fresh through the cold months.

How to determine the best sweet potato harvest time by leaf and vine signs
Knowing when to harvest sweet potatoes can make the difference between sweet, storable tubers and tough, flavorless roots. The key lies in watching your plants' leaf color and vine health—both telltale signs that your sweet potatoes are ready for digging.
In my USDA Zone 6a garden, I've learned that timing is everything, especially when balancing flavor and storage potential.
Sweet potatoes thrive in warm climates but also grow well in cooler regions if you plant early and harvest before frost. The first visual cue is when the vines turn yellow and start dying back naturally.
This usually happens 90-120 days after planting, depending on your variety and climate. For me, this typically falls between late October and December in my region.
Here's where things get tricky: in cooler climates, frost sensitivity becomes a critical factor. If frost is forecasted, harvest immediately—even if the vines aren't fully yellow.
In warmer climates, you can wait longer, but don't delay past the point where the leaves completely die back, as this can lead to woody tubers.
| Sign | Early Harvest Indicators | Late Harvest Indicators | Action |
|---|---|---|---|
| Vine Color | Mostly green with some yellowing | Fully yellow and drying | Harvest soon for baby sweet potatoes |
| Leaf Condition | Leaves still mostly intact | Leaves wilted and dropping | Wait 1-2 weeks for full maturity |
| Skin Texture | Soft and easily pierced | Tough and resists puncture | Ideal harvest time for storage |
| Frost Risk | None in forecast | Frost expected within 2 weeks | Harvest immediately to prevent damage |
| Tuber Size | Small (under 4 inches) | Fully sized (4+ inches) | Best for long-term storage |
Another critical sign is the skin toughness. Gently press a finger into the skin near the soil line—if it resists puncture, your sweet potatoes are ready. I always test a few tubers this way before committing to a full harvest, as some varieties mature unevenly.
For storage-quality sweet potatoes, aim for this firmness combined with fully yellowed vines.
In my experience, regional climate plays a huge role. Gardeners in Zone 7 and above often have more flexibility, while those in Zone 6 or cooler must act quickly when vines yellow.
Last year, I nearly missed my harvest window because I waited for perfect conditions—only to have an early frost damage half my crop. Now, I harvest at the first sign of vine yellowing if frost is possible.
Don't confuse early harvest with baby sweet potatoes. While you can dig small tubers when vines first show yellowing, these won't store well. For the best of both worlds, harvest a few small ones for immediate use while waiting for the majority to mature fully.
This two-stage approach has saved me from losing entire harvests to over-maturity.
One mistake I see often is waiting too long for perfect conditions. Sweet potatoes won't get sweeter after vines die back—they'll just become tough and stringy. The ideal harvest window is when 70-80% of vines have yellowed, and the skin feels firm.
This balance gives you the best flavor and storage potential without risking frost damage or over-maturity.
Pro tip: If you're unsure, dig up one or two test tubers. Cut them open to check for size and sweetness. The flesh should be firm with no hollow centers.
This simple test has saved me from harvesting too early—and too late—multiple times. Remember, sweet potatoes continue to mature underground even after vines yellow, so timing is everything.
For gardeners in warmer climates, you might have a longer window, but don't let vines completely die back. Once they're brown and crispy, your tubers may have turned woody.
In my Zone 6a garden, I always aim to harvest before the first hard frost, which typically arrives in late October. This gives me plenty of time to cure and store my harvest properly.
Finally, keep an eye on your local forecast. Even a light frost can damage sweet potatoes still in the ground, so always have your digging fork ready when temperatures drop. With practice, you'll develop an instinct for the perfect harvest moment—one that balances maturity, flavor, and storage potential.
That first perfect tuber you pull from the ground is worth every moment of patience!
Sweet potato harvest methods: digging techniques for minimal damage and maximum yield
Once your sweet potatoes show ready signs—like yellowed vines and tough skin—it’s time to harvest with care. The wrong technique can bruise tubers or leave them vulnerable to disease. I’ve perfected a method that protects your harvest while maximizing yield, whether you’re digging by hand or using tools.
Start by choosing a dry, sunny day for harvesting to reduce soil clinging and speed up curing. Work gently to avoid puncturing the thin skin, which can invite rot.
Below, I’ll break down my step-by-step approach, including soil prep, digging depth, and post-harvest handling to keep your sweet potatoes in prime condition.
🌱 Sweet Potato Harvest Checklist
- ☑️ Prep soil: Lightly loosen top 6 inches with a fork to avoid damaging tubers.
- ☑️ Dig carefully: Use hands or a garden fork to lift tubers—never pull by vines.
- ☑️ Inspect immediately: Brush off dirt and discard any bruised or damaged tubers.
- ☑️ Cure properly: Store at 80-85°F and 80% humidity for 10 days to thicken skin.
- ☑️ Store cool: Move to 55-60°F after curing for long-term storage.
For hand harvesting, kneel beside the plant and gently work your fingers into the soil, following the vine’s path. Sweet potatoes grow just below the surface, so aim for 4-6 inches deep.
If vines are dry and brittle, they’ll snap easily—this is your cue to dig deeper. A garden fork is ideal for larger patches, but always angle it downward to avoid piercing tubers.
After lifting, never stack harvested sweet potatoes—this causes bruising. Instead, lay them in a single layer on a tarp or clean cloth in a shady, well-ventilated spot.
Let them air-dry for 1-2 hours before handling further. This step is critical for preventing rot during storage. I’ve seen tubers last 6+ months when cured and stored correctly.
Post-harvest, focus on curing conditions. Place tubers in a warm, humid space (like a garage or shed) for 10 days. Avoid refrigeration—cold temperatures convert starches to sugars, making them taste sweet but spoil faster.
Once cured, store in a cool, dark place with good airflow, like a root cellar or pantry.
Pro tip: Label your storage containers with the harvest date to track freshness. Sweet potatoes stored properly can last through winter, giving you homegrown goodness year-round. With these techniques, you’ll harvest healthier, sweeter tubers every season—minimal damage, maximum yield. 🌿