
How To
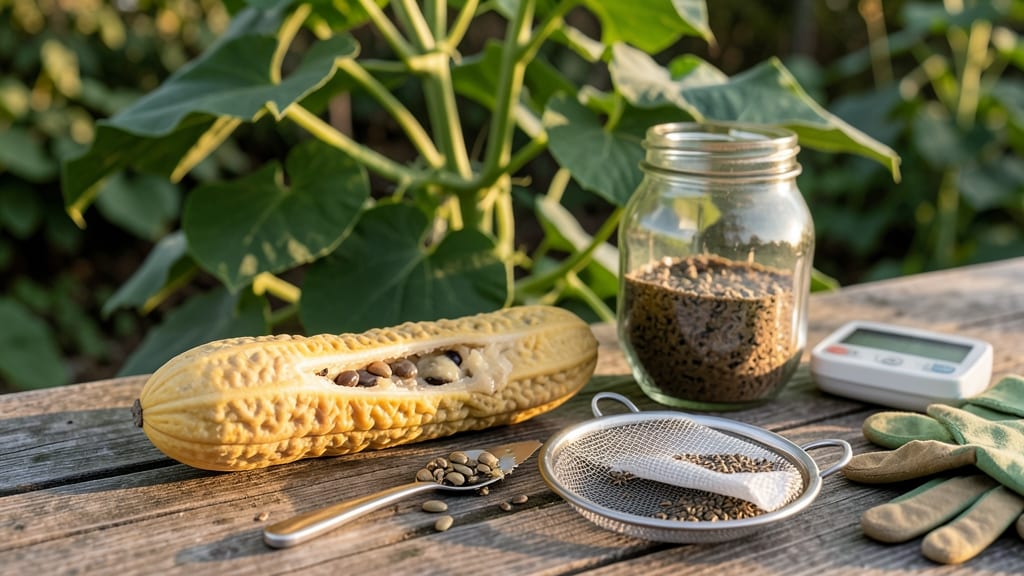
To harvest cucumber seeds from mature fruit 🥒, start by saving seeds from fully ripened cucumbers that turn yellow and soften on the vine.
Did you know some heirloom cucumbers taste nothing like store-bought varieties—and their seeds are disappearing? Learning how to harvest cucumber seeds lets you preserve rare flavors while creating a self-sustaining garden treasure.
Most gardeners overlook this simple process, but saving seeds is easier than you think. With just a few tools and a little patience, you can collect seeds from your best cucumbers and store them for next year's planting.
Below, I’ll walk you through every step—from selecting the right cucumbers to fermenting, drying, and storing seeds—so you never lose a favorite variety again.
Step-by-step guide to harvesting cucumber seeds from ripe fruit
Preserving heirloom cucumber seeds is one of the most rewarding ways to maintain garden biodiversity. Unlike store-bought varieties, heirloom cucumbers often have unique flavors and textures that disappear when commercial seeds dominate.
The key to saving viable seeds lies in proper fermentation, which removes bitter pulp and prevents mold contamination. This process ensures your seeds will germinate reliably for next year’s harvest.
Harvesting cucumber seeds requires patience and attention to detail, but the payoff is a self-sustaining garden filled with flavors you’ve cultivated yourself. The fermentation trick I’m about to share is critical—it’s what separates viable seeds from moldy messes.
Whether you’re saving seeds from a 6-foot vining variety or a compact bush cucumber, the steps remain the same.
How to Harvest Cucumber Seeds: Step-by-Step
- 1 Select fully mature cucumbers with yellowing skin or overripe signs (soft spots). Avoid hybrid varieties—only open-pollinated cucumbers yield true seeds.
- 2 Slice open the cucumber lengthwise and scrape out seeds into a glass jar. Add 1 inch of water to cover seeds—this starts the fermentation process.
- 3 Cover jar with a clean cloth or lid and let ferment at room temperature (70-75°F) for 3-5 days. Stir daily to prevent mold—this is the critical fermentation trick!
- 4 Rinse seeds through a fine mesh strainer to remove pulp and debris. Discard the bitter-smelling water—this indicates successful fermentation.
- 5 Spread seeds on a paper towel or screen in a single layer. Let dry in a cool, dark place for 1-2 weeks until completely brittle.
- 6 Store seeds in a paper envelope or airtight container with a moisture absorber (like silica gel). Label with the variety name and harvest year.
Fermentation is where most beginners struggle—skipping this step leads to moldy seeds that won’t sprout. The 3-5 day fermentation breaks down the bitter cucurbitacin coating, which would otherwise inhibit germination. Think of it as a natural seed treatment that ensures 90%+ viability if done correctly.
After fermentation, rinsing seeds thoroughly is non-negotiable. Leftover pulp can attract pests or promote mold during drying. I once tried drying seeds with residual pulp and ended up with a black mold infestation—a lesson learned the hard way! Always rinse until the water runs clear.
Drying seeds properly is just as critical as fermentation. A cool, dark place prevents seeds from overheating, which can reduce germination rates. I recommend using a seed-saving screen or even a clean window screen stretched over a frame. This allows airflow while keeping seeds contained.
Once seeds are fully dry and brittle, store them in a cool, dry location. A paper envelope is ideal because it allows seeds to breathe, unlike plastic, which can trap moisture.
Labeling is a game-changer—I’ve found myself with mystery seeds before, and trust me, you don’t want to plant <
When and how to choose the best cucumbers for seed saving
Not all cucumbers are equal when it comes to seed saving. To ensure viable, pure seeds, you must select fully mature fruit from open-pollinated varieties. Hybrid cucumbers—like those labeled "F1"—produce seeds that won’t grow true to type, so skip those entirely.
Instead, focus on heirloom or open-pollinated varieties, which are specifically bred for seed saving.
Look for cucumbers that have reached their full size and color for the variety. For slicing types, this often means a deep green or yellow hue, while pickling cucumbers may stay smaller but still turn fully colored.
The skin should feel slightly soft to the touch—like a ripe avocado—rather than hard or waxy. Avoid cucumbers with yellowing stems or signs of disease, as these can compromise seed quality.
Timing is everything. Harvest cucumbers for seed saving late in the season, ideally after the plant has produced its best fruit. This ensures the seeds have fully developed and are ready for extraction.
If you’re growing multiple varieties, keep them isolated by at least 500 feet to prevent cross-pollination, which can lead to mixed seeds and unpredictable traits in future plants.
| Key Indicator | What to Look For | Avoid |
|---|---|---|
| Variety Type | Open-pollinated or heirloom cucumbers | Hybrid (F1) varieties |
| Fruit Maturity | Fully colored, soft skin, yellowing stem end | Hard, pale, or underripe cucumbers |
| Pollination Isolation | 500+ feet from other cucumber varieties | Mixed plantings without barriers |
| Season Timing | Late-season harvest for fully developed seeds | Early or mid-season cucumbers |
| Health Condition | No signs of mold, pests, or disease | Damaged or diseased fruit |
Once you’ve selected your ideal cucumbers, let them ripen further off the vine. Place them in a cool, dry spot—like a paper bag with air holes—for 3-5 days. This mimics natural overripening and helps the seeds fully mature.
You’ll know they’re ready when the cucumber turns yellow and mushy inside, almost like a squash. Squeeze gently: if the seeds ooze out easily, they’re perfect for saving.
Pro tip: If you’re unsure about a cucumber’s readiness, cut it open and check the seeds. They should be plump and fully formed, not shriveled or still developing. Discard any cucumbers with moldy or discolored seeds, as these won’t germinate well.
By focusing on these key indicators, you’ll maximize your chances of saving high-quality, viable seeds for next year’s garden.
With the right cucumbers in hand, you’re ready to move on to the fermentation and drying process, which we’ll cover in the next section. This step is crucial for removing the gelatinous coating around the seeds and ensuring they’re clean and ready for storage.