
How To
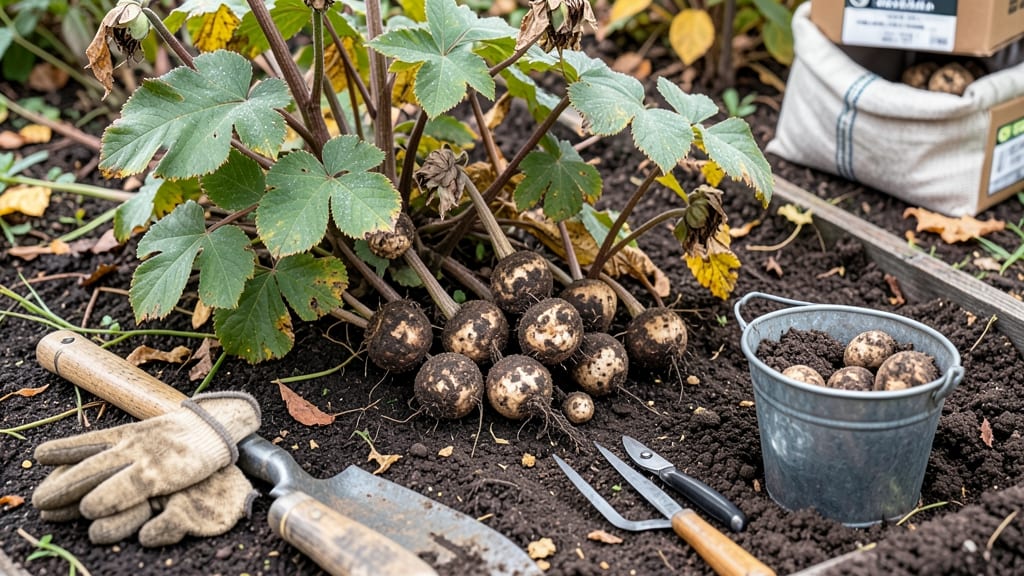
Harvesting dahlia tubers at the right time ensures your 🌼 dahlias survive winter and thrive next season—here’s exactly how to do it without risking rot or damage.
Failing to harvest dahlia tubers correctly can mean losing your prized plants forever—but timing, tools, and technique make all the difference between winter survival and wasted effort.
Most gardeners wait until after the first frost when foliage turns brown and crispy, but even then, improper handling can ruin tubers before they ever make it to storage.
In this guide, I’ll walk you through the step-by-step process, from the perfect moment to dig up tubers to the tools you’ll need and how to store them for regrowth in spring.

When and how to harvest dahlia tubers for maximum winter survival
Harvesting dahlia tubers at the wrong time can turn your winter storage into a game of roulette—will they survive or rot? The critical window for harvesting is after the first frost, when foliage turns brown and crispy.
This timing ensures tubers have fully developed while avoiding rot from lingering moisture. I’ve learned the hard way that waiting too long risks soft, mushy tubers, while harvesting too early leaves them underdeveloped and weak for next season.
Dahlias thrive in well-draining soil with full sun exposure, but their tubers need special care after the growing season ends. The key is to mimic their natural dormancy cycle by letting the plant fully senesce before digging.
This process strengthens tuber resilience and prevents shock. I always mark my calendar for October 15th (the average first frost date in Zone 6a) as my target, but I watch for foliage color changes as the final signal.
Before you grab your shovel, gather the right tools: a garden fork, pruning shears, gloves, and a bucket for sorting. I also keep a soft brush handy to gently clean dirt from tubers without damaging their skin.
The goal is to minimize stress on the tubers while removing them from the ground. Skipping these tools can lead to cuts, bruises, or even broken tubers—all of which compromise winter survival.
Now, let’s get to the step-by-step process. Timing, technique, and tool use all work together to ensure your dahlias return next year. Follow these exact steps to maximize tuber health and storage success.
Step-by-Step Dahlia Tuber Harvesting Guide
- 1 Wait for the right signs: Harvest only after all foliage turns brown and crispy and the ground temperature drops below 40°F (4°C). This ensures tubers are fully mature.
- 2 Cut back the stems: Use pruning shears to trim stems to 2-3 inches above the soil line. This reduces moisture loss and prevents fungal growth during storage.
- 3 Gently lift the tubers: Use a garden fork to loosen soil around the base of the plant. Lift tubers carefully by hand to avoid cuts or bruises—never pull or yank.
- 4 Remove excess soil: Gently brush off dirt with a soft brush to inspect for damage or disease. Discard any tubers that are soft, moldy, or shriveled immediately.
- 5 Cure the tubers: Lay tubers in a shady, dry location (like a garage or shed) for 2-3 days to form a protective skin. This step prevents rot during long-term storage.
- 6 Sort and store: Separate tubers by size and health. Store in a cool (40-50°F), dry place with good airflow, such as a cardboard box filled with peat moss or vermiculite.
One of the biggest mistakes I’ve seen (and made!) is harvesting tubers too early when green leaves remain. This leaves tubers underdeveloped and prone to rotting in storage. Always wait until the foliage is completely brown and crispy—this is your green light to dig.
Another critical step is curing the tubers for 2-3 days before storage. This process hardens their skin, making them more resistant to disease and dehydration during the winter months.
After curing, I store my dahlias in a well-ventilated container filled with dry peat moss or coconut coir. This medium absorbs excess moisture while keeping tubers from touching each other, which reduces rot risk.
I label each container with the dahlia variety and the harvest year to avoid confusion when replanting. Pro tip: Avoid plastic bags or airtight containers—they trap moisture and accelerate rot.
If you’re new to storing dahlias, start small with a few tubers to practice. Pay close attention to temperature and humidity levels—ideal conditions are 40-50°F (4-10°C) with 50-60% humidity. Check tubers monthly for signs of mold or soft spots.
If you notice any issues, isolate the affected tubers immediately to prevent spreading. With the right care, your dahlias can last 3-5 years in storage, giving you stunning blooms year after year.
Remember, the goal is to preserve tuber health while mimicking their natural dormancy. By following these steps, you’ll ensure your dahlias wake up ready to bloom next spring—just as vibrant as the year before. Happy digging! 🌼
Essential tools and preparation for dahlia tuber harvesting
Harvesting dahlia tubers requires the right tools and careful preparation to ensure your plants survive winter. Without proper equipment and pre-harvest care, tubers can rot, dry out, or even fail to regrow.
I’ve learned that a gardening fork, sharp pruners, and protective gloves are non-negotiable for a smooth harvest.
Before digging, adjust your watering routine to reduce soil moisture 1-2 weeks before harvest. This helps tubers dry slightly, making them easier to handle and less prone to damage. I also trim back the foliage to about 6 inches above ground—this minimizes disease risk and directs energy to the tubers.
| Tool/Task | Purpose | Notes |
|---|---|---|
| Gardening Fork | Lifts tubers without crushing | Use a 4-tine fork for delicate roots |
| Sharp Pruners | Trims stems cleanly | Disinfect blades to prevent disease |
| Heavy-Duty Gloves | Protects hands from thorns | Choose gardening-specific gloves |
| Bucket with Holes | Drains excess moisture | Use a 5-gallon bucket for large batches |
| Paper Towels | Wipes off soil debris | Helps spot rot or damage |
After harvesting, prepare your storage area to maintain ideal conditions. Dahlias thrive in a cool, dark space with 50-60°F temperatures and 50-70% humidity. I use a cardboard box lined with peat moss or straw—this mimics natural dormancy conditions and prevents tubers from drying out or rotting.
Label each tuber with its variety name and harvest date using a pencil. This helps track which dahlias need replanting first in spring. I also avoid stacking tubers too high to prevent crushing, which can lead to mold. A single layer in the box keeps them safe and organized.
Finally, let tubers cure for 2-3 weeks before full storage. Place them in a shady, dry spot for 10-14 days to toughen their skins. This step is crucial—it reduces the risk of soft rot during winter. Once cured, store them in your prepared box until spring planting.
With the right tools and prep, your dahlias will regrow beautifully next season—no wasted effort here! 🌼