
How To
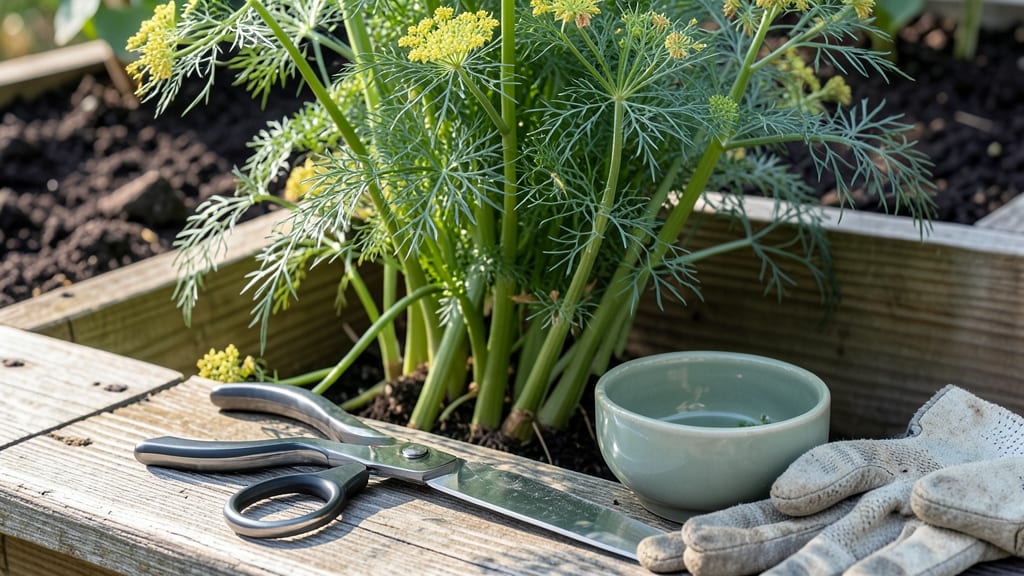
Harvesting dill for pickles at the right time and with the right cut makes all the difference in flavor—think crisp, bright, and tangy instead of bitter or woody.
Picture this: you’ve spent weeks nurturing your 🌿 dill in Zone 6a, and now it’s time to reap the rewards. But if you wait too long or use the wrong technique, those perfect pickles you’re dreaming of might turn out flat or even ruined.
The secret? Knowing when to snip—and how.
You’ll learn the three best cuts for maximum flavor, how to tell when your dill is ready (hint: it’s not when it’s fully mature), and simple tricks to keep your plant thriving so you can harvest again and again.
No more guesswork—just simple, foolproof methods that’ll have your jars packed with dill so fresh it’ll make your neighbors jealous.

The 3 best dill cuts for pickles (and when to use each)
Harvesting dill at the right stage and using the correct cutting technique is the secret to bold, aromatic pickles. The flavor compounds in dill peak just before flowering, but different cuts serve different purposes—whether you need fresh leaves for immediate pickling or seed heads for long-term storage.
Let’s break down the three best methods, their ideal timing, and how each impacts your pickle’s taste.
The wrong harvest can turn your dill bitter or woody, ruining even the best pickle brine. For example, cutting stems too late—after flowering—reduces the anise-like notes that make homemade pickles shine.
Meanwhile, harvesting leaves too early means milder flavor, while seeds harvested too soon won’t develop their full nutty depth. Precision matters, and I’ll show you exactly how to nail it.
| Harvest Method | Best Time to Harvest | Flavor Impact | Preservation Tips | Regrowth Potential |
|---|---|---|---|---|
| Whole Stem Cuts | When stems reach 6–12 inches and leaves are bright green (pre-flowering) | Boldest flavor—ideal for fresh pickles; retains essential oils in stems | Use immediately or store stems upright in water in the fridge for up to 5 days | High—cut 1/3 of stems to encourage bushier growth |
| Leaf-Only Cuts | Throughout growing season when leaves are tender and aromatic | Milder, fresher taste—best for quick-pickling or garnishes | Wash, pat dry, and store in airtight containers with a paper towel for 3–5 days | Moderate—avoid over-pruning main stems to prevent stress |
| Seed-Head Harvest | When seed pods turn brown (late summer/early fall) | Nutty, earthy depth—perfect for fermented dill seeds in pickles | Dry seeds completely, then store in glass jars away from light for up to 1 year | None—plant dies back after seeding |
For whole stem cuts, aim to harvest when your dill plants are 6–12 inches tall but before any flower buds appear. This is when the essential oils are at their peak, delivering that signature tangy kick to your pickles.
Use sharp clean scissors to snip stems just above a leaf node—this encourages the plant to branch out and produce even more harvests. I like to bundle stems and store them upright in a jar of water, mimicking their natural growth, to keep them fresh for up to a week.
If you’re making quick-process pickles, leaf-only cuts are your best friend. Snip individual leaves throughout the growing season whenever they’re large enough to handle. This method is perfect for small-batch pickling or when you only need a handful of leaves.
Just be mindful not to strip the plant bare—always leave at least half the leaves to keep the plant healthy and productive. Store harvested leaves in the fridge wrapped in a damp paper towel to preserve their vibrant green color and crisp texture.
Don’t overlook the power of dill seeds for pickles! When your plants start to flower and the seeds turn brown, it’s time to harvest them for a unique nutty flavor.
Let the seed heads dry completely on the plant, then snip them off and spread them on a baking sheet to finish drying. Once fully dry, crush the seeds lightly and store them in an airtight container.
These seeds add a complex depth to fermented pickles that store-bought dill simply can’t match. Just remember, once you harvest the seeds, your dill plant will bolting and won’t regrow.
Timing is everything when it comes to harvesting dill for pickles. The pre-flowering stage is your golden window for the best flavor, but even then, each cutting method serves a different purpose. For immediate pickling, whole stems or fresh leaves are ideal, while long-term storage benefits from dried seeds.
Pay attention to your plant’s cues—bright green leaves, firm stems, and a strong aroma are all signs it’s ready for the cut.
Pro tip: If you’re growing dill specifically for pickles, consider planting two batches—one for early-season leaves and another for late-season seeds. This way, you’ll have fresh dill for quick pickles and dried seeds for fermented batches all season long.
Just be sure to space your plants properly to avoid overcrowding, which can lead to woody stems and reduced flavor.
One common mistake I see is harvesting dill too late, after the flowers have already opened. At this stage, the plant shifts its energy
Step-by-step guide to harvesting dill without damaging your plant
Harvesting dill at the right time and with the right technique ensures you get the brightest flavor for your pickles while keeping your plant healthy. The key is to cut stems properly and avoid over-harvesting, which can stress the plant.
I’ve learned that timing matters—harvest in the morning after dew dries when oils are most concentrated.
Before you begin, gather your tools: a pair of sharp pruning shears or clean kitchen scissors, a bowl for storage, and a small spray bottle with water.
Always sanitize your tools with rubbing alcohol to prevent disease spread. Dill regrows well if harvested correctly, so you’ll enjoy multiple harvests from a single plant.
- Step 1: Locate the outer stems of your dill plant. These are the thickest, most mature stems that won’t harm the plant’s center.
- Step 2: Use your pruning shears to cut stems at a 45-degree angle, about 1 inch above a leaf node. This encourages new growth.
- Step 3: Harvest 30-50% of the plant at once to avoid stress. For pickles, focus on stems with bright green leaves and minimal flowering.
- Step 4: Rinse stems under cool water to remove dirt, then pat dry with a clean towel or paper towels.
- Step 5: Store in a sealed container in the fridge for up to 1 week, or dry for long-term use. For pickles, use within 3-5 days for peak flavor.
If you’re harvesting for dill seeds (great for pickling spices), wait until the plant flowers and seeds turn brown. Cut the entire seed head and hang it upside down in a paper bag to dry. Shake occasionally to release seeds. This method preserves the plant’s energy for next year’s harvest.
After harvesting, water your dill plant deeply to help it recover. Avoid fertilizing immediately, as new growth needs time to establish. With proper care, your dill will regrow and produce more flavorful stems for future batches of pickles. Consistency is key—harvest every 2-3 weeks during peak season.
For best results, always harvest on a sunny morning when the plant’s oils are at their peak. Avoid harvesting after rain, as moisture can dilute flavor and encourage rot. With these steps, you’ll enjoy a steady supply of fresh dill for your pickling projects all season long.