
How To
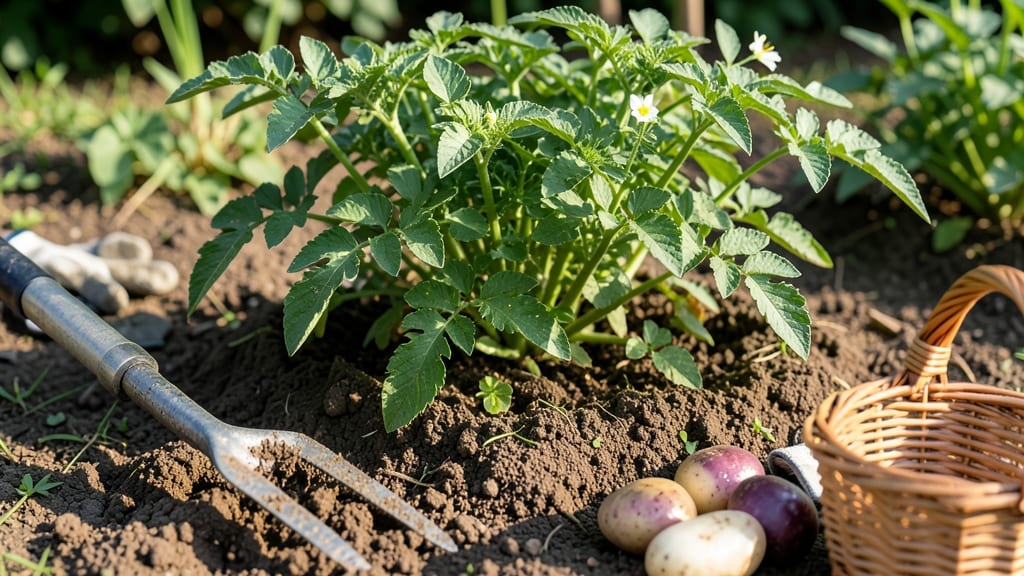
Harvesting potatoes at the right time means the difference between perfectly sized tubers and shriveled scraps — and the key is knowing when to dig them up.
Picture this: you’ve waited months for your 🥔 plants to flourish, only to pull them too early and find tiny, underdeveloped potatoes — or worse, leave them too long and watch them rot in the soil.
The good news? There are 3 simple tactile tests to nail the timing every time, whether you’re growing early varieties or late-season spuds.
From checking flower blooms to testing tuber firmness, these methods work in Zone 6a and beyond, ensuring you harvest at peak flavor and size. No more guesswork, just a foolproof way to dig up your best crop yet.
Below, I’ll walk you through each test, plus how to store your harvest so it stays fresh for months. Ready to turn your garden into a potato powerhouse?

3 Tactile tests to determine when to harvest potatoes perfectly
Knowing exactly when to harvest potatoes can feel like a guessing game—until you learn these science-backed tactile tests. Unlike relying on days after planting (which varies by variety), these physical checks give you precise, hands-on confirmation that your tubers are ready.
Whether you're growing Russet, Yukon Gold, or fingerlings, these methods work for all types. The key is paying attention to flower signals, stem flexibility, and tuber size—each revealing critical clues about maturity.
Many gardeners make the mistake of harvesting too early for new potatoes (small, tender tubers) or too late for storage potatoes (risking rot). The tactile tests below eliminate guesswork by focusing on what you can see and feel in your garden.
Start with the flower inspection for early warning signs, then move to the stem bend test and tuber size check for final confirmation. Mastering these will transform your harvest from hit-or-miss to consistently perfect.
- 1. Flower Inspection: For flowering varieties, harvest when 50% of blooms fade and drop. Non-flowering types skip this step.
- 2. Stem Bend Test: Gently bend a stem near the soil—if it snaps cleanly, tubers are ready. If it bends without breaking, wait 1-2 weeks.
- 3. Tuber Size Check: Dig up a test tuber—if it's 2-3 inches wide with firm skin, harvest immediately.
The flower inspection is your first line of defense, especially for varieties like Kennebec or Red LaSoda. When half the flowers on your plant have dropped naturally, it signals the plant is redirecting energy from blooms to tuber development.
This is nature’s way of telling you, "I’m done flowering—time to focus on roots!" For non-flowering varieties (like some Yukon Gold strains), skip this step and move directly to the stem test.
Pro tip: Use a small hand trowel to gently lift soil around stems—this reveals early signs of tuber formation without damaging the plant.
Next, the stem bend test is a game-changer for precision. Here’s how to do it right: Choose a healthy stem near the base of the plant (not the woody main stalk) and grasp it between your thumb and forefinger.
Apply gentle pressure—downward, not sideways—until you feel resistance. If the stem snaps cleanly (like a dry twig), your potatoes are ready. If it bends like green celery, wait another week.
This test works because mature tubers signal the plant to stop sending nutrients upward, making stems brittle. Avoid testing in wet soil, as moisture can give false "flexible" results.
Many gardeners overlook the tuber size check until the plant is already senescing (dying back), leading to shrunken harvests. To test, use a small hand fork to carefully dig down 6 inches beside the plant—just enough to expose a few tubers.
Look for these three key indicators: 2-3 inch diameter, firm skin (not soft or wrinkled), and a brown stem end (not green). If tubers are smaller than a golf ball, they’re not ready.
If the skin pierces easily with your thumbnail, they’re overripe. For new potatoes (harvested small), you’ll dig when tubers reach 1-2 inches, but these won’t store well.
Avoid these common mistakes that sabotage perfect harvests: Harvesting after a hard frost (tubers turn sweet and mealy), using a shovel too close to stems (risks cutting tubers), or leaving potatoes in the soil too long (they’ll sprout and rot).
Instead, use a stiff garden fork to loosen soil in a wide circle around the plant, then gently lift tubers to avoid bruising. For sandy soil, tubers are easier to spot—just shake off excess dirt.
In clay soil, you may need to dig deeper (8+ inches) to find them.
Regional climate plays a surprising role in harvest timing. In cool climates (USDA Zones 3-5), potatoes often mature earlier (70-90 days) due to shorter growing seasons, while warm climates (Zones 8-10) can extend maturity to 120 days.
For example, early varieties like 'Red Norland' might be ready by early June in Zone 4, but the same variety in Zone 9 could wait until July. Always adjust your tactile tests for local conditions—hotter weather speeds up tuber development, while cool, cloudy spells delay it.
Keep a garden journal to track what works best in your microclimate.
For container-grown potatoes, the tactile tests still apply, but with one key difference: tubers grow in a limited root zone, so they may mature faster. Check for readiness by gently squeezing the pot sides—if you feel resistance from tubers, it’s time to harvest.
Empty the pot carefully, brushing off soil to inspect for fully formed tubers. If you’re growing potatoes in straw (a no-dig method), pull back the straw to spot tubers through the holes—this lets you see their size without digging.
Once you’ve confirmed potatoes are ready using these tests, act quickly to preserve quality. New potatoes should be eaten within 3-5 days, while storage potatoes need proper curing (2-3 weeks in a dark, humid space at 50-60°F).
For long-term storage, choose a cool, dark basement with high humidity (85-90%) and avoid refrigeration (it turns tubers sweet). If you’re unsure whether your potatoes are fully mature, perform the stem bend test again after 5-7 days—this extra check catches many near-miss harvests.
Mastering these three tactile tests will give you confidence in every harvest, whether you’re growing potatoes for immediate eating or long-term storage.
The key is consistency: inspect flowers weekly, test stems every 3-5 days as you near the expected harvest window, and dig a test tuber when you’re unsure. With practice, you’ll develop an instinct for the perfect moment—when your potatoes are firm, flavorful, and free of blemishes.
Happy digging! 🥔
Harvest timing by potato variety: early vs. late season guidelines
Not all potatoes ripen on the same schedule—some varieties like Yukon Gold mature in just 70-80 days, while others like Russet need 100-120 days. Understanding these timelines helps you avoid digging too soon (tiny tubers) or too late (shriveled spuds).
Climate also plays a role: cooler regions speed up growth, while warm areas may slow maturity.
Your harvest window depends on both variety and local climate. Early-season potatoes (like Red Pontiac) thrive in short growing seasons, while late-season types (like Kennebec) need longer summers. Even within varieties, a 1-2 week window separates perfect harvest from disappointment.
🌱
For early varieties, aim to harvest when 50-70% of flowers have bloomed—this signals tubers are ready. Late-season types like Russets should wait until foliage turns yellow and dies back naturally. In warm climates, potatoes may mature faster; in cool regions, extend the timeline by 1-2 weeks.
Pro tip: Use the thumbnail test—if a tuber’s skin resists your nail, it’s ready. If it pierces easily, wait 1-2 weeks. For new potatoes (small, tender spuds), harvest when tubers are 1-2 inches wide—but these won’t store long-term.
🌿
Adjust your schedule based on local frost dates. If frost threatens before harvest, dig immediately—even slightly underripe potatoes are better than none. For successive planting, stagger early and late varieties to enjoy a continuous harvest from spring to summer.