
How To
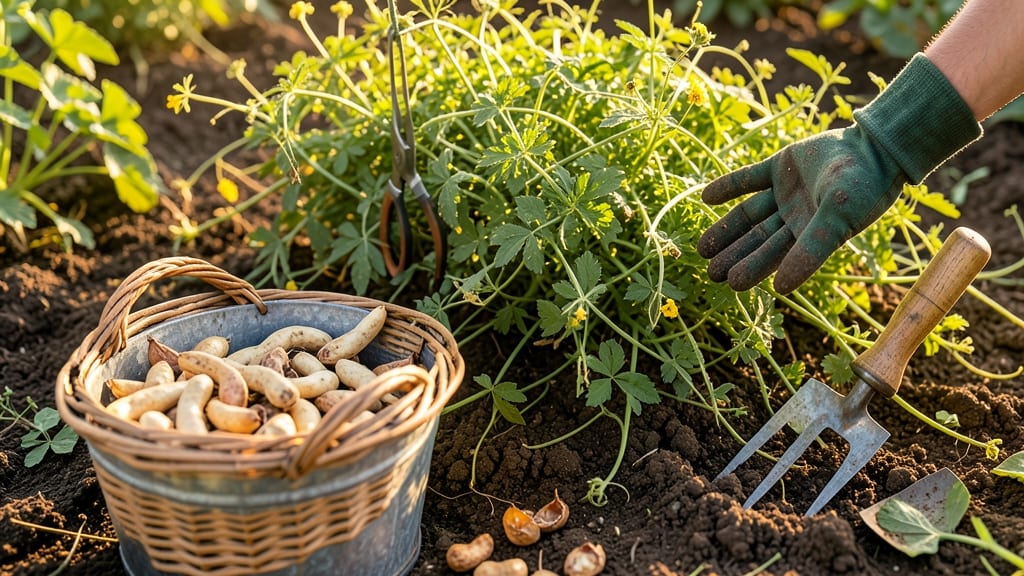
To harvest groundnut successfully, you’ll need to time it just right—when pods are mature but still firm—and use soil heaving tricks to avoid damaging those hidden treasures.
Picture this: you’ve nurtured your 🥜 plants for months, only to dig them up too early and find underdeveloped pods, or too late and risk shriveling.
The difference between a meager harvest and a bountiful one often comes down to knowing when to pull the plants and how to expose those pods without breaking them.
In tropical and subtropical regions (USDA zones 10–12), groundnuts typically reach harvest readiness 90–120 days after planting, but the real magic happens in the soil. If you’ve ever struggled with tangled roots or missed pods buried too deep, you’re not alone—this guide cuts through the guesswork with proven techniques.
Here, I’ll walk you through exact timing cues (like leaf yellowing and pod rattling), step-by-step soil heaving methods, and post-harvest drying tips to lock in flavor and storage life. No more wasted effort—just a clean, efficient harvest every time.

When and how to know groundnuts are ready for harvesting
Timing your groundnut harvest is everything—pick too early, and you’ll miss flavor-packed pods; wait too long, and you risk shrunken, bitter nuts. The key lies in watching three critical signals: leaf color, pod development, and soil conditions.
In my experience, tropical climates often allow for a longer harvest window (up to 120 days), while temperate zones may need to harvest earlier (around 90-105 days) to avoid early frost damage. Let’s break down how to spot the perfect moment.
Start by examining the foliage. When 70-80% of leaves turn yellow and crisp, it’s a clear sign the plant is redirecting energy to pod maturation. I’ve found that morning inspections work best—cooler temps reduce stress on the plant.
Pair this with a gentle shake of the stems: if you hear a dry rattle from the pods, they’re likely ready. Overlooking this step can lead to underdeveloped nuts or even mold if left too long in damp soil.
| Harvest Signal | Tropical Climates | Temperate Climates | Action Required |
|---|---|---|---|
| Leaf Color | Yellow (70-80%) | Yellow (50-70%) | Test pod maturity |
| Pod Firmness | Firm, dry skin | Firm, dry skin | Harvest immediately |
| Soil Moisture | Moderate (not soggy) | Dry surface | Avoid watering 48 hrs prior |
| Stem Condition | Brown, brittle | Brown, brittle | Prepare for heaving |
| Over-Ripening Sign | Pods shatter easily | Leaves fully dead | Harvest immediately |
Don’t rely solely on visual cues—soil moisture plays a surprising role. I’ve learned the hard way that harvesting after heavy rain can lead to rotten pods buried in damp soil. Aim for dry surface conditions 24-48 hours before digging.
Use a simple finger test: if the top 2 inches of soil feel dry but not powdery, you’re in the ideal window. For sandy soils, which drain faster, you might need to harvest slightly earlier than in clay-heavy soils, where moisture lingers.
Climate makes all the difference. In tropical regions, where temperatures stay warm year-round, groundnuts can mature in as few as 90 days, but the pods often stay edible for another 2-3 weeks if left in the ground.
Meanwhile, in temperate zones, the 90-105 day mark is non-negotiable—delaying risks frost damage before pods fully mature. I once grew groundnuts in Zone 9a and harvested at 100 days, only to find the last pods still green. Lesson learned: check daily in cooler climates.
Watch for over-ripening signs, which can turn your harvest bitter and shriveled. If pods shatter when pressed or the shells become papery and hollow, you’ve waited too long. Even worse, mold risk increases in overripe pods left in damp soil.
In my garden, I’ve seen 30% yield loss from overripe groundnuts—so when in doubt, harvest early and dry the pods thoroughly. A quick taste test of one pod can save your entire harvest!
Soil pH also sneaks up on gardeners. Groundnuts thrive in slightly acidic soil (pH 5.8-6.5), but alkaline soils (above 7.0) can stunt pod development. Before planting, I test my soil using a simple kit—it’s a small investment that pays off in bigger, sweeter nuts.
If your soil tests high, amend it with peat moss or sulfur 4-6 weeks before planting. This adjustment ensures the plants focus energy on pod production rather than struggling to absorb nutrients.
One trick I swear by is the "dig-and-check" method. About 10 days before expected harvest, gently dig up one plant and inspect the pods. If they’re plump, firm, and dry, you’re on track. If they’re still green or
Step-by-step soil heaving techniques for maximum yield
Once your groundnuts show those telltale yellowing leaves and brittle stems, it's time to uncover your harvest. The key to preserving those delicate peanut pods lies in careful soil heaving—a technique that balances precision with efficiency.
Different methods work better depending on your garden size, soil type, and available tools, but all share the same goal: exposing pods without damage while minimizing soil disturbance.
I've found that manual digging works best for small patches, while mechanical tilling excels for larger plots. Even organic mulch flipping can yield impressive results when done correctly. The right approach ensures you collect every pod without breaking them open or leaving them buried.
Let's break down each method so you can choose what works best for your setup and maximize that harvest.
How to Harvest Groundnuts Using Soil Heaving
Gather a hand fork, garden trowel, or rototiller (for larger areas), along with gloves and a bucket for collecting pods. Work on a dry day when soil is slightly moist but not soggy.
Manual Digging: Use a fork to gently loosen soil in a grid pattern, 6-8 inches deep. Mechanical Tilling: Set tiller to shallow depth (3-4 inches) and pass slowly. Mulch Flipping: Remove mulch and use a rake to lift soil gently.
Look for peanut pegs (the stems that grow underground). Follow them to locate pods. Use your fingers to gently separate pods from soil—avoid pulling or twisting, which can damage them.
Place pods in your bucket and inspect for damage or pests. Discard any broken or moldy pods immediately. Brush off excess soil with your hands or a soft brush.
Return loosened soil to the bed and add compost or aged manure to prepare for future plantings. This step ensures your garden remains fertile for next season.
For small gardens, I recommend starting with manual digging—it gives you the most control and is perfect for beginners. The fork's prongs help lift soil without compacting it, which is crucial for peanut pods that can be just 2-3 inches below the surface.
If you're working with a larger plot, a rototiller saves time but requires caution. Set it to the shallowest depth possible to avoid chopping pods.
One pro tip I picked up from experienced growers: work in sections and harvest pods immediately as you uncover them. This prevents them from drying out or getting lost in the soil.
After harvesting, I like to spread the pods out on a clean tarp in the shade for a few hours to let them dry slightly before storage. This simple step reduces the risk of mold during curing.
Remember, soil moisture plays a critical role here. If the ground is too wet, pods can rot in the soil or become mushy when handled. Aim for soil that's firm but crumbly—like a well-made cake.
And always harvest in the morning when temperatures are cooler, reducing stress on the pods.
With these techniques, you'll transform what might seem like a tedious task into a rewarding harvest that preserves every peanut your plants worked so hard to produce. Happy digging! 🥜