
How To
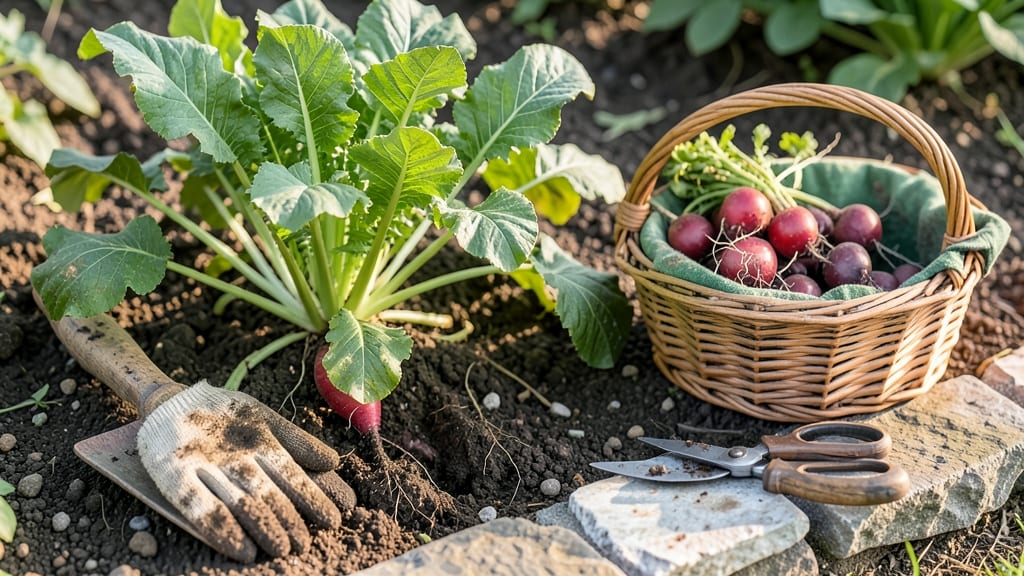
To harvest radishes at their crisp, peppery peak, pull them when roots reach 1-2 inches in diameter—any larger and they turn woody and bitter.
Picture this: you’ve been watching your 🥕 radish patch grow for just three weeks, and now the roots are plump and ready. Miss this window, though, and you’ll end up with tough, pithy roots that taste like disappointment. The key is acting fast once they hit that perfect size.
Harvesting at the right time isn’t just about flavor—it’s also about avoiding stress on the plant. Overgrown radishes split easily, and waiting too long can even trigger early bolting (that’s when they flower and go to seed).
Below, I’ll show you exactly how to check for readiness, the best tools to use, and how to pull them without damaging those delicate roots.
You’ll also learn how to store your harvest so it stays crisp for weeks, plus troubleshooting tips for common mistakes like cracked roots or uneven growth. Ready to turn your garden into a radish feast?

When to harvest radishes: ideal size and soil conditions for perfect flavor
Timing your radish harvest is everything—pull them too early, and they’ll be tiny and bland; wait too long, and they’ll turn woody and bitter. The sweet spot? When roots reach 1-2 inches in diameter, typically 25-30 days after planting.
This window ensures maximum crispness and that signature peppery kick we all love. Climate matters too: cooler spring and fall seasons speed up growth, while hot summers may slow it down slightly.
Beyond size, watch for visual maturity cues like vibrant color and leaf size.
A radish’s top greens should be 4-6 inches tall, and the leaves may show slight yellowing at the edges—a sign of readiness. Soil moisture also plays a role: harvest when the soil is lightly moist (not soggy), making roots easier to pull cleanly.
Overly dry soil can crack roots, while waterlogged soil makes them muddy and prone to rot.
Here’s the key: Radishes grow fastest in cool weather (50-75°F), so adjust your timing if you’re in a hotter zone. In USDA Zone 6a, aim for April-May or September-October harvests. If your garden stays warm year-round, you might need to plant successive crops every 2-3 weeks to keep the harvest window tight. Early varieties like ‘Cherry Belle’ mature in just 20-25 days, while larger types like ‘Daikon’ may take up to 30-40 days.
| Harvest Indicator | Specification | Actionable Tip |
|---|---|---|
| Root Diameter | 1-2 inches | Use a ruler to check—thinner than a pencil means wait! |
| Top Greens Height | 4-6 inches | Lush, vibrant leaves signal peak flavor; yellowing edges confirm readiness. |
| Soil Moisture | Lightly moist | Harvest after morning watering to avoid muddy roots. |
| Temperature Range | 50-75°F | Cooler temps speed growth; hotter weather may delay harvest by 1-2 weeks. |
| Variety Maturity | 20-40 days | Check seed packets—early types like ‘Easter Egg’ mature faster than ‘Black Spanish.’ |
If you miss the 1-2 inch window, don’t panic—radishes can still be harvested up to 3 inches in diameter, though they’ll lose crispness and gain a milder, slightly bitter taste. Overgrown radishes (those with thick, woody roots) can still be eaten, but they’re best suited for soups or fermenting.
To avoid this, sow radishes in succession every 2 weeks for a continuous harvest, especially in longer growing seasons.
Another pro tip: Harvest in the morning when roots are firm and soil is cooler. This preserves their crisp texture and makes them easier to pull without damage. Grip the greens, not the root, and twist gently to avoid breaking the root—this also helps prevent soil from clinging.
After harvesting, rinse roots immediately in cool water to remove dirt, then store them in the fridge for up to 2 weeks (or longer if wrapped in a damp paper towel).
For container gardeners, timing is even more critical since space is limited. Thin seedlings early to give roots room to grow to 1-2 inches without crowding.
If you’re growing daikon radishes, they can reach 10+ inches long, so check their specific variety guidelines—these take longer to mature but are equally delicious when harvested at the right size. Color consistency is another clue: vibrant reds, purples, or whites mean peak flavor, while pale or streaky roots may indicate uneven growth or nutrient issues.
One common mistake is harvesting based solely on days after planting without checking size. Cooler weather speeds growth, while heat slows it down—so always verify with your fingers or a ruler. Early varieties like ‘Cherry Belle’ are foolproof for beginners, while heirloom types like ‘French Breakfast’ offer more complex flavors but require precise timing. Mark your calendar when you plant to track progress, or use a harvest journal to note when your radishes typically reach size in your climate.
Finally, soil health matters. Well-draining, loamy soil with a pH of 6.0-7.0 ensures even growth and sweet flavor. If your soil is clay-heavy or sandy, amend it with compost or aged manure before planting. Over-fertilized radishes can bolt (send up flowers) prematurely, ruining their flavor.
Stick to a light feed of 5-10-10 fertilizer early in the season, and avoid nitrogen-heavy amendments once seeds sprout. With these tips, you’ll harvest crisp, flavorful radishes every time—no bitter surprises!
Step-by-step radish harvesting guide to preserve crisp texture
Harvesting radishes at the right moment transforms your garden into a crisp, peppery flavor powerhouse. The key is acting quickly—once roots reach 1-2 inches in diameter, they’re at their sweetest.
Delaying just a few days can turn them woody and bitter, ruining that satisfying crunch. I’ve learned the hard way that patience isn’t always a virtue when it comes to radishes!
To preserve that perfect texture, you’ll need the right technique and tools. Start by gathering a few essentials: a small hand fork or garden trowel for stubborn roots, a bucket of cool water for rinsing, and a clean kitchen towel for drying.
Avoid pulling by the greens—this can damage the root. Instead, focus on the soil and root structure for a clean harvest.
How to Harvest Radishes Without Damaging Roots
- Step 1: Check Soil Moisture – Gently loosen the soil around the radish with your fingers. Dry soil makes roots brittle, while soggy soil can cause them to break. Aim for slightly damp but not waterlogged conditions.
- Step 2: Grip the Root – Wrap your thumb and forefinger around the top of the radish root, about ½ inch below the soil line. This gives you leverage without pulling the greens, which can snap.
- Step 3: Lift Gently – Apply steady upward pressure while twisting slightly. Most radishes will pop free easily, but if resistance occurs, use your hand fork to loosen the soil around the sides.
- Step 4: Rinse Immediately – Plunge harvested radishes into your cool water bucket to remove dirt. Rub gently with your fingers to clean crevices—soil residue can cause spoilage.
- Step 5: Dry Thoroughly – Lay radishes on a clean kitchen towel in a single layer. Let them air-dry for 1-2 hours in a shady, well-ventilated area to prevent rot.
- Step 6: Store Properly – Place dried radishes in a perforated plastic bag or ventilated container. Store them in the crispest part of your fridge (usually the vegetable drawer) where they’ll stay fresh for 1-2 weeks.
What if your radishes have outgrown their prime? Don’t toss them! Overgrown radishes (those larger than 2 inches in diameter) can still be salvaged by peeling the outer layers and using them in soups or stir-fries, where their texture won’t be the star.
The key is to harvest early—most varieties are ready in just 25-30 days, so plan successive plantings every 2 weeks for a continuous harvest.
Pro tip: Save the radish greens! They’re packed with nutrients and can be chopped into salads or sautéed like spinach. Just trim the greens at the base when harvesting the roots—this encourages larger root growth in the remaining plants. A little multitasking goes a long way in the garden!
After harvesting, keep an eye on your soil. Radishes are light feeders, so avoid fertilizing after planting—this can lead to bolting (premature flowering). Instead, focus on consistent watering and well-draining soil to set up your next planting for success. Happy harvesting!