
How To
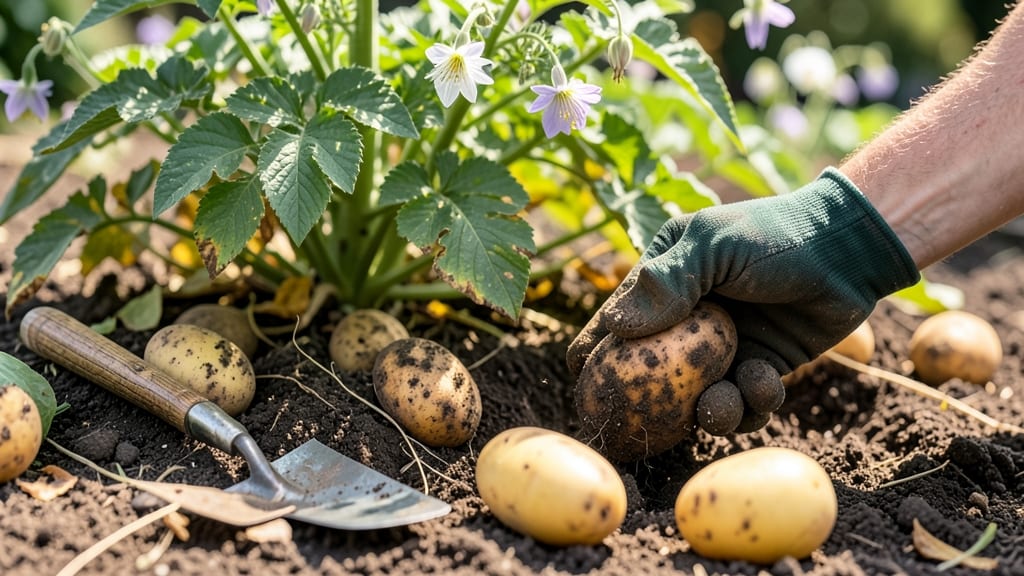
To know when to harvest potatoes, watch for three key signs: yellowing foliage, blooming flowers, and tubers reaching 2-3 inches in size—miss these, and you risk small potatoes or wasted effort.
Digging up potatoes too early or too late can ruin your harvest—here’s how to spot the perfect moment using simple, foolproof visual cues most gardeners miss.
Most varieties like Yukon Gold or Red Pontiac signal readiness when leaves turn yellow and die back, but early harvesters (like new potatoes) need a different approach.
Below, I’ll show you how to check tuber size without damaging the plant, when to dig for baby potatoes vs. mature harvests, and why soil conditions matter for storage quality.

3 Key visual signs your potatoes are ready for harvesting
Timing your potato harvest perfectly ensures you get the largest, most flavorful tubers without sacrificing storage quality. Many gardeners struggle to know exactly when to dig, often harvesting too early for small potatoes or too late for shriveled, green-skinned ones.
The secret lies in three visual cues your potato plants give you—each signaling a different stage of readiness. Ignoring these signs can mean wasted effort or poor-tasting potatoes. Let’s break down what to watch for in your garden.
First, understand that potatoes mature at different rates depending on the variety. Early-season types like 'Yukon Gold' may be ready in just 60-70 days, while late-season varieties like 'Russet Burbank' need 100-120 days.
But no matter the type, these three visual markers will tell you when it’s time to grab your fork and dig. Paying attention to them saves you from guessing and ensures a bountiful harvest every time.
Here’s the game-changer: these visual signs work together like a checklist. When you spot two or all three of these cues, your potatoes are nearly ready. But each one carries unique meaning—some signal baby potatoes are forming near the surface, while others mean it’s time for a full harvest.
Let’s dive into each one so you never miss the perfect moment.
Flowers Appear (For Seed Potatoes)
When your potato plant blooms, it’s a clear signal that tubers are forming underground. For seed potatoes, harvest when flowers fade—this is your cue for baby potatoes. For table potatoes, wait a few more weeks after blooms drop.
Leaves Turn Yellow and Die Back
This is the most reliable sign for mature potatoes. When about 50-75% of foliage yellows and wilts, it’s time to harvest. Late-season varieties often need this full yellowing phase to develop maximum tuber size.
Tubers Are 2-3+ Inches in Diameter
For a gentle test, brush back soil near the plant base. If you find tubers the size of a golf ball or larger, they’re ready. Smaller ones (under 1 inch) are best harvested earlier as new potatoes.
The first visual cue—flower blooms—is especially useful for early-season varieties. When your potato plant sends up those delicate white or purple flowers, it’s a clear sign that tubers are forming underground.
For seed potatoes, you can harvest right after the flowers fade, as this is when baby potatoes are at their peak. But if you’re growing table potatoes, wait an extra 2-3 weeks after the blooms drop to let the tubers mature further.
Why does this matter? Flowers indicate the plant has shifted its energy from leaf growth to tuber development. Skipping this step means you might harvest potatoes that are still small and underdeveloped.
Pro tip: If you’re growing 'Red Pontiac' or similar varieties, mark the day flowers appear in your garden journal—it’s your first countdown to harvest.
Next, keep an eye on your foliage. When about half to three-quarters of the leaves turn yellow and start to die back, this is your second major cue. This yellowing happens because the plant is redirecting nutrients from the leaves to the tubers below ground.
For late-season varieties like 'Russet Burbank', this yellowing phase is critical—it often means the tubers have reached their maximum size. If you harvest before this stage, you’ll miss out on larger potatoes.
Here’s where many gardeners make a mistake: they assume yellow leaves mean the plant is diseased. But in potatoes, this is a natural process signaling maturity.
The key is to act quickly once you see this yellowing—wait too long, and the tubers may start to shrivel or develop green skin from exposure to light, which makes them bitter. I’ve learned this the hard way with my 'Kennebec' potatoes—always harvest within a week of seeing widespread yellowing.
The third and final visual cue is the most hands-on: checking tuber size. Once your potatoes have been growing for 8-12 weeks (depending on the variety), gently brush back the soil near the plant base to peek at the tubers.
If they’re about the size of a golf ball or larger—roughly 2-3 inches in diameter—they’re ready for harvest. This is especially important for varieties like 'Yukon Gold', which are prized for their buttery texture when fully mature.
For baby potatoes or early harvests, you can dig when tubers are smaller—around 1 inch in diameter. These are perfect for quick cooking and have a slightly sweeter flavor. But if you’re aiming for storage potatoes, wait until they’re larger.
A simple trick I use is to mark a few plants when I first see tubers forming, then check them weekly. This way, I can harvest at the perfect size without damaging the rest of the crop.
One common question I get is: “What if I see these signs but the potatoes are still small?” This usually happens with early-season varieties or if the growing conditions weren’t ideal. In that case, give your plants a few more weeks or check the variety’s days to maturity.
For example, 'Early Girl' potatoes are ready in about 60 days, while 'Monalisa' takes closer to 90 days. Always refer to the seed packet for guidance.
Finally, remember that these visual cues work together. You might see flowers before the leaves yellow, or tubers might reach harvest size before the foliage fully dies back. The best approach is to combine these signs with a little gentle probing of the soil.
If two out of three cues are present, it’s time to start harvesting. And if you’re unsure, a small test harvest—digging just one plant—can give you peace of mind before committing to the full crop.
How to check potato size without damaging the plant (step-by-step guide)
Checking potato size without harming the plant is easier than you think! Most gardeners assume they must dig up the entire plant to see progress, but you can test tuber development with just your hands or a small tool.
For new potatoes (harvested early), look for tubers near the soil surface that are 1-2 inches in diameter. These are ready when the skin resists gentle pressure from your thumbnail but isn’t fully hardened.
Mature potatoes, like Yukon Gold or Russet Burbank, need a different approach. Wait until foliage yellows and dies back completely before testing size—this ensures full development without wasting effort.
Step-by-Step: How to Test Potato Size
- Step 1: Choose a sunny day after watering to soften the soil. Avoid testing after rain to prevent damage.
- Step 2: Use a small hand trowel to gently loosen soil around the plant’s base. Work slowly to avoid cutting tubers.
- Step 3: Look for tubers near the surface (new potatoes) or deeper (mature potatoes). Gently brush away soil to expose them.
- Step 4: Use your thumbnail to press the skin. If it resists but doesn’t dent, the potato is ready. For baby potatoes, aim for 1-2 inches in diameter.
- Step 5: If tubers are smaller than 1 inch, wait 1-2 weeks and retest. For mature potatoes, wait until foliage dies back completely before full harvest.
- Step 6: After testing, cover tubers with soil and water lightly to help them recover. Avoid disturbing them again for 1-2 weeks.
Timing matters! Early varieties like Red Norland are ready in 60-80 days, while late varieties like Kennebec need 100-120 days. Always check your seed packet for variety-specific guidelines.
Pro tip: If you’re unsure, dig up one plant as a test. This gives you a clear idea of tuber size without risking the entire crop. Once you confirm readiness, harvest the rest within 1-2 weeks.
Remember, potatoes store best when harvested at the right size and cured in a cool, dark place for 1-2 weeks before storage. This process thickens the skin and improves shelf life.