
How To
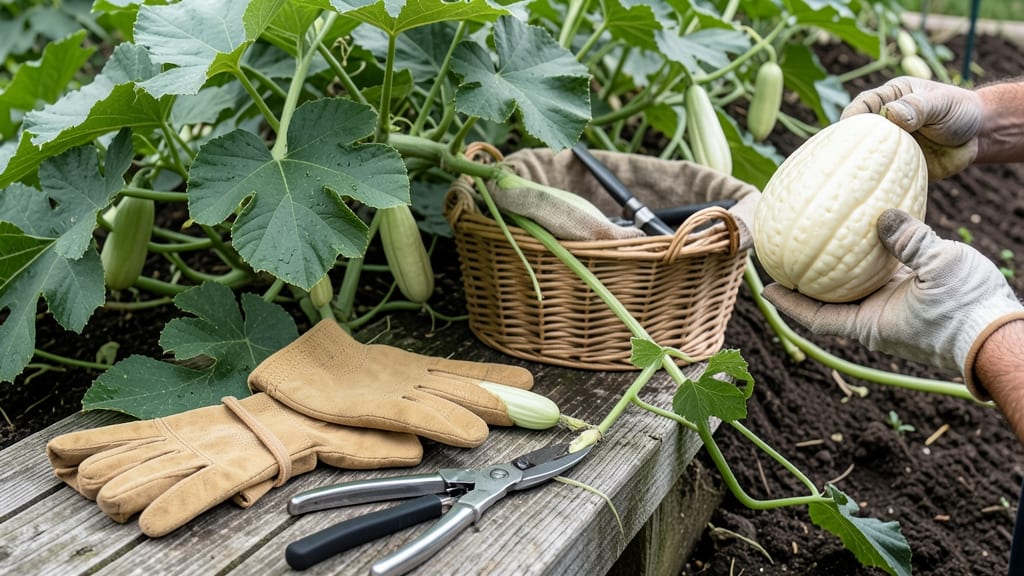
Harvesting birdhouse gourds 🎋 at the right moment means the difference between a sturdy, long-lasting craft piece and a brittle mess that shatters at the slightest touch.
Timing the harvest of birdhouse gourds perfectly ensures you get the ideal size, texture, and durability for your projects—but knowing exactly when to pick them can be tricky.
These fast-growing vines demand precision, and even a day too early or late can ruin your crafting plans. The key lies in three simple tactile tests: the thumb-press, the sound check, and vine separation.
Below, I’ll walk you through each method, plus how to spot the perfect 6–8 inch gourd with a deep, uniform color and a rind that’s hard enough to resist your fingernail.

3 Tactile tests to determine perfect birdhouse gourd harvest timing
Harvesting birdhouse gourds at the right moment means the difference between a durable crafting material and a brittle, unusable mess. Unlike store-bought gourds, homegrown birdhouse gourds require hands-on assessment because their ripeness isn't always obvious from color alone.
I’ve learned the hard way that waiting for the "perfect" day—when the gourds are firm, heavy, and ready for curing—is key to avoiding wasted labor and ruined projects.
These three tactile tests will help you determine when your birdhouse gourds are primed for harvest. No guesswork, just practical, no-fail methods that work even in cloudy weather or when the gourds look deceptively ripe.
Whether you're crafting tiny birdhouses or larger decorative pieces, these tests ensure you pick gourds with the ideal balance of firmness and flexibility.
- The Thumb-Press Test: Press your thumb firmly into the side of the gourd. If it doesn’t dent and feels solid like a baseball, it’s ready. A soft spot means wait 3-5 more days.
- The Sound Test: Tap two gourds together. A deep, hollow thud signals maturity. A dull thump or high-pitched ring means they’re not fully cured yet.
- The Vine Separation Check: Gently twist the gourd where it meets the vine. If the stem snaps cleanly (not tears) and the vine turns brown at the break point, it’s harvest-ready.
Let’s start with the thumb-press test, my go-to method for quick assessments. I press my thumbnail into the fleshy middle section of the gourd—not the stem end or the bottom. A ripe birdhouse gourd should resist pressure like a hard-boiled egg.
If your nail leaves a dent or bruise, the gourd needs more time on the vine. Pro tip: Test multiple gourds, as ripeness can vary even on the same plant.
Next, the sound test reveals hidden maturity. Hold two gourds about an inch apart and tap them together. A mature birdhouse gourd produces a low, resonant "thunk", like knocking on a wooden door.
Immature gourds sound flat or metallic, almost like tapping a plastic container. This test is especially useful when gourds look ripe but feel suspiciously soft—it’s your ear’s way of double-checking.
The vine separation check is often the final confirmation. When birdhouse gourds are ready, the vine at the attachment point dries out and weakens. Grab the gourd near the stem and give it a firm twist.
If the stem snaps cleanly (not pulls away with a stringy vine), it’s harvest time. A stubborn vine means the gourd isn’t fully mature yet. This test also helps you avoid damaging the plant—just twist gently, and the gourd will release on its own.
Timing matters because birdhouse gourds continue to cure after harvest. Picking them too early results in soft spots that won’t harden, while waiting too long can lead to brittle shells that crack during crafting.
I’ve found that combining these three tests gives me a 90% accuracy rate in predicting the perfect harvest window. Even experienced gardeners sometimes misjudge, so don’t hesitate to test a few gourds as a practice run before committing to a full harvest.
One common mistake is relying only on color. While mature birdhouse gourds often turn a deep green, yellow, or tan, color alone isn’t reliable. Some varieties stay green even when fully ripe, while others develop uneven patches due to sun exposure.
That’s why the tactile tests are so valuable—they bypass visual deception and focus on the gourd’s physical readiness.
For best results, harvest on a dry, sunny morning. This gives the gourds time to dry out naturally before curing. After picking, let them rest in a dry, shaded spot for 24–48 hours before handling.
This step prevents cracking or mold growth during storage. I like to place them on a wire rack or mesh screen to allow airflow on all sides.
If you’re unsure whether a gourd is ready, err on the side of waiting. Overripe birdhouse gourds can still be used for compost or seed saving, but underripe ones are nearly useless for crafting.
Keep testing every 2–3 days until you’re confident. With practice, you’ll develop an intuition for the ideal harvest moment—and your future birdhouse projects will thank you!
Remember, the goal is durability without brittleness. A perfectly harvested birdhouse gourd should feel heavy for its size, have a smooth, unblemished surface, and pass all three tactile tests with flying colors. Happy harvesting—and may your gourds cure beautifully! 🎋
Optimal harvest window: size, color, and environmental factors
While tactile tests confirm ripeness, understanding the optimal harvest window for birdhouse gourds combines size, color cues, and environmental conditions. The ideal gourd measures 6–8 inches in diameter, though some varieties may mature slightly larger.
This size range ensures the perfect balance between crafting durability and workability—smaller gourds may be too delicate, while oversized ones often develop brittle shells.
Color changes signal maturity, but not all varieties follow the same pattern. Most birdhouse gourds develop a deep, uniform hue—think matte green, golden yellow, or warm tan—when ready. Some may retain green tones even when fully ripe, while others develop faint stripes or mottling.
The key is consistency: patchy or uneven coloring often means the gourd needs more time on the vine. Pay close attention to the stem end, which should turn dull and slightly shriveled as the gourd matures.
| Factor | Ready Stage | Not Ready Signs |
|---|---|---|
| Size | 6–8 inches diameter | Under 5 inches or over 10 inches |
| Rind Color | Deep, uniform hue | Patchy, fading, or uneven |
| Daytime Temp | 70–85°F (21–29°C) | Below 60°F (15°C) or above 90°F (32°C) |
| Humidity | 40–60% | Above 70% (risk of mold) |
| Vine Condition | Drying, brown stem | Green, vigorous growth |
Environmental conditions play a crucial role in determining the best harvest moment. Aim to pick birdhouse gourds when daytime temperatures hover between 70–85°F (21–29°C). Cooler weather slows ripening, while extreme heat can cause premature drying or cracking. Humidity also matters: harvest during 40–60% humidity to minimize mold risk. If your region experiences high humidity or frequent rain, prioritize harvesting gourds slightly earlier to prevent rot or soft spots.
Watch for vines beginning to yellow and die back, a clear sign the plant is redirecting energy to seed production. This typically occurs in late summer to early fall, depending on your USDA zone. In cooler climates (Zones 3–5), harvest by mid-September to avoid frost damage.
In warmer zones (Zones 8–10), you may have until October or November. Frost is the enemy: even a light freeze can ruin gourds still on the vine, leaving them soft and unusable.
One final tip: harvest on a dry morning after any overnight dew has evaporated. Wet gourds are more prone to mold during curing. Use a clean, sharp pruner to cut the stem, leaving a 1–2 inch stub.
This prevents the gourd from losing moisture too quickly while allowing airflow to speed up the drying process. After harvesting, let gourds rest in a shaded, well-ventilated area for 24–48 hours before handling—this critical step ensures they cure evenly and retain their shape.
Remember, the perfect birdhouse gourd combines ideal size, consistent color, and environmental readiness. When these factors align, you’ll know it’s time to harvest—no more guessing, just confident crafting ahead! 🎋