
Vegetables
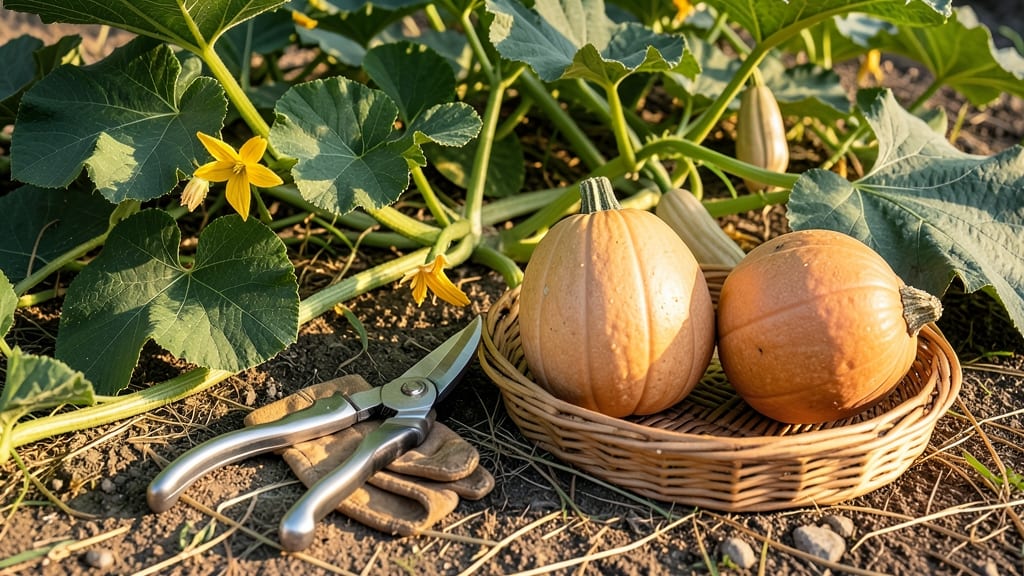
Harvesting butternut squash 🎃 at the right time ensures peak sweetness and seed readiness before frost sets in.
Butternut squash left on the vine too long turns starchy and tough—while harvesting too early means missing out on its signature sweetness. Mastering the perfect harvest window ensures a bounty of flavorful, seed-ready squash every season.
You’ll know it’s time when the skin turns a dull, matte orange and feels hard when pressed. The stem near the fruit should also shrink and dry out, signaling the seeds are fully developed.
In USDA Zone 6a, aim for late September to early October before the first frost arrives.
Below, I’ll walk you through three tactile tests to confirm readiness, plus how climate affects timing and how to store your harvest for months. No more guesswork—just perfect squash every time.
3 Tactile tests to determine butternut squash harvest readiness
Harvesting butternut squash at the right moment transforms a simple garden task into a rewarding experience. Unlike many vegetables, butternut squash doesn't ripen off the vine, so timing is everything.
I've learned that relying on days-to-maturity alone can lead to disappointment—some years, my squash stayed stubbornly green well past the expected harvest window. The secret lies in these three tactile tests that reveal when your butternut squash is truly ready to pick for peak flavor and storage potential.
These hands-on methods go beyond color charts and calendar dates. You'll use your fingers to feel for skin hardness, your eyes to spot stem changes, and even a quick cut test to check seed development.
Trust me, once you master these techniques, you'll never second-guess your harvest timing again. The difference between a squash that's sweet and nutty versus one that's tough and starchy comes down to these simple but critical checks.
-
1Skin Hardness Test
Press your thumbnail into the skin near the blossom end. If it springs back and leaves no mark, the squash is ready. Early in the season, the skin will dent easily—this means it needs more time. Aim for a skin so hard you can't even leave a faint impression with firm pressure. -
2Stem Drying Test
Look for the stem near the fruit to shrink and turn brown. When it's dry and papery, the squash is ready. A thick, green stem means it's not ready yet. Pro tip: Gently tug on the stem—if it separates easily from the vine, that's your cue to harvest immediately. -
3Seed Development Test
Use a sterilized knife to cut open a small section. Mature seeds should be plump and fully formed, not shriveled or still developing. The flesh near the seeds should be sweet and orange—if it's pale or watery, wait a few more days. This test is my favorite because it reveals the squash's true readiness from the inside out.
Let me walk you through each test in more detail, including what to watch for when conditions like humidity or temperature fluctuations might throw off your timing. For example, in my Zone 6a garden, early frosts can rush the maturity process, while hot, dry summers might delay it.
Understanding these environmental factors helps you adjust your tactile checks accordingly.
The skin hardness test is my go-to first check because it's the most reliable indicator of overall maturity. I've found that butternut squash skin goes from soft and green to hard and dull orange as it ripens.
The key is to press near the blossom end—the part that was attached to the flower—because that's where the skin thickens first. If you press here and see no indentation, your squash is likely ready.
Early in the season, I often see gardeners mistake the neck area for full maturity because it hardens later.
Don't overlook the stem drying test—this is where many gardeners make their biggest mistake. A green, thick stem means the squash is still growing, while a dry, shriveled stem signals it's time to harvest.
I once left a squash on the vine for two weeks past its prime because I ignored this test, and the result was a mealy, flavorless squash. The stem should be brown and crispy, almost like paper. If you see any green remaining, give it another week.
Here's a pro tip for the seed development test: if you're unsure about cutting into your squash, you can use a flashlight to shine through the blossom end. Mature seeds will cast a distinct shadow inside the squash.
This non-destructive method lets you check readiness without damaging the fruit. I've used this trick in my garden to avoid unnecessary cuts, especially when I'm close to the harvest window but not quite sure.
Timing your harvest correctly also affects how well your butternut squash stores. Squash harvested too early won't ripen further and will spoil quickly, while those left too long on the vine develop a woody texture and lose sweetness.
The ideal harvest window is when all three tests—skin hardness, stem drying, and seed maturity—align. This usually happens about 90-110 days after planting, but environmental factors can shift this window by several weeks.
One common question I get is whether to harvest butternut squash before or after the first frost. The answer depends on your climate. In cooler regions like mine, a light frost can actually improve flavor by converting starches to sugars.
However, a hard freeze will damage the squash. If frost is in the forecast, harvest as soon as your squash passes all three tests. In warmer climates, you might need to harvest earlier to avoid overripe squash that attracts pests.
Remember that butternut squash continues to ripen slightly after harvest, so don't worry if they're not perfect when you pick them. Store them in a cool, dry place with good airflow for up to three months.
The tactile tests ensure you're starting with the best possible squash for long-term storage. With these methods, you'll consistently harvest butternut squash at its peak—sweet, nutty, and perfect for roasting, soups, or baking.
Butternut squash maturity timeline: days to harvest by variety
Timing your butternut squash harvest depends on the variety and your local climate. Most varieties reach maturity between 80-110 days, but cooler temperatures or less sunlight can stretch this window.
For example, the 'Waltham' variety typically matures in 90-100 days, while 'Long Island Cheese' takes slightly longer, around 100-110 days. Understanding these timelines helps you avoid harvesting too early or too late.
Environmental factors like sunlight exposure and temperature play a huge role. Butternut squash thrives in full sun (6-8 hours daily) and warm soil (above 60°F). In USDA Zone 6a, where frost arrives early, aim to harvest by late September.
In warmer zones (e.g., Zone 8-10), you may have until November. Always prioritize harvesting before the first frost to preserve sweetness and texture.
Below is a quick reference table for common butternut varieties, including their maturity timelines and ideal harvest windows. Use this as your guide to plan ahead and adjust for your growing conditions.
| Variety | Days to Maturity | Harvest Window (Zone 6a) | Climate Notes |
|---|---|---|---|
| 'Waltham' | 90-100 days | Late September | Fast-growing; ideal for short seasons |
| 'Long Island Cheese' | 100-110 days | Early October | Slower but sweeter; needs warm soil |
| 'Sugar Pie' | 85-95 days | Mid-September | Compact; great for containers |
| 'Golden Hubbard' | 100-120 days | Late October (if frost delayed) | Large; needs extra space |
If your summer temperatures dip below 70°F, growth slows, and maturity may take 10-15 extra days. Conversely, hotter climates (above 85°F) can speed up maturation, sometimes by 5-10 days. Always monitor your squash’s skin color and stem condition—these are more reliable indicators than days alone.
Pro tip: Mark your planting date and use a garden journal to track progress. For example, if you planted 'Waltham' on May 15, expect harvest-ready squash by August 24-31. Adjust for your last frost date to avoid losing your crop to cold weather.
Once you’ve nailed the harvest window, store your squash in a cool, dry place (50-55°F) for up to 3 months. Proper timing ensures your butternut squash stays sweet and storable all winter long.