
Vegetables
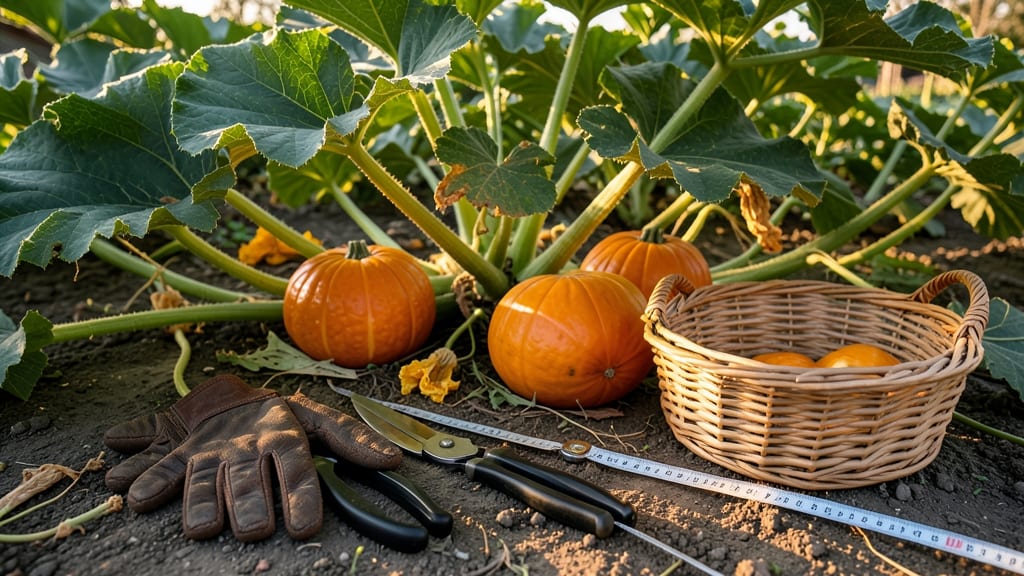
Harvesting winter squash 🎃 at the right time means the difference between a shelf-stable pantry staple and a meal ruined by mealy flesh.
Picture this: you’ve nurtured your winter squash all season, and now the moment of truth arrives. One wrong move, and your hard work turns to mush. But knowing the exact cues—when the rind hardens, seeds darken, and vines yellow—lets you pull them at peak flavor and storage potential.
Most varieties like butternut and acorn are ready between 90 and 120 days, but environmental factors like frost and humidity can shift that window.
Below, I’ll walk you through the visual and tactile signs to harvest at the perfect moment, plus how to cure and store your squash so it lasts until next spring.
Whether you’re a first-time gardener or a seasoned grower, these practical tips will help you avoid the most common mistakes—like harvesting too early or too late—and ensure your squash stays fresh for months.
How to identify perfect winter squash harvest time by rind, seed, and vine signs
Harvesting winter squash at the right moment means the difference between a tender, short-lived fruit and one that stores for months in your pantry. The key lies in three telltale signs: rind hardness, seed maturity, and vine decline.
Each clue works together to confirm when your squash is ready—don’t miss these critical cues!
First, focus on the rind's texture. A properly matured winter squash will have a hard, thick skin that resists pressure from your fingernail. Press gently—if it doesn’t dent easily, it’s ready. This hardness prevents spoilage during storage, so it’s non-negotiable for long-term keeping.
Next, check the seed cavity inside the squash. Cut a small slice near the stem end and inspect the seeds. Fully mature seeds will be plump, dark-colored (often black or deep brown), and firm to the touch. Pale or shriveled seeds mean the squash needs more time on the vine.
Finally, observe the vines and leaves. As the squash nears harvest, the vines will start yellowing and dying back, signaling the plant is redirecting energy to the fruit. If the vines are still lush and green, the squash likely isn’t ready yet—patience is key!
Avoid the common mistake of harvesting too early just because the squash looks big or colorful. Size and color alone aren’t reliable indicators—always test the rind hardness first. For example, a butternut squash might look fully grown but still have a soft spot if harvested prematurely.
Timing is especially critical for storage varieties like acorn or pumpkin squash. Harvesting too late risks frost damage, which ruins the skin’s protective barrier. If frost is forecasted, harvest immediately—even if the rind isn’t perfectly hard—to salvage your crop.
For seed-saving purposes, wait until the seeds are fully mature and the rind is completely hard. Overripe squash may develop soft spots or rot, so balance harvest timing with weather conditions. Store your squash in a cool, dry place (50–55°F) for optimal longevity.
Pro tip: Use a sharp pruning shear to cut the stem, leaving a 1–2 inch attachment. This prevents rot and extends shelf life. Handle squash gently to avoid bruising, which shortens storage time significantly.
If you’re unsure whether your squash is ready, err on the side of waiting a few more days. A fully mature winter squash will keep for 2–6 months, while an underripe one may spoil within weeks.
Trust the rind, seeds, and vines—they’re your garden’s way of telling you it’s time!
Best practices for harvesting winter squash without damaging the fruit
Once your winter squash shows all the right maturity signs, the next challenge is harvesting without bruising the delicate skin. A sharp cut or rough handling can create entry points for rot, shortening storage life dramatically.
I’ve learned the hard way—my first butternut squash harvest had three cracked fruits because I used a dull knife. The right tools and technique make all the difference.
Start by gathering your harvesting essentials: a clean, sharp pruning shears or knife, a basket with soft padding, and a spray bottle of water. Work on a dry, sunny day when the squash’s skin is firmest.
Avoid harvesting after rain, as wet conditions increase the risk of fungal infections and make the vines slippery. Timing your harvest right isn’t just about the fruit—it’s also about the weather conditions.
⚠️ WARNING: Common Harvest Mistakes That Ruin Your Squash
⚠️ Using dull tools – A jagged cut invites rot. Always use a sterilized, sharp knife or pruning shears. Disinfect blades with rubbing alcohol between cuts.
⚠️ Leaving stems attached – The stem is the squash’s natural scar tissue. Cutting it too short exposes the fruit to disease. Leave a 1-2 inch stem stub to protect the harvest wound.
⚠️ Storing before curing – Skipping the curing process reduces shelf life by 50% or more. Cure squash in a warm, dry place for 7-10 days before storing.
To harvest, hold the squash firmly with one hand and use your pruning shears or knife to cut the stem about 1-2 inches above the fruit. Angle the blade slightly downward to avoid tearing the skin.
Gently twist the squash free from the vine—don’t pull—using a rolling motion to prevent stem damage. Place each squash in your padded basket immediately to avoid bruising. If you’re harvesting multiple varieties, label them with twine to keep track of types like acorn vs. butternut.
After harvesting, let the squash cure in ideal conditions: a warm (80-85°F), dry, and well-ventilated space like a garage or sunroom. Cure acorn and pumpkin squash for 7-10 days, while butternut and spaghetti squash need 10-14 days.
Turn them occasionally for even drying. Proper curing hardens the skin, deepens flavor, and extends storage life to 2-6 months depending on the variety. Avoid direct sunlight during curing, as it can cause sun scald on the skin.
Once cured, store your squash in a cool (50-55°F), dark, and humid (50-70%) environment. A root cellar or unheated basement works perfectly. Check squash monthly for soft spots or mold, and remove any affected fruits immediately.
If you don’t have a root cellar, a paper bag in a closet can work in a pinch, though storage life may shorten to 1-2 months. The key is consistency—fluctuating temperatures and humidity are the enemies of long-term storage.
With these techniques, your winter squash will stay fresh and flavorful well into the new year. I’ve stored butternut squash for 6 months using this method, and the taste is just as vibrant as the day I harvested it.
The secret? Patience in harvesting, precision in curing, and vigilance in storage. Your future self will thank you when you pull out a perfect squash in January for a hearty soup.